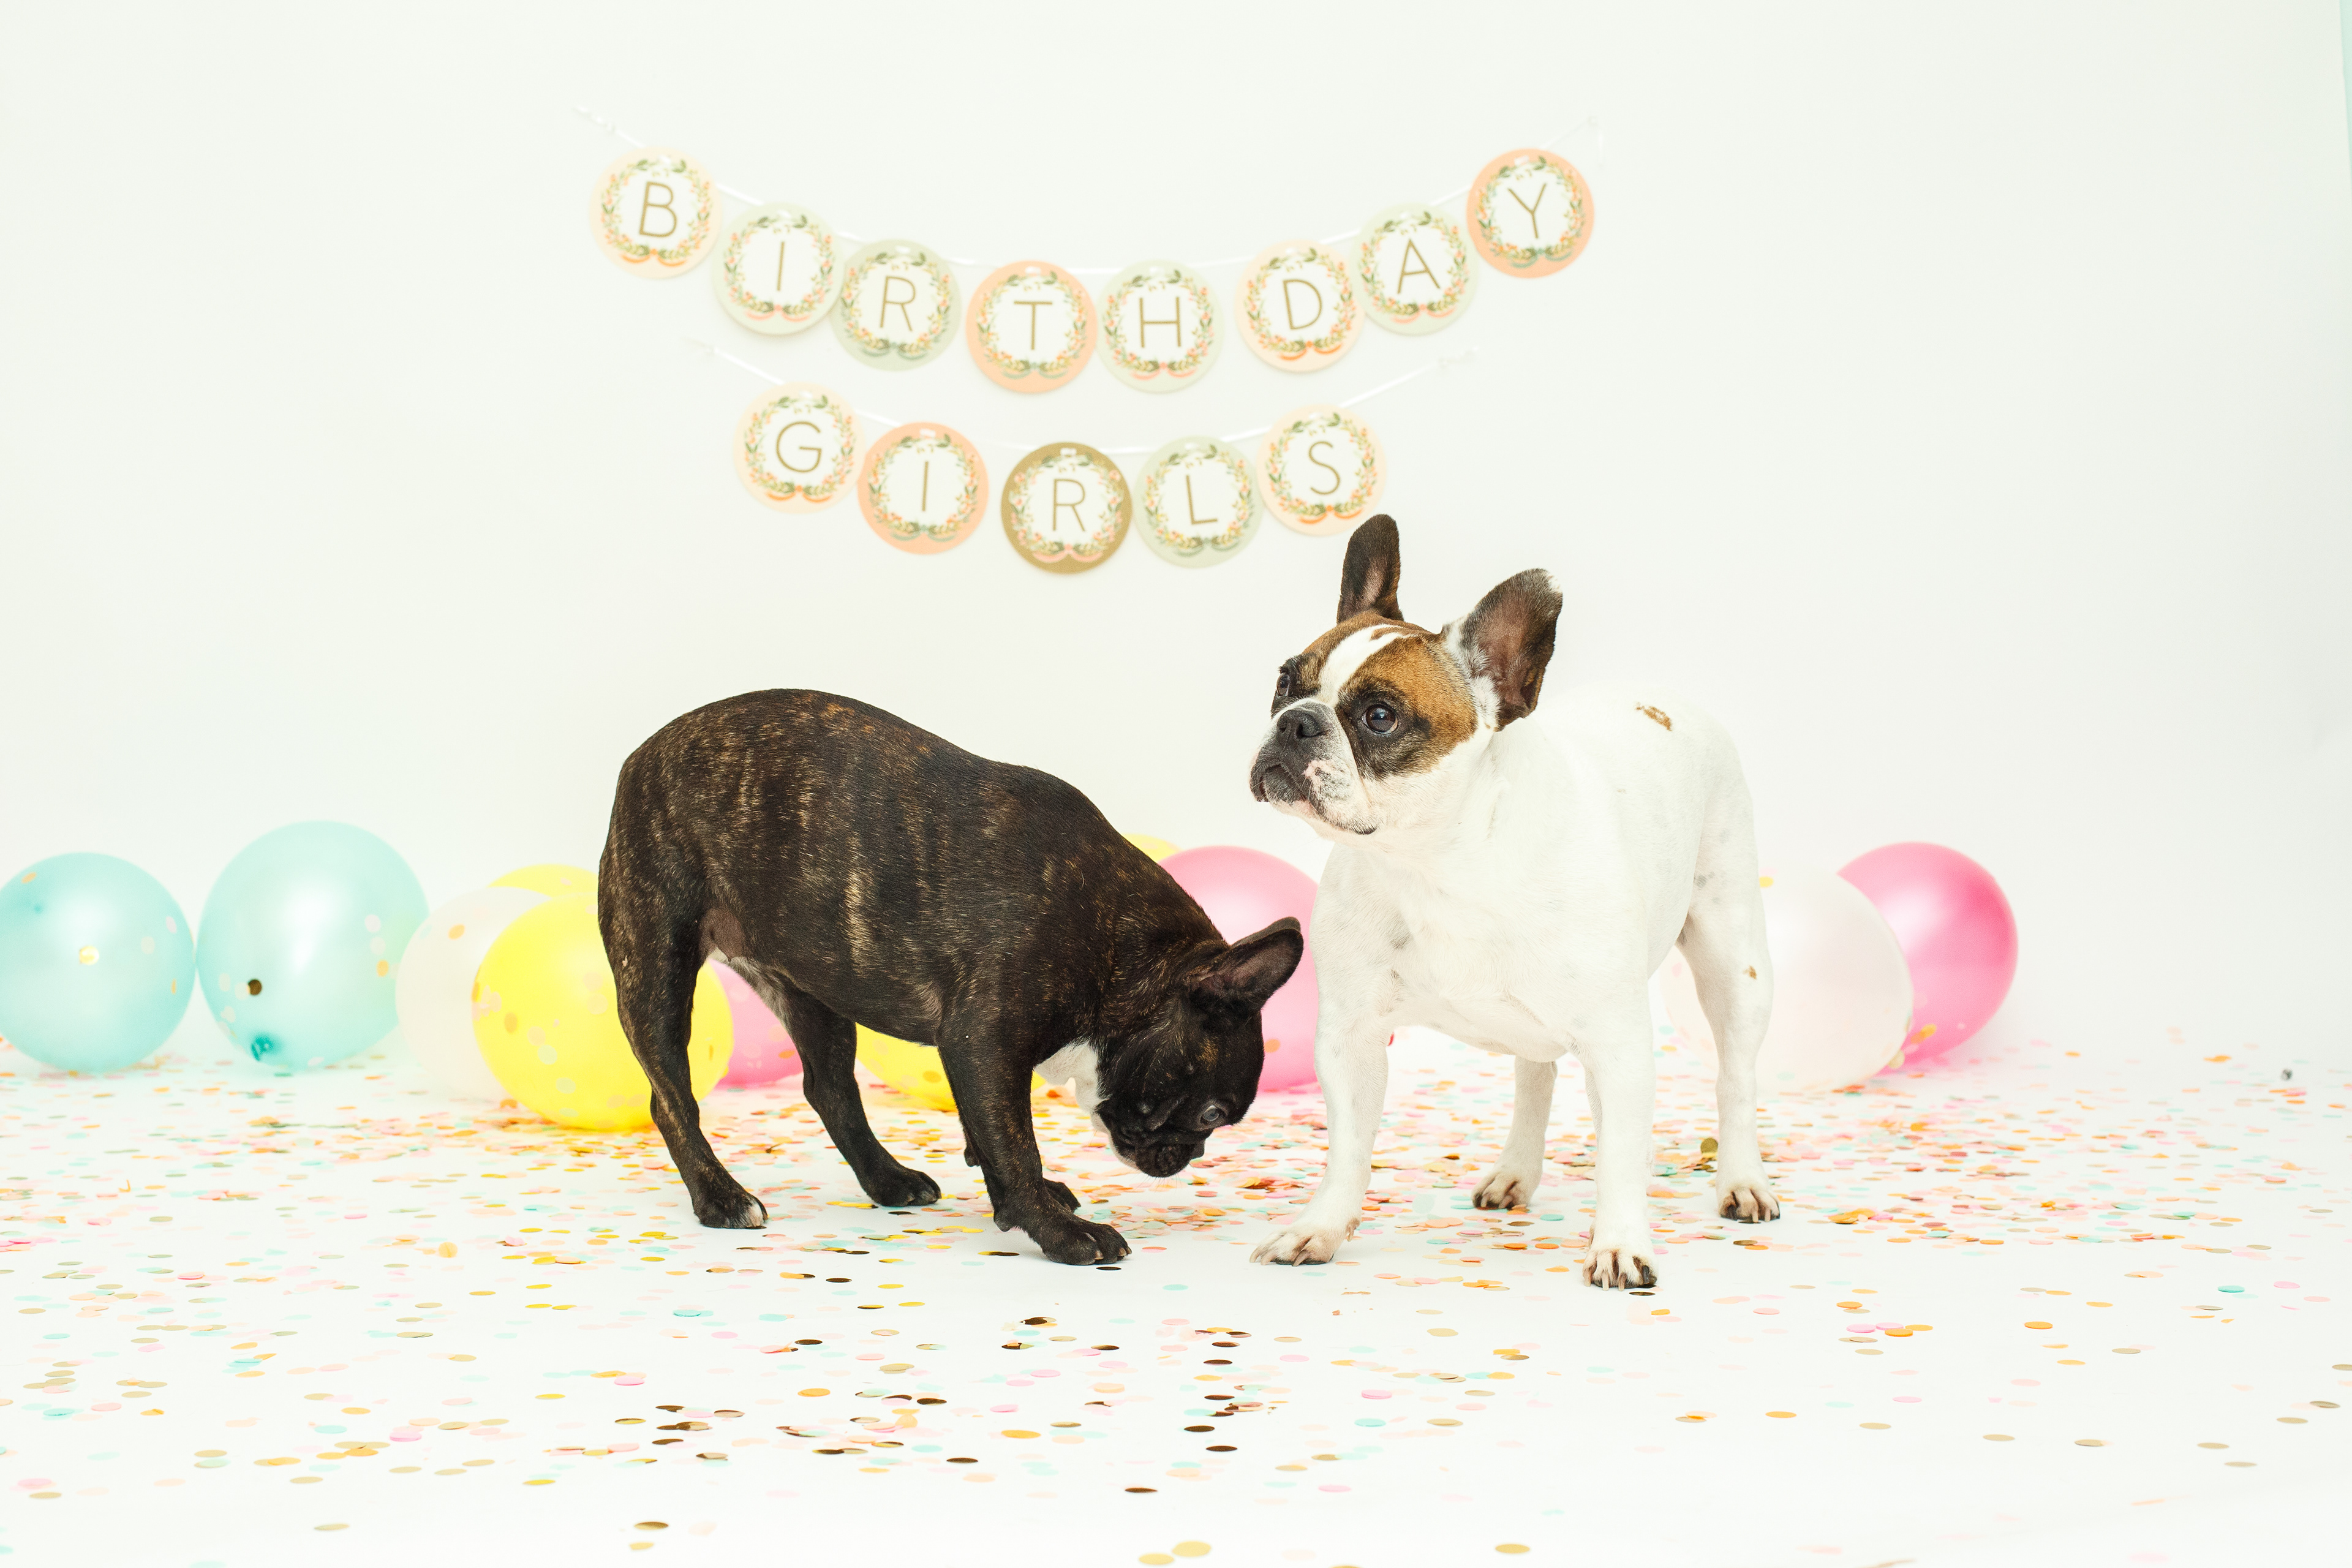
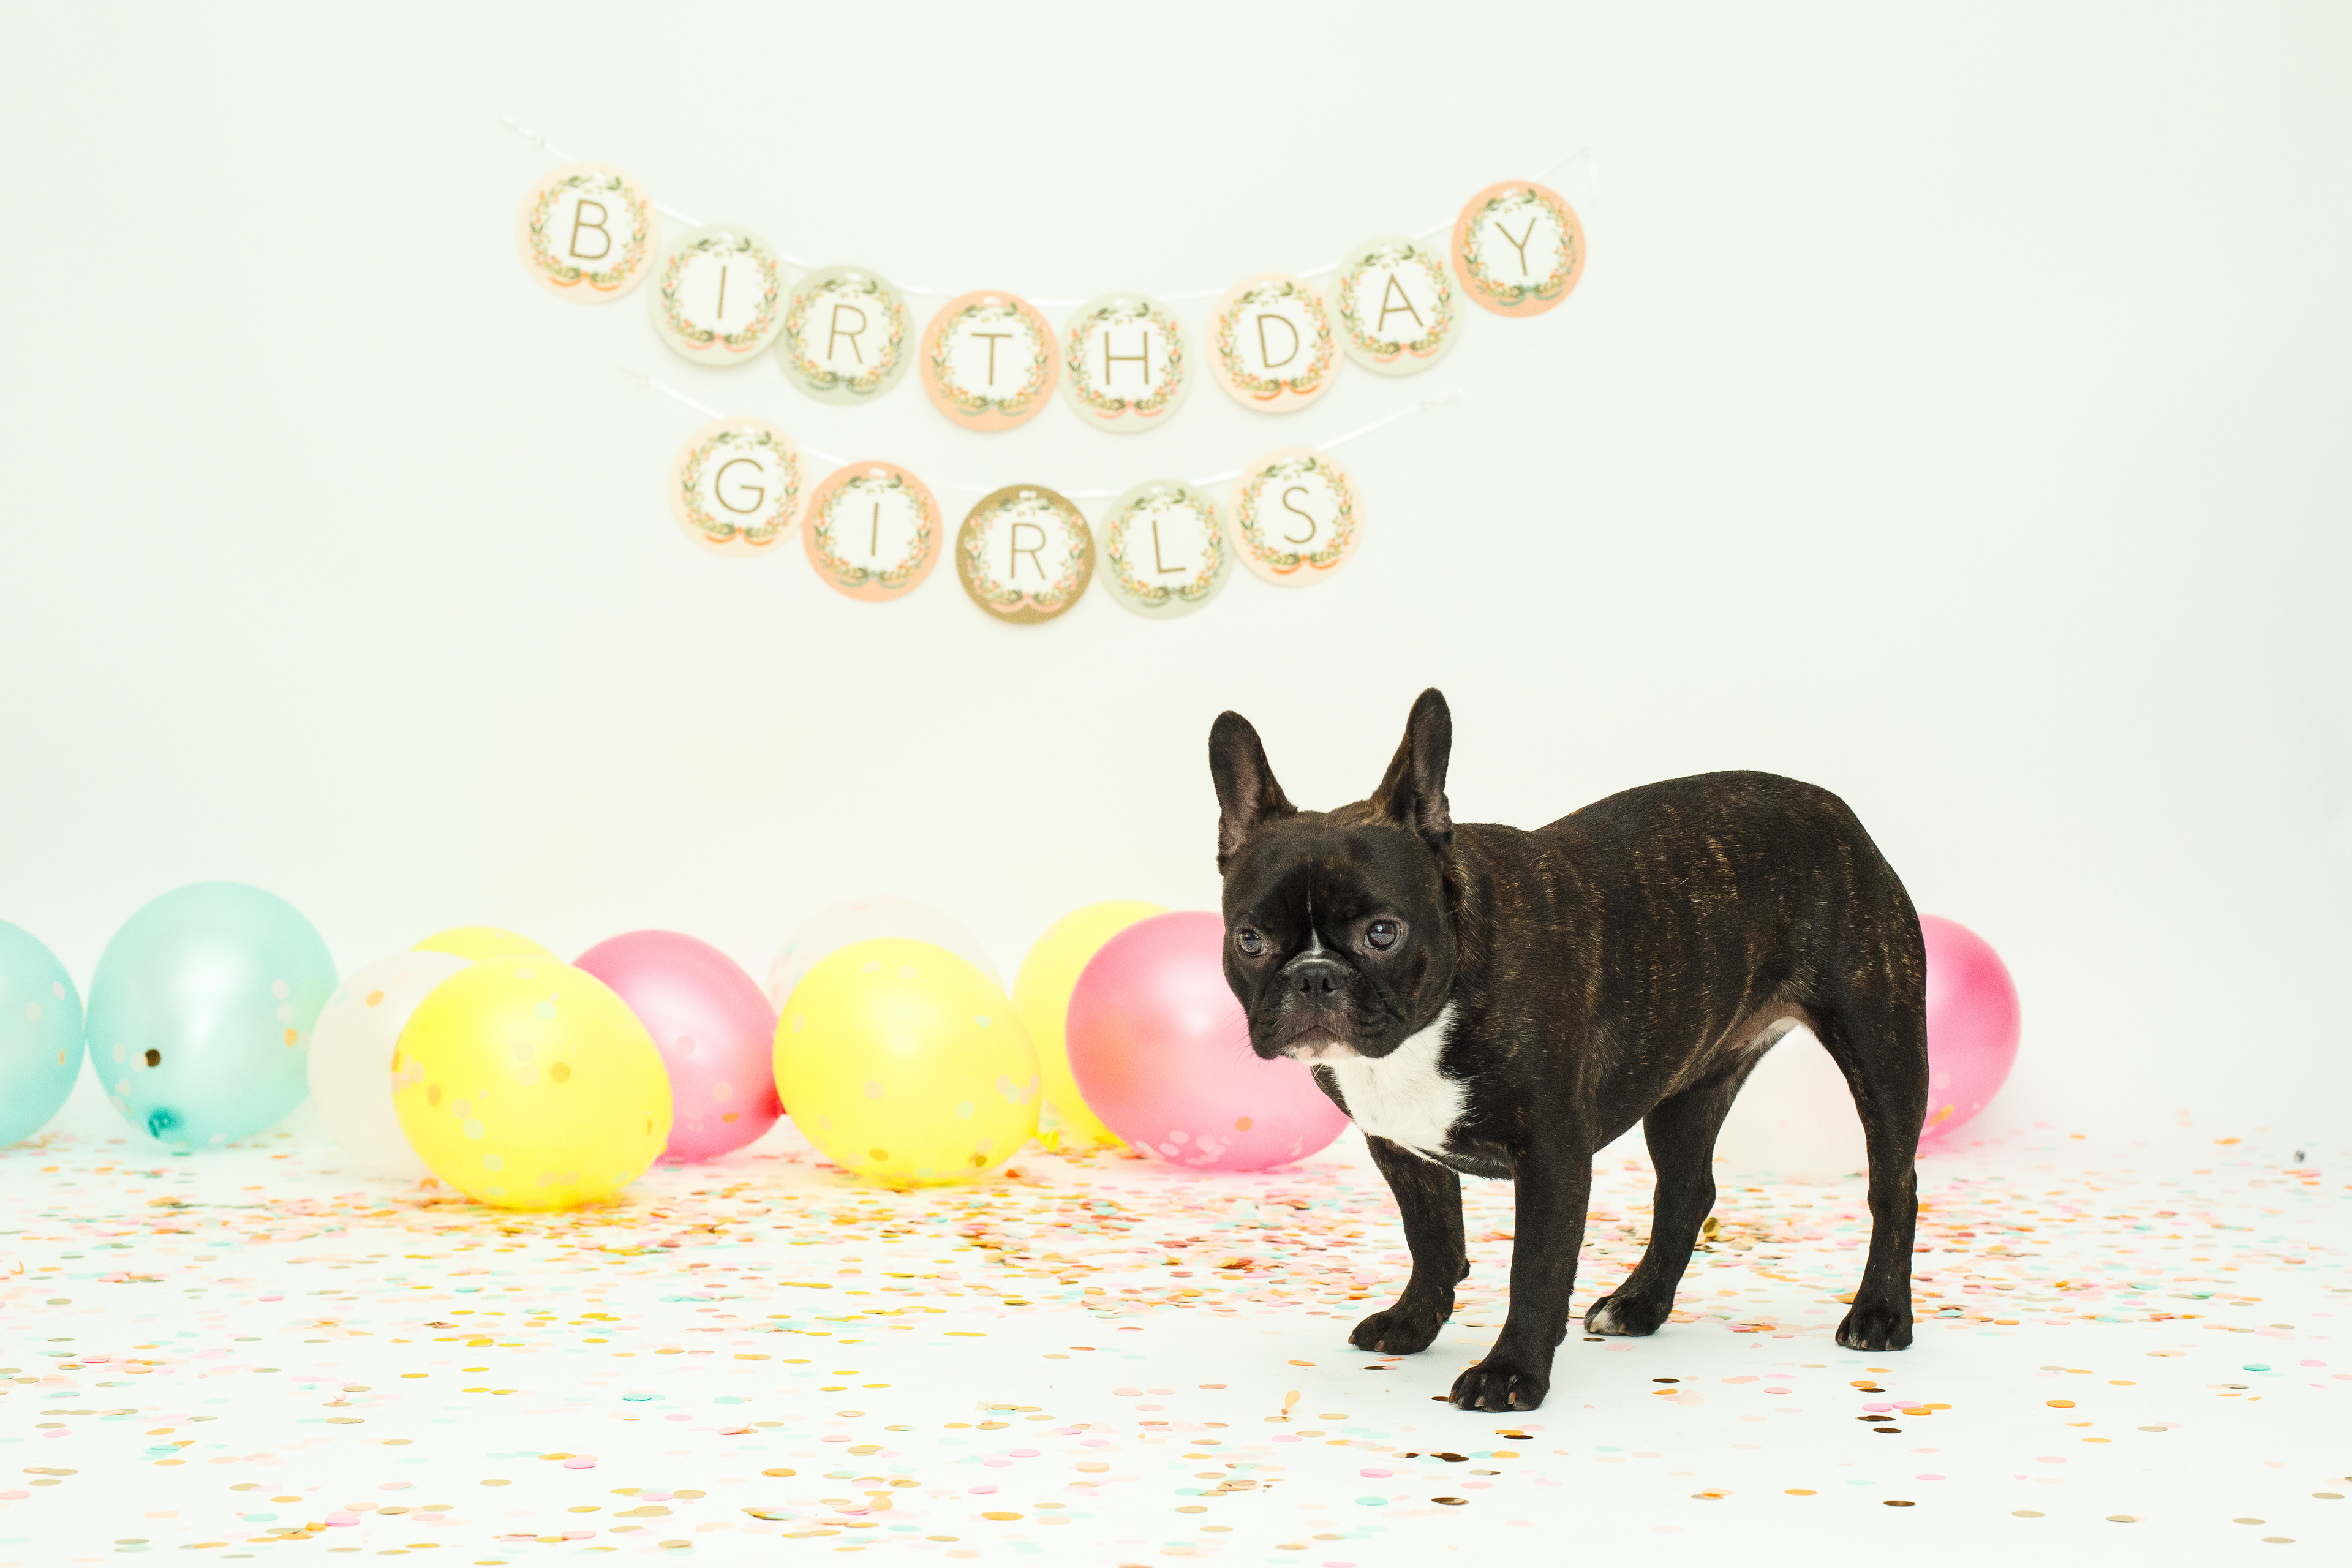
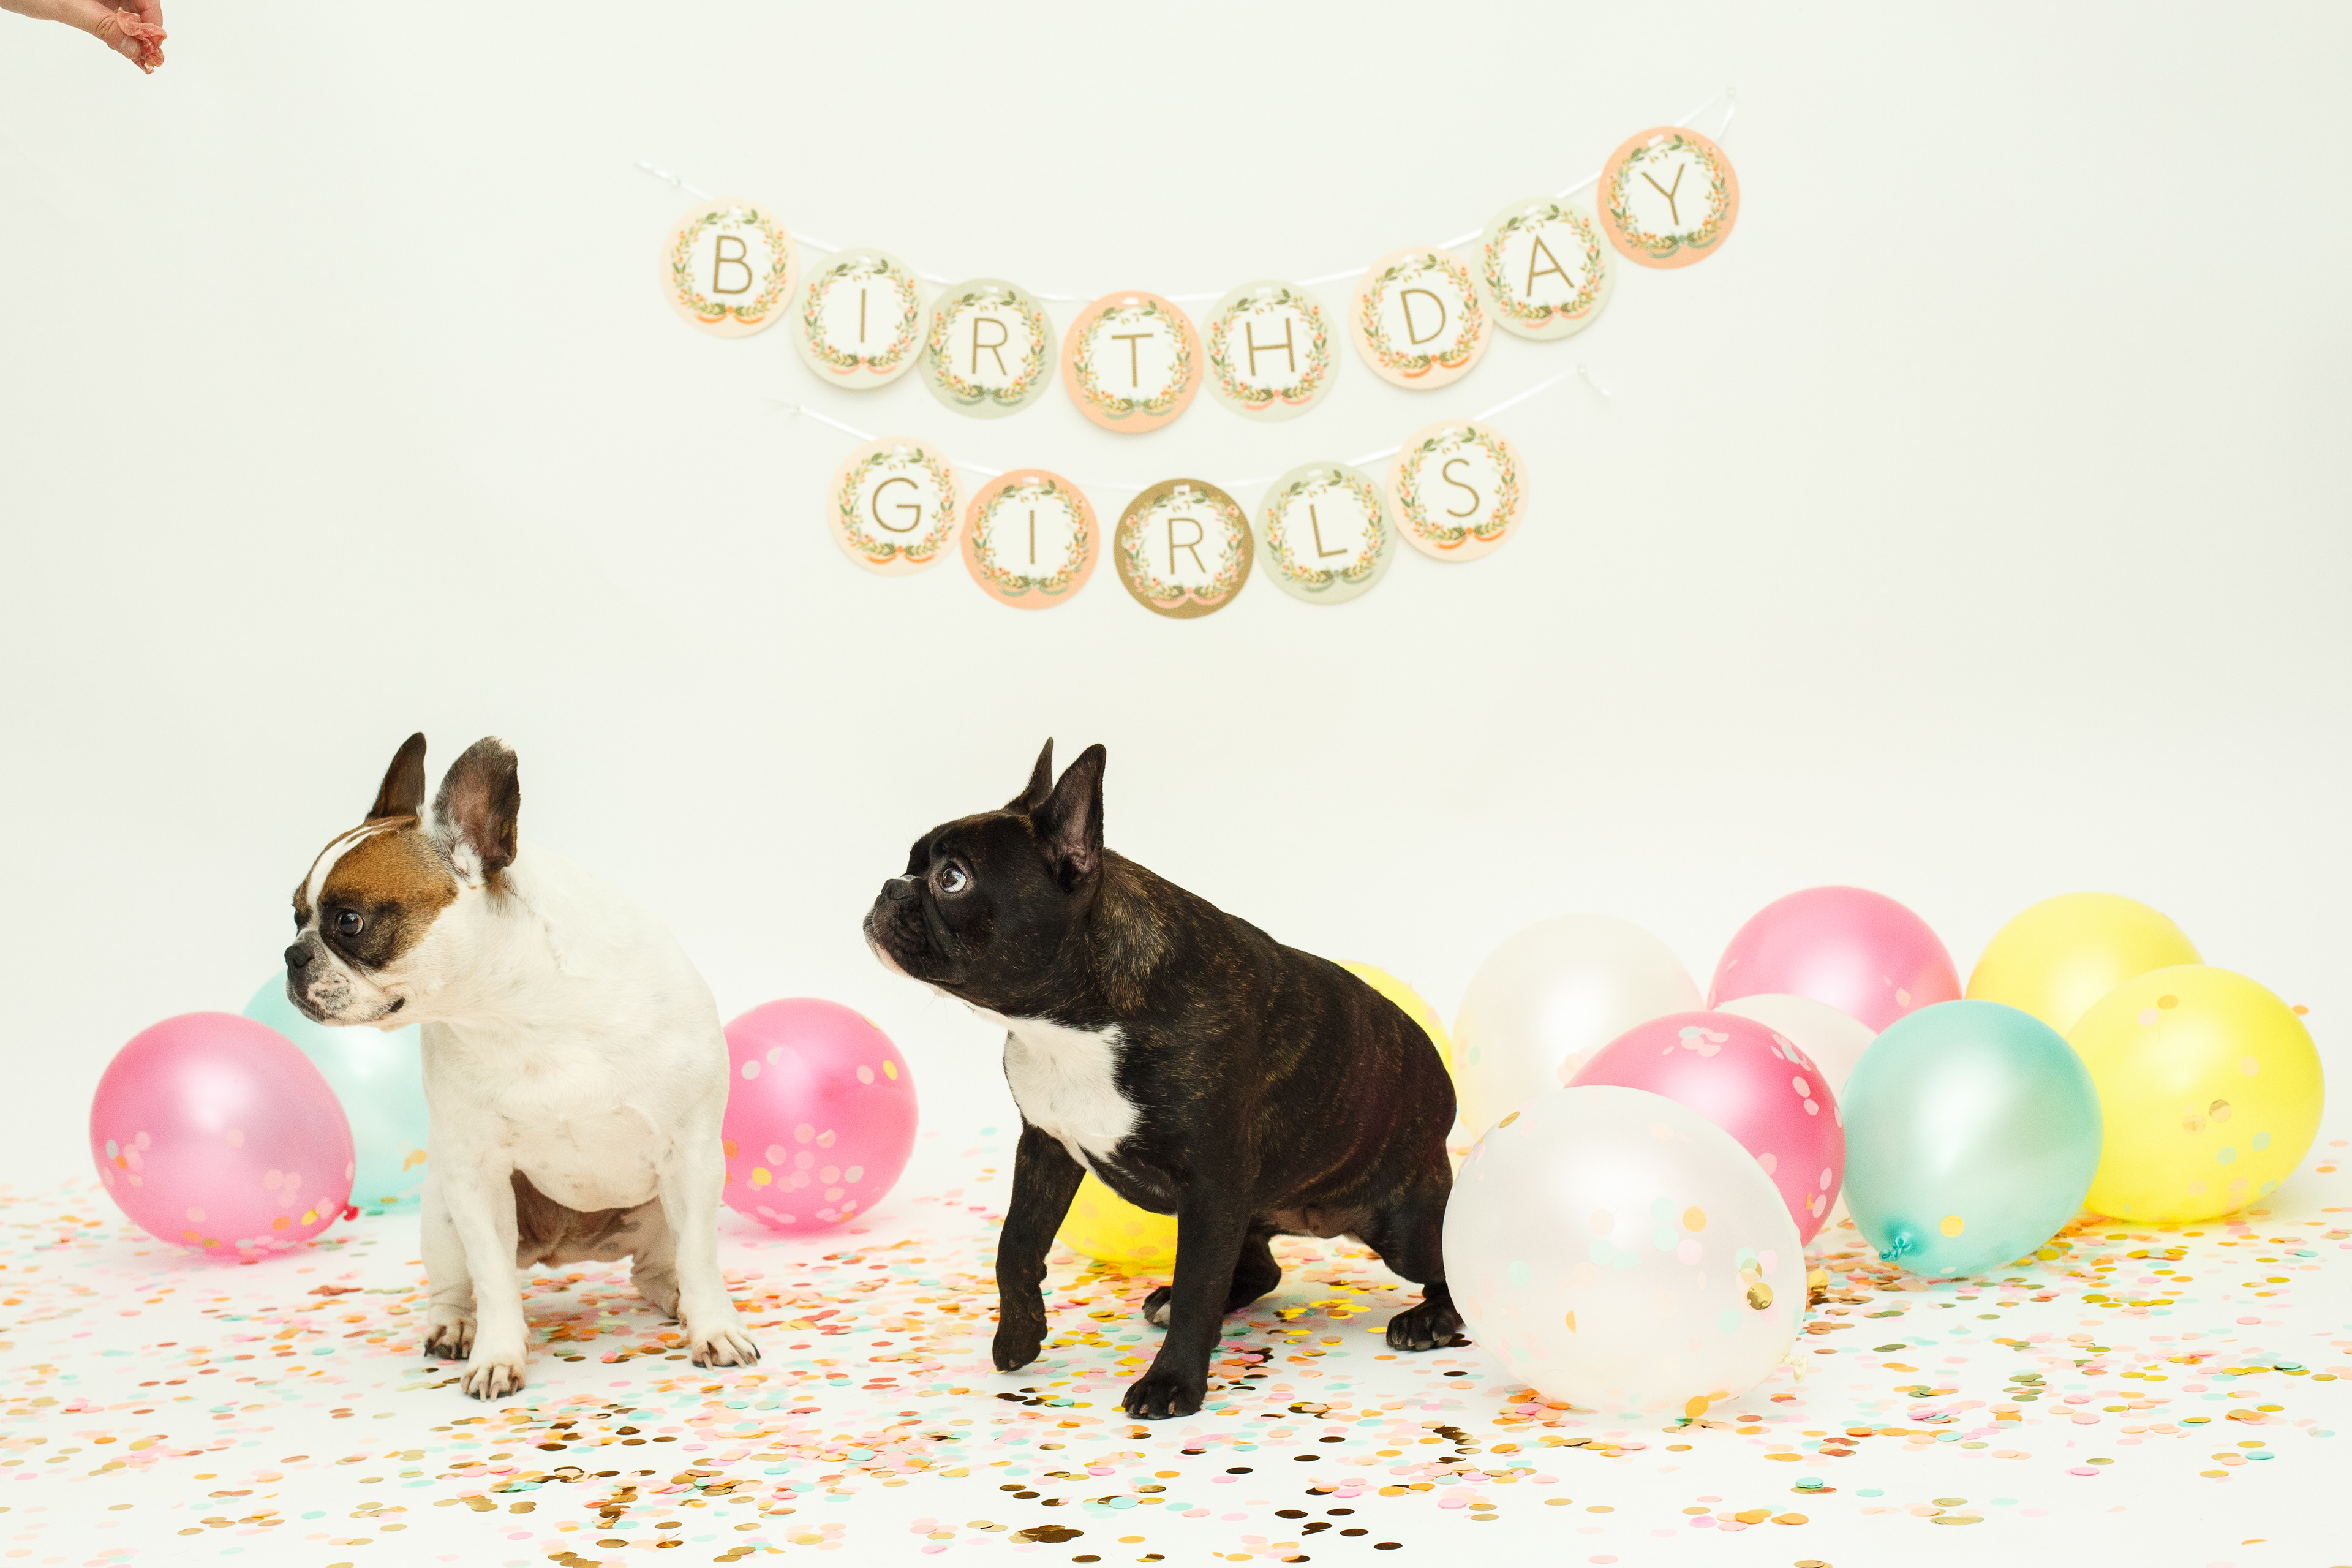
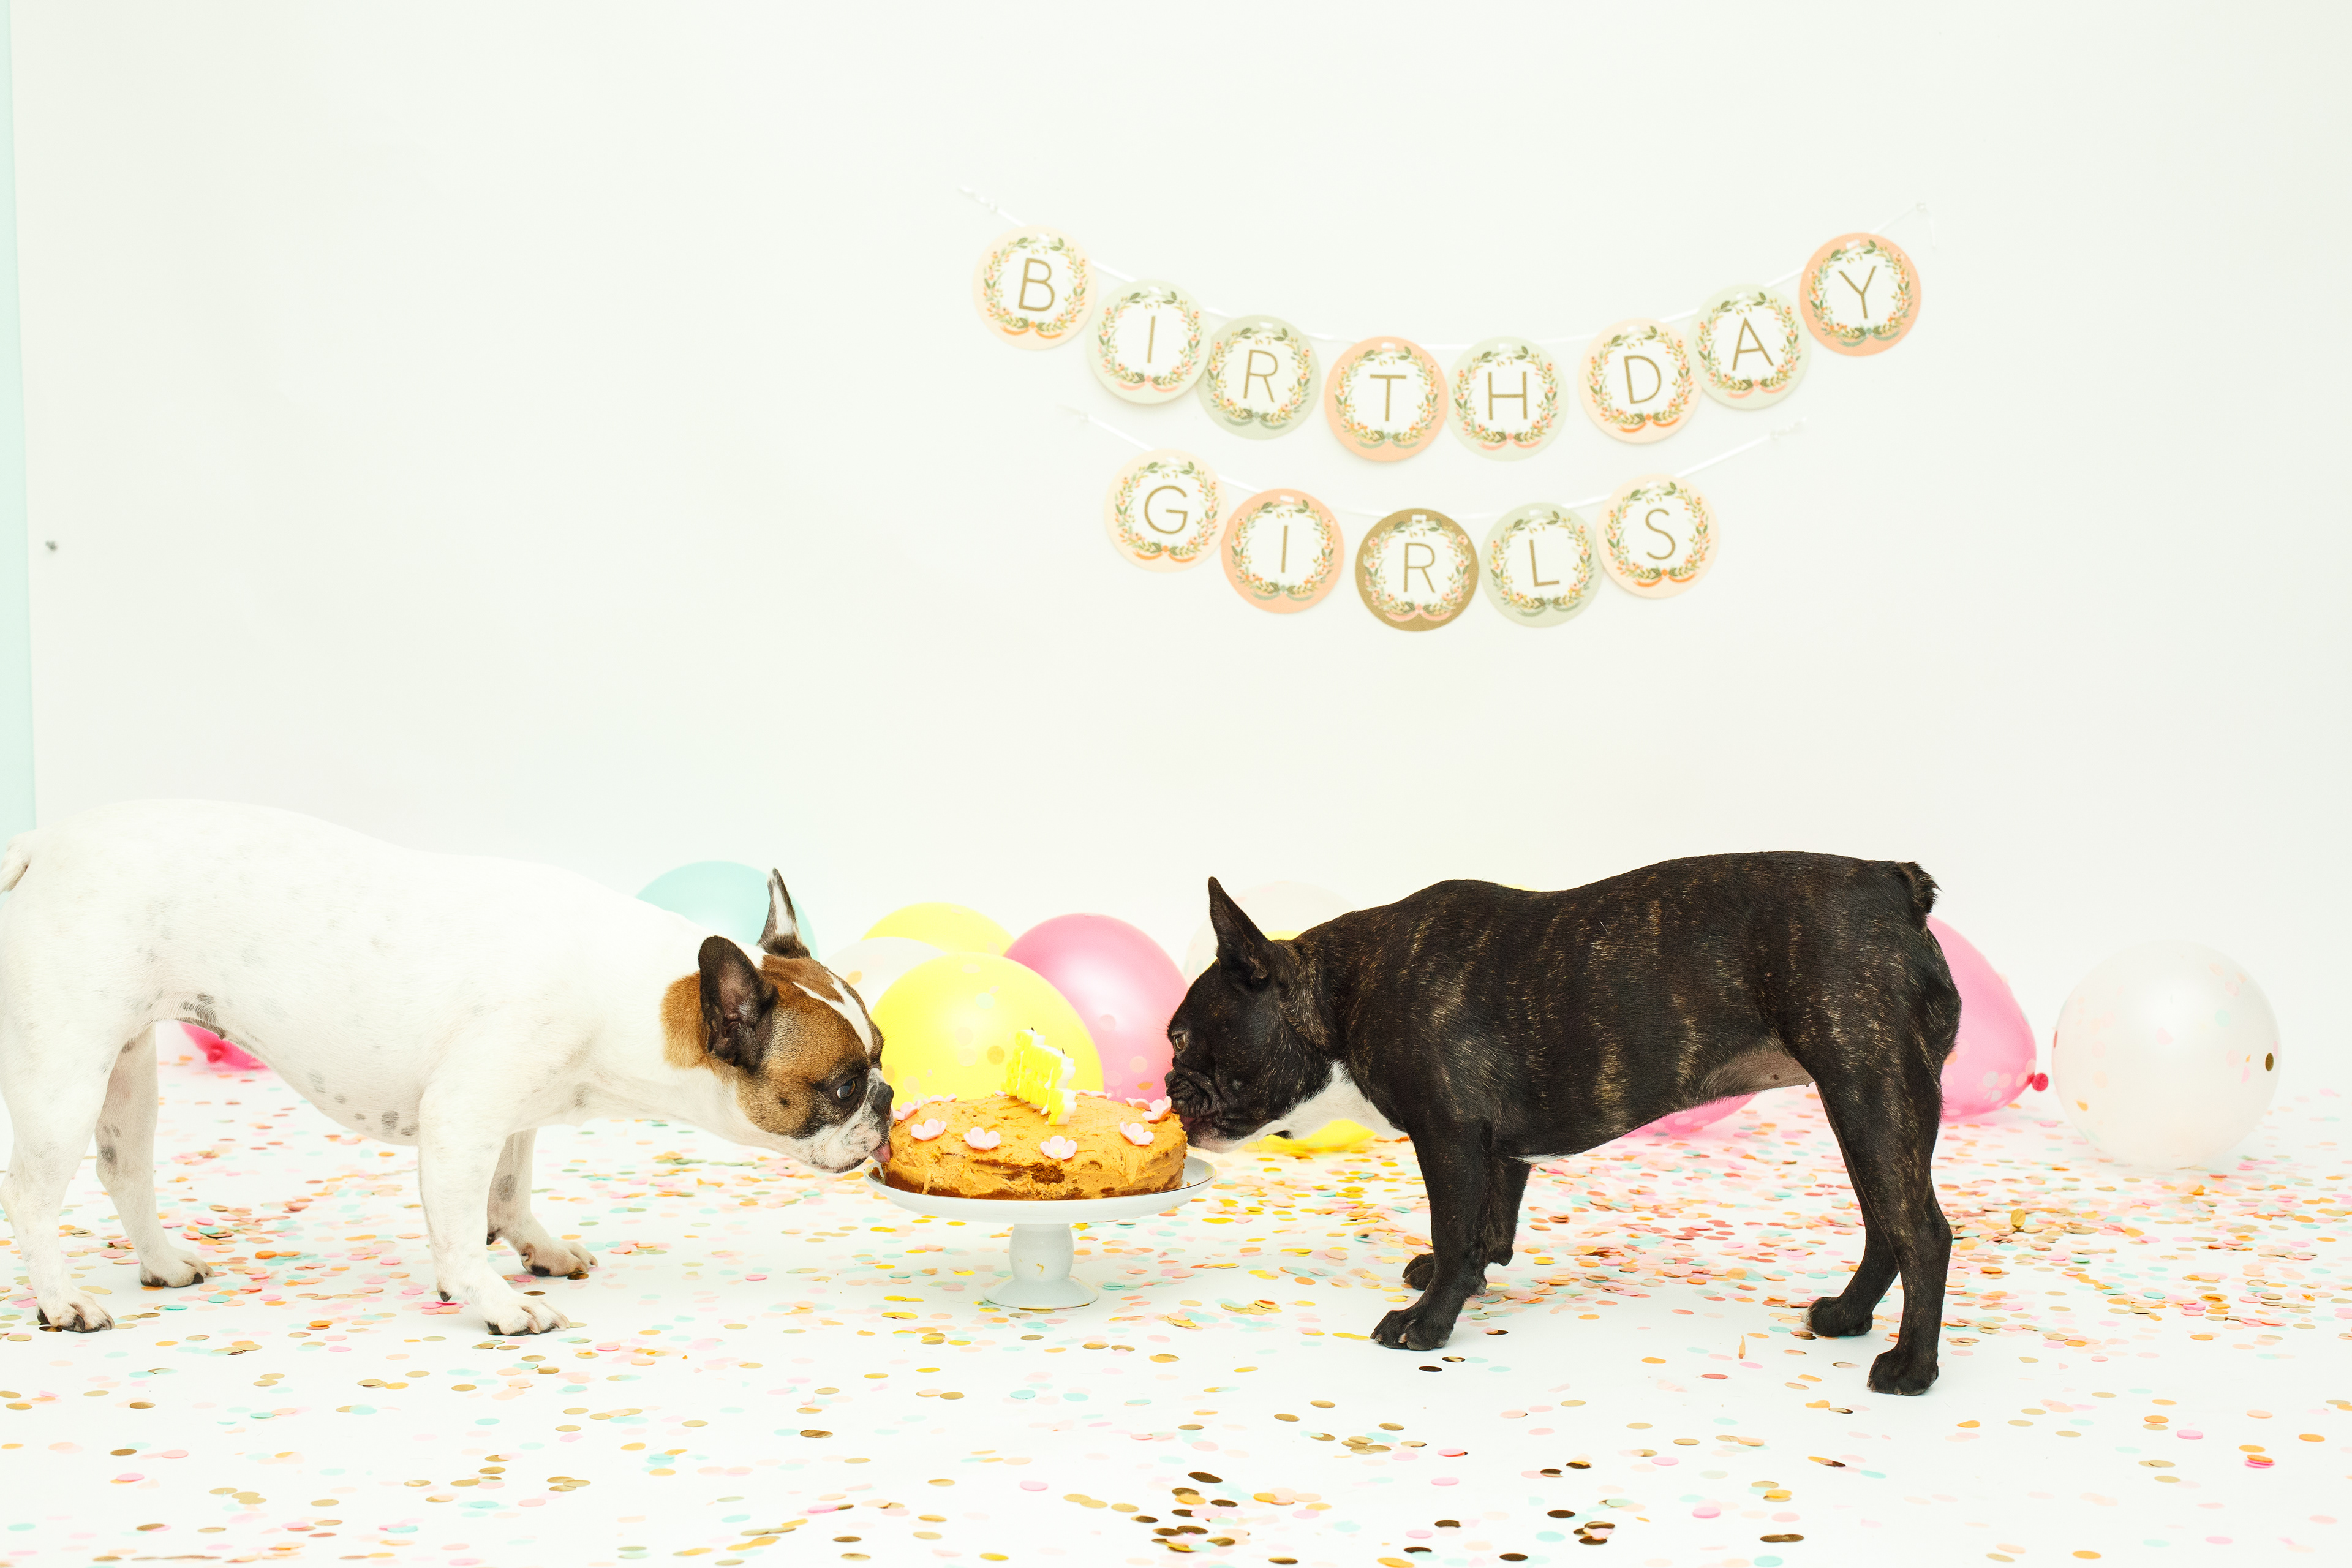
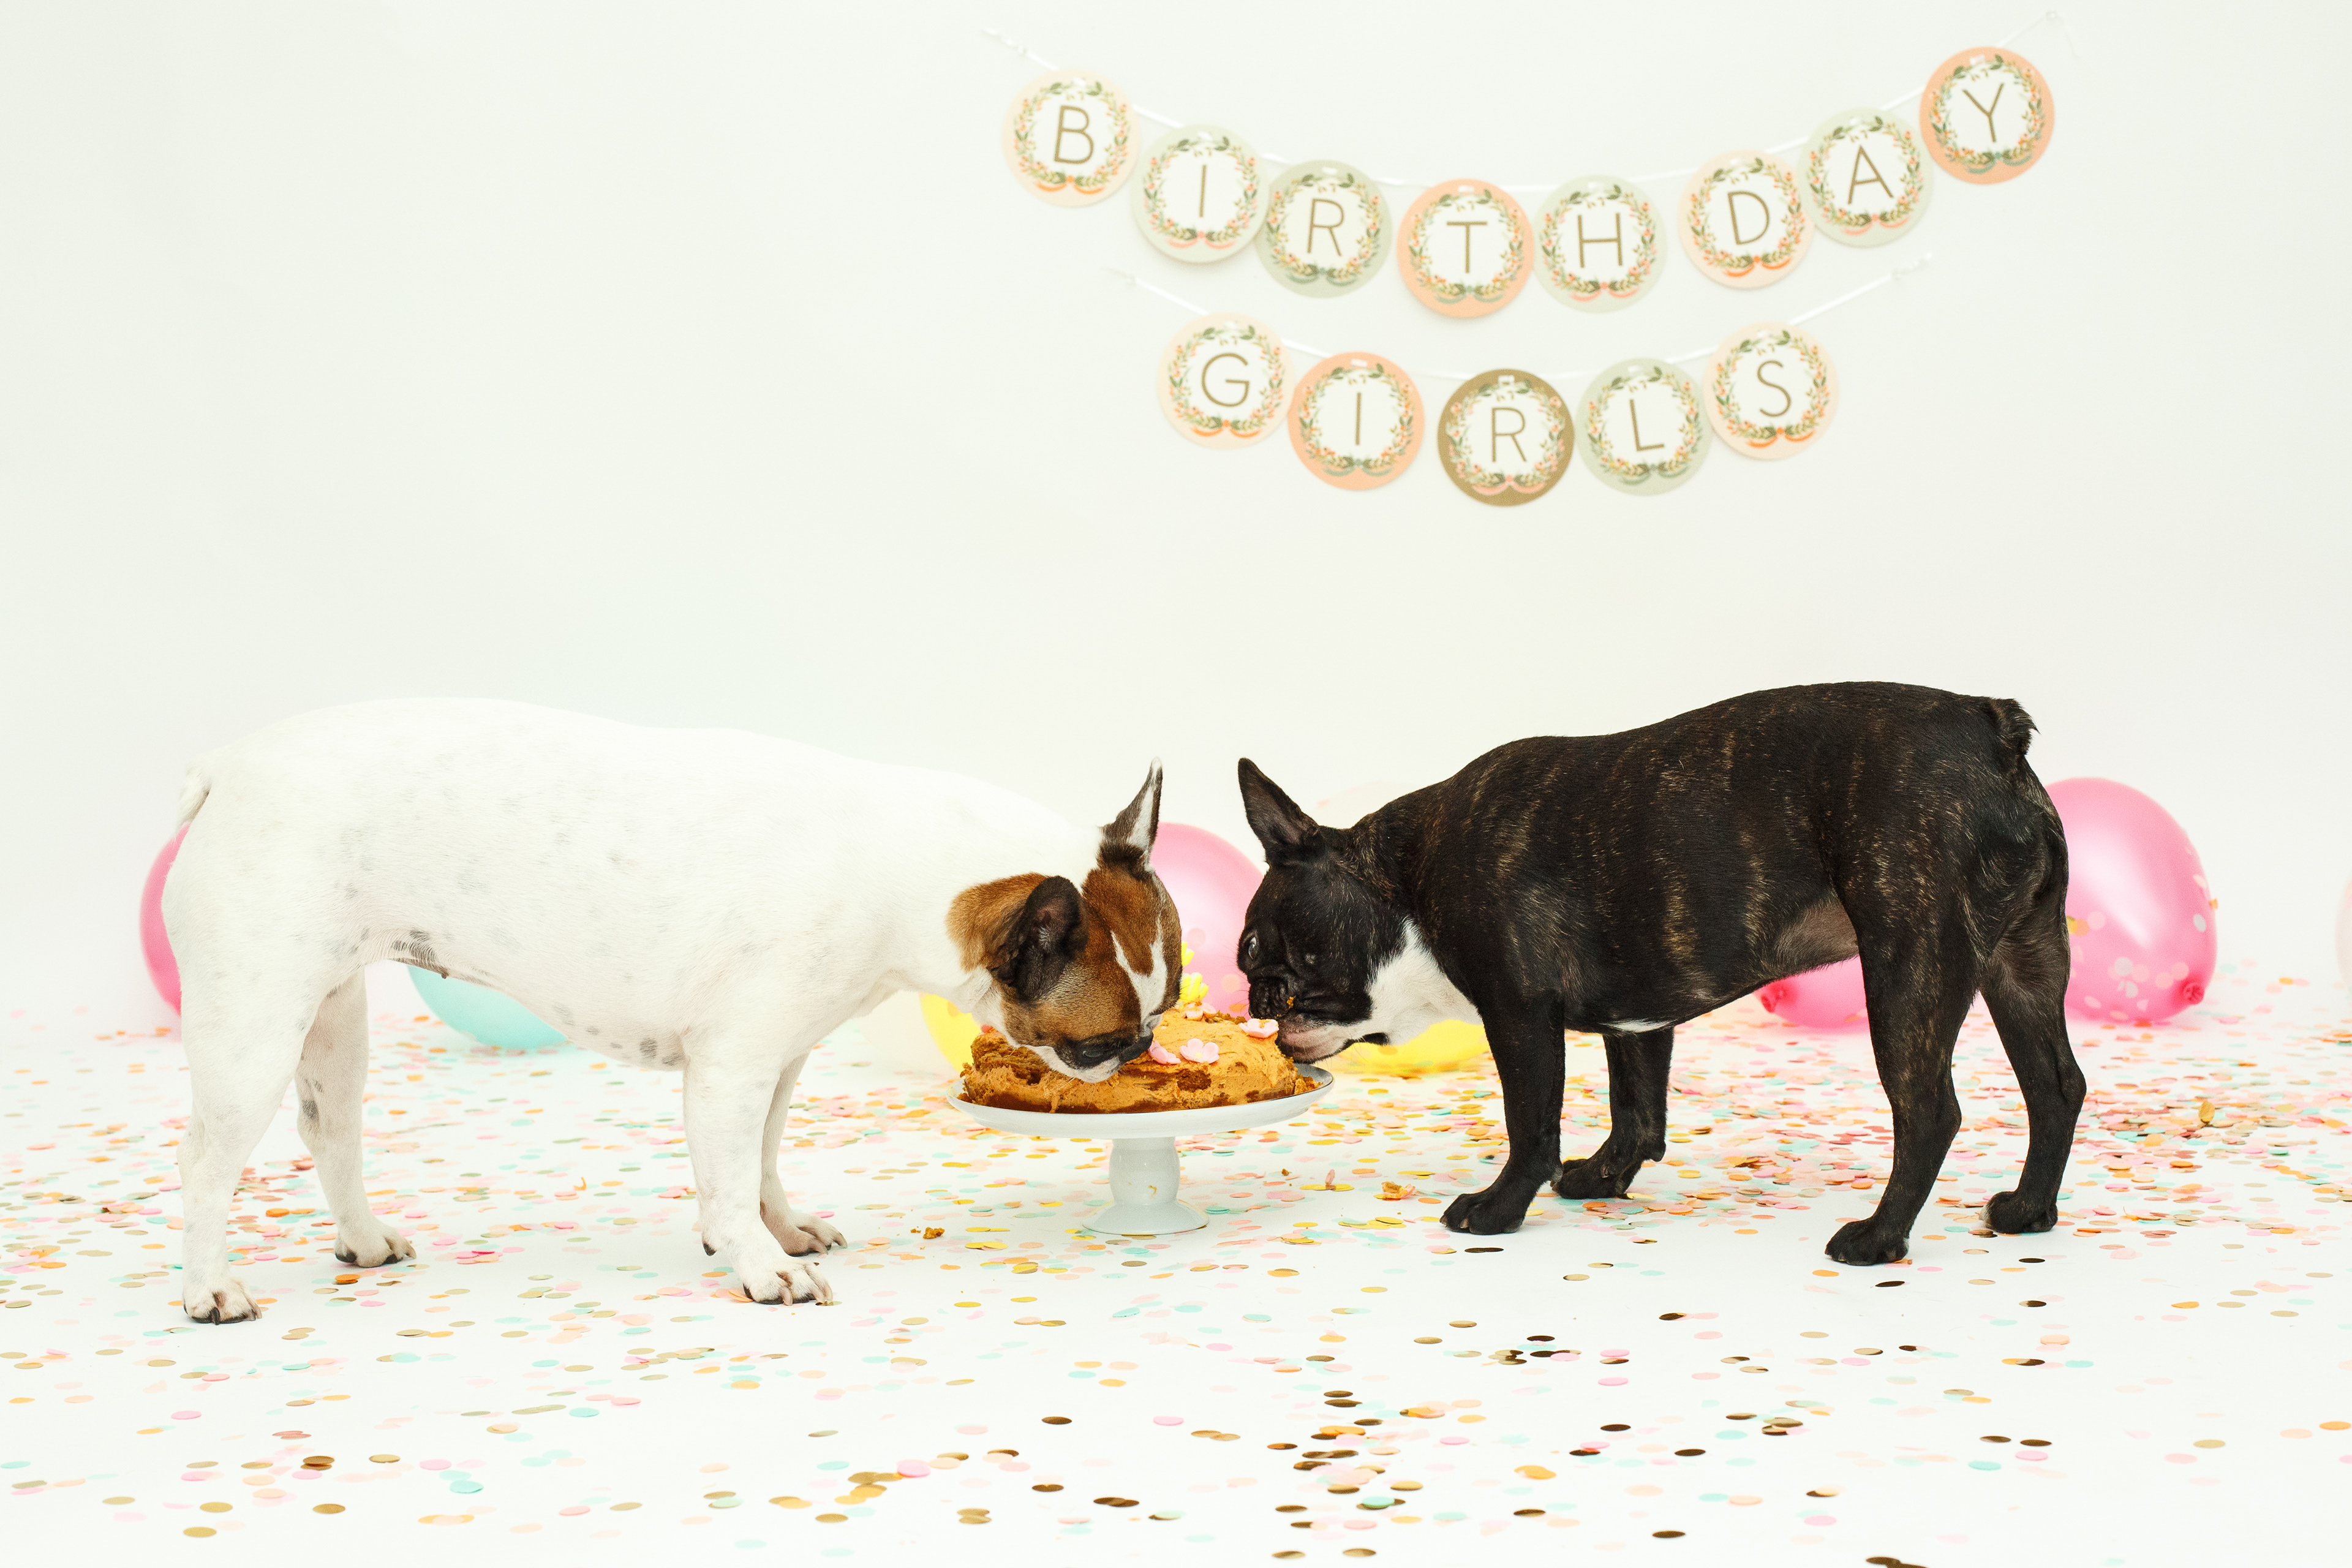
IT'S A PUPPY PARTY!

Real Talk: I am OBSESSED with my two French bulldogs, Molly & Ruby. To say I am the ultimate dog mom would be an understatement and I couldn’t be more proud! Molly is 5 years old and we got her when she was only 8 weeks old. She has been the light of our life so we not surprisingly make the decision to get another frenchie earlier this year. Ruby is officially 1 year old today (hooray!) and we’ve had her since she was also 8 weeks old.
While their personality differences have been a challenge, Molly and Ruby do have one thing in common and it’s the dates of their birthdays! They were born exactly one-month apart to the date: Molly’s birthday is September 9th and Ruby’s is October 9th. (Okay okay, so it’s not as exciting as sharing the same birthday, but one month apart is pretty special… at least to me!) We didn’t realize this until only a few months ago and saw it as yet another sign that Ruby was meant for us.
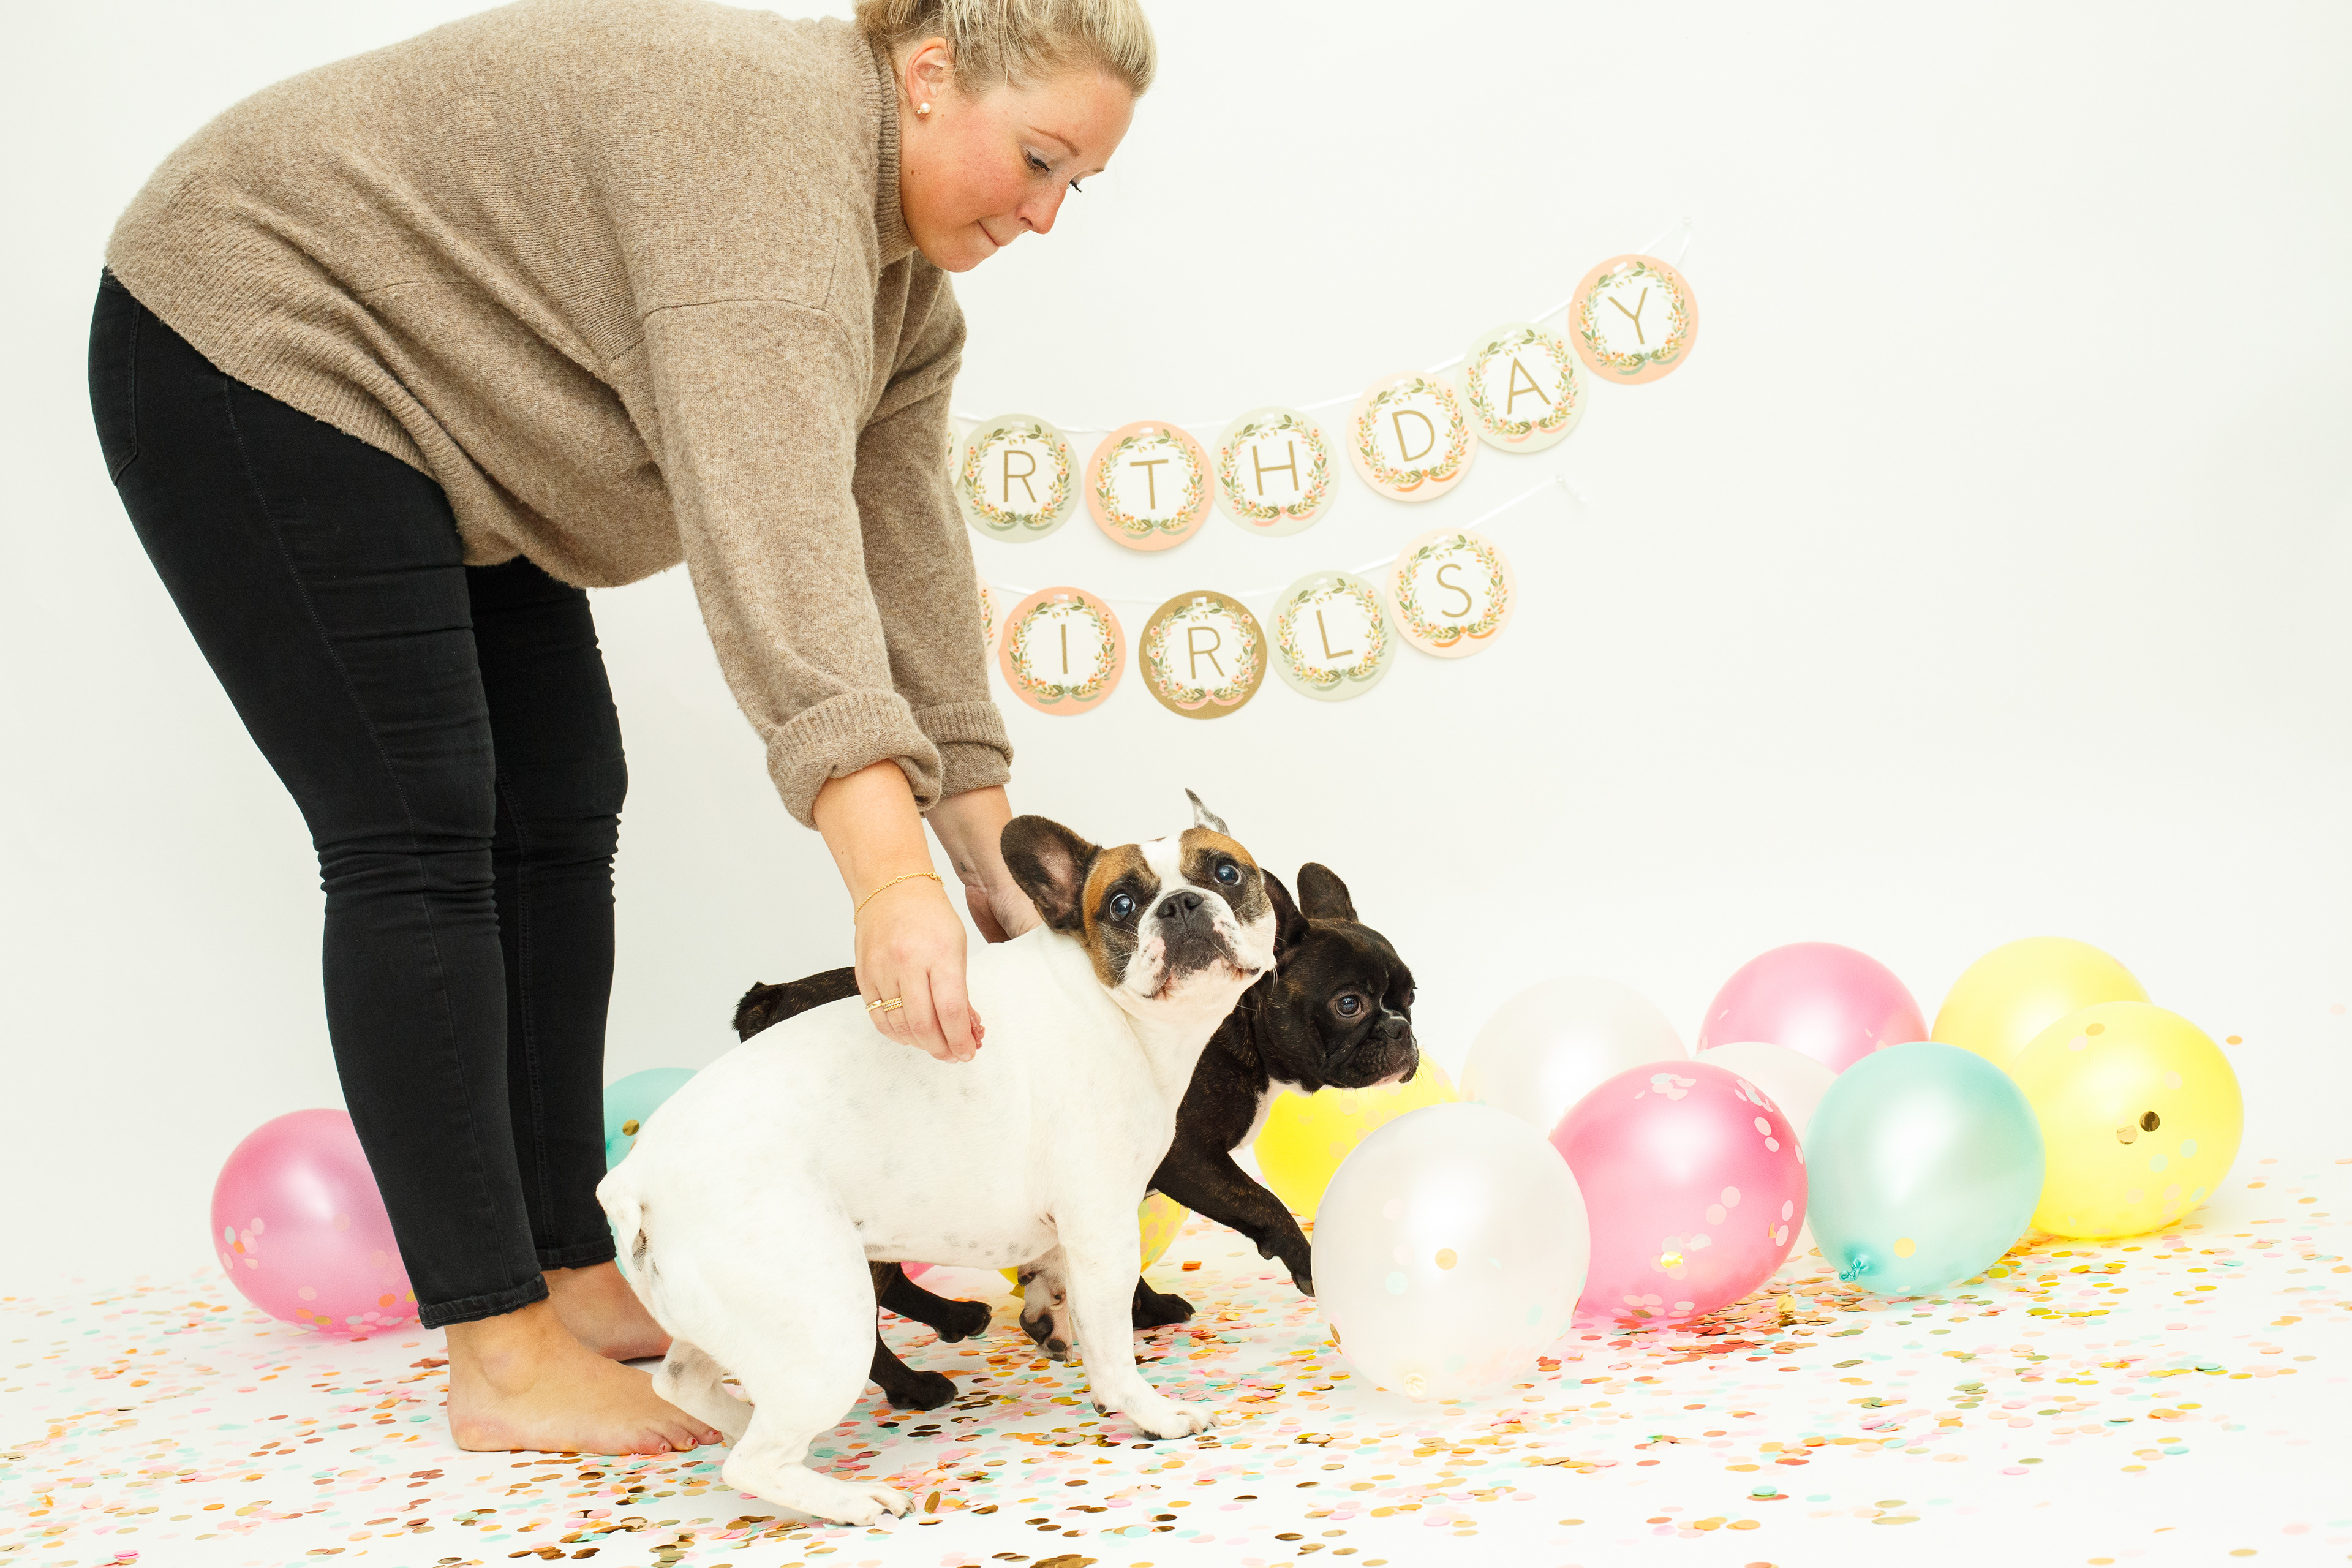
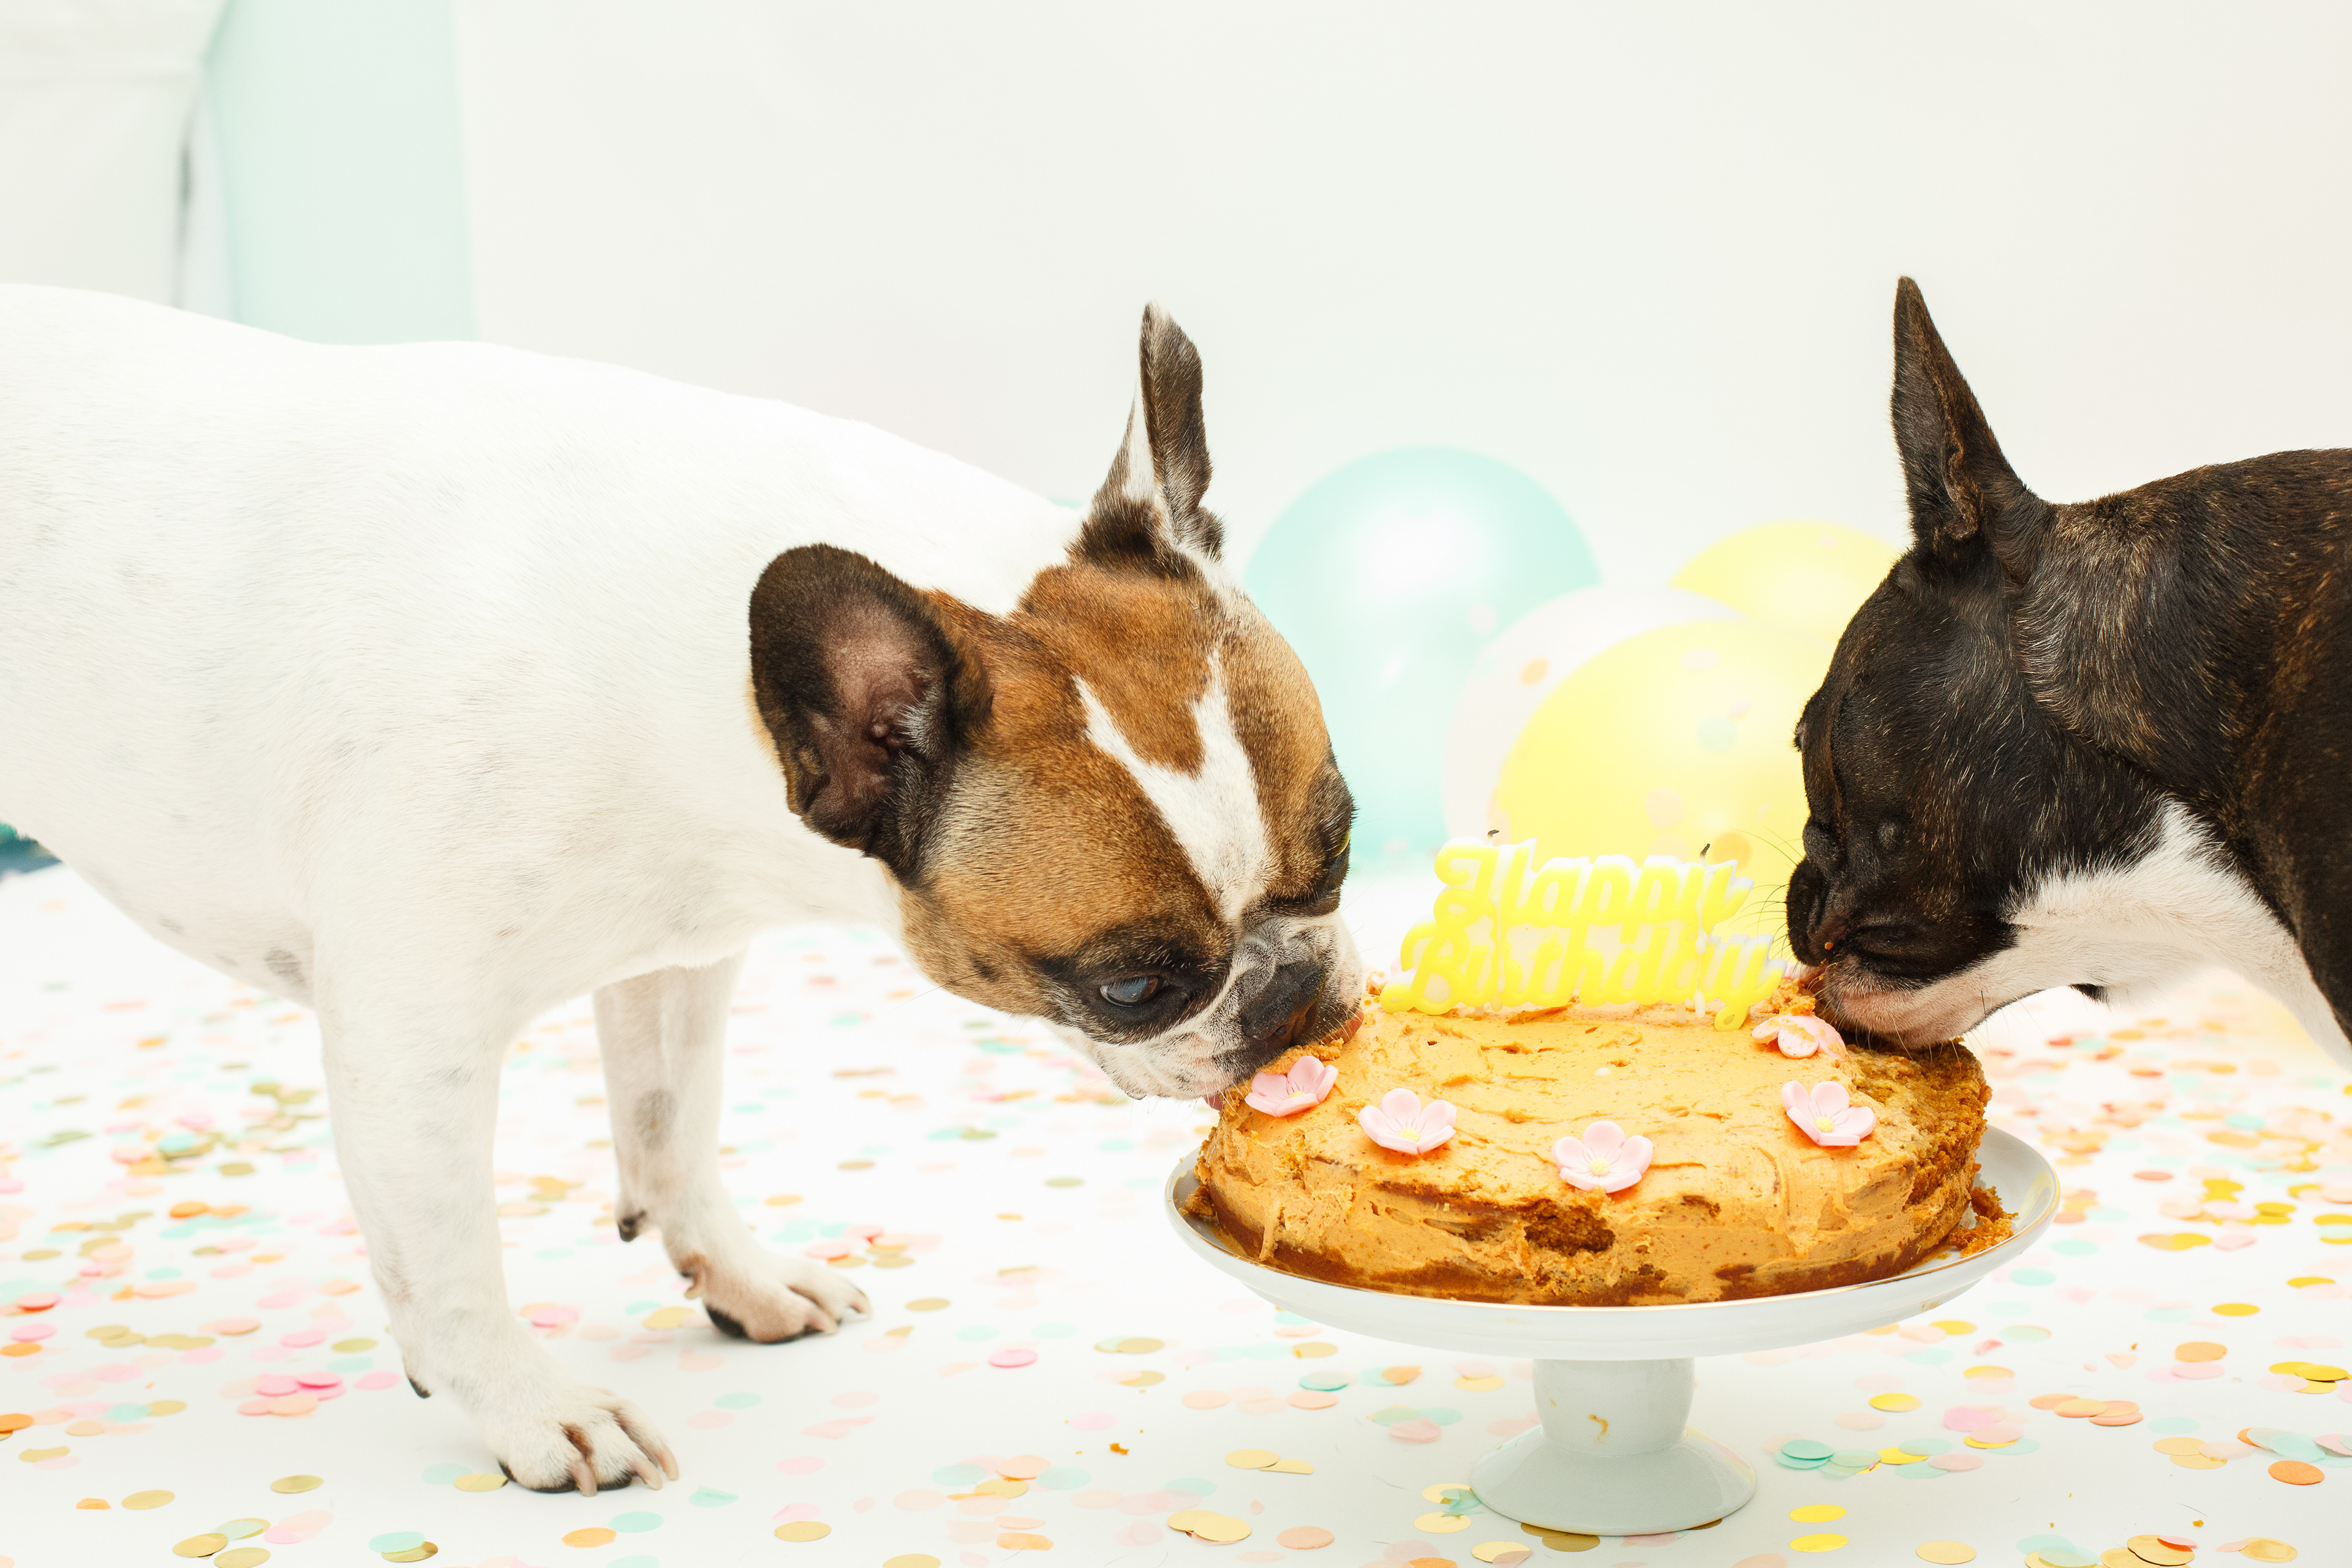
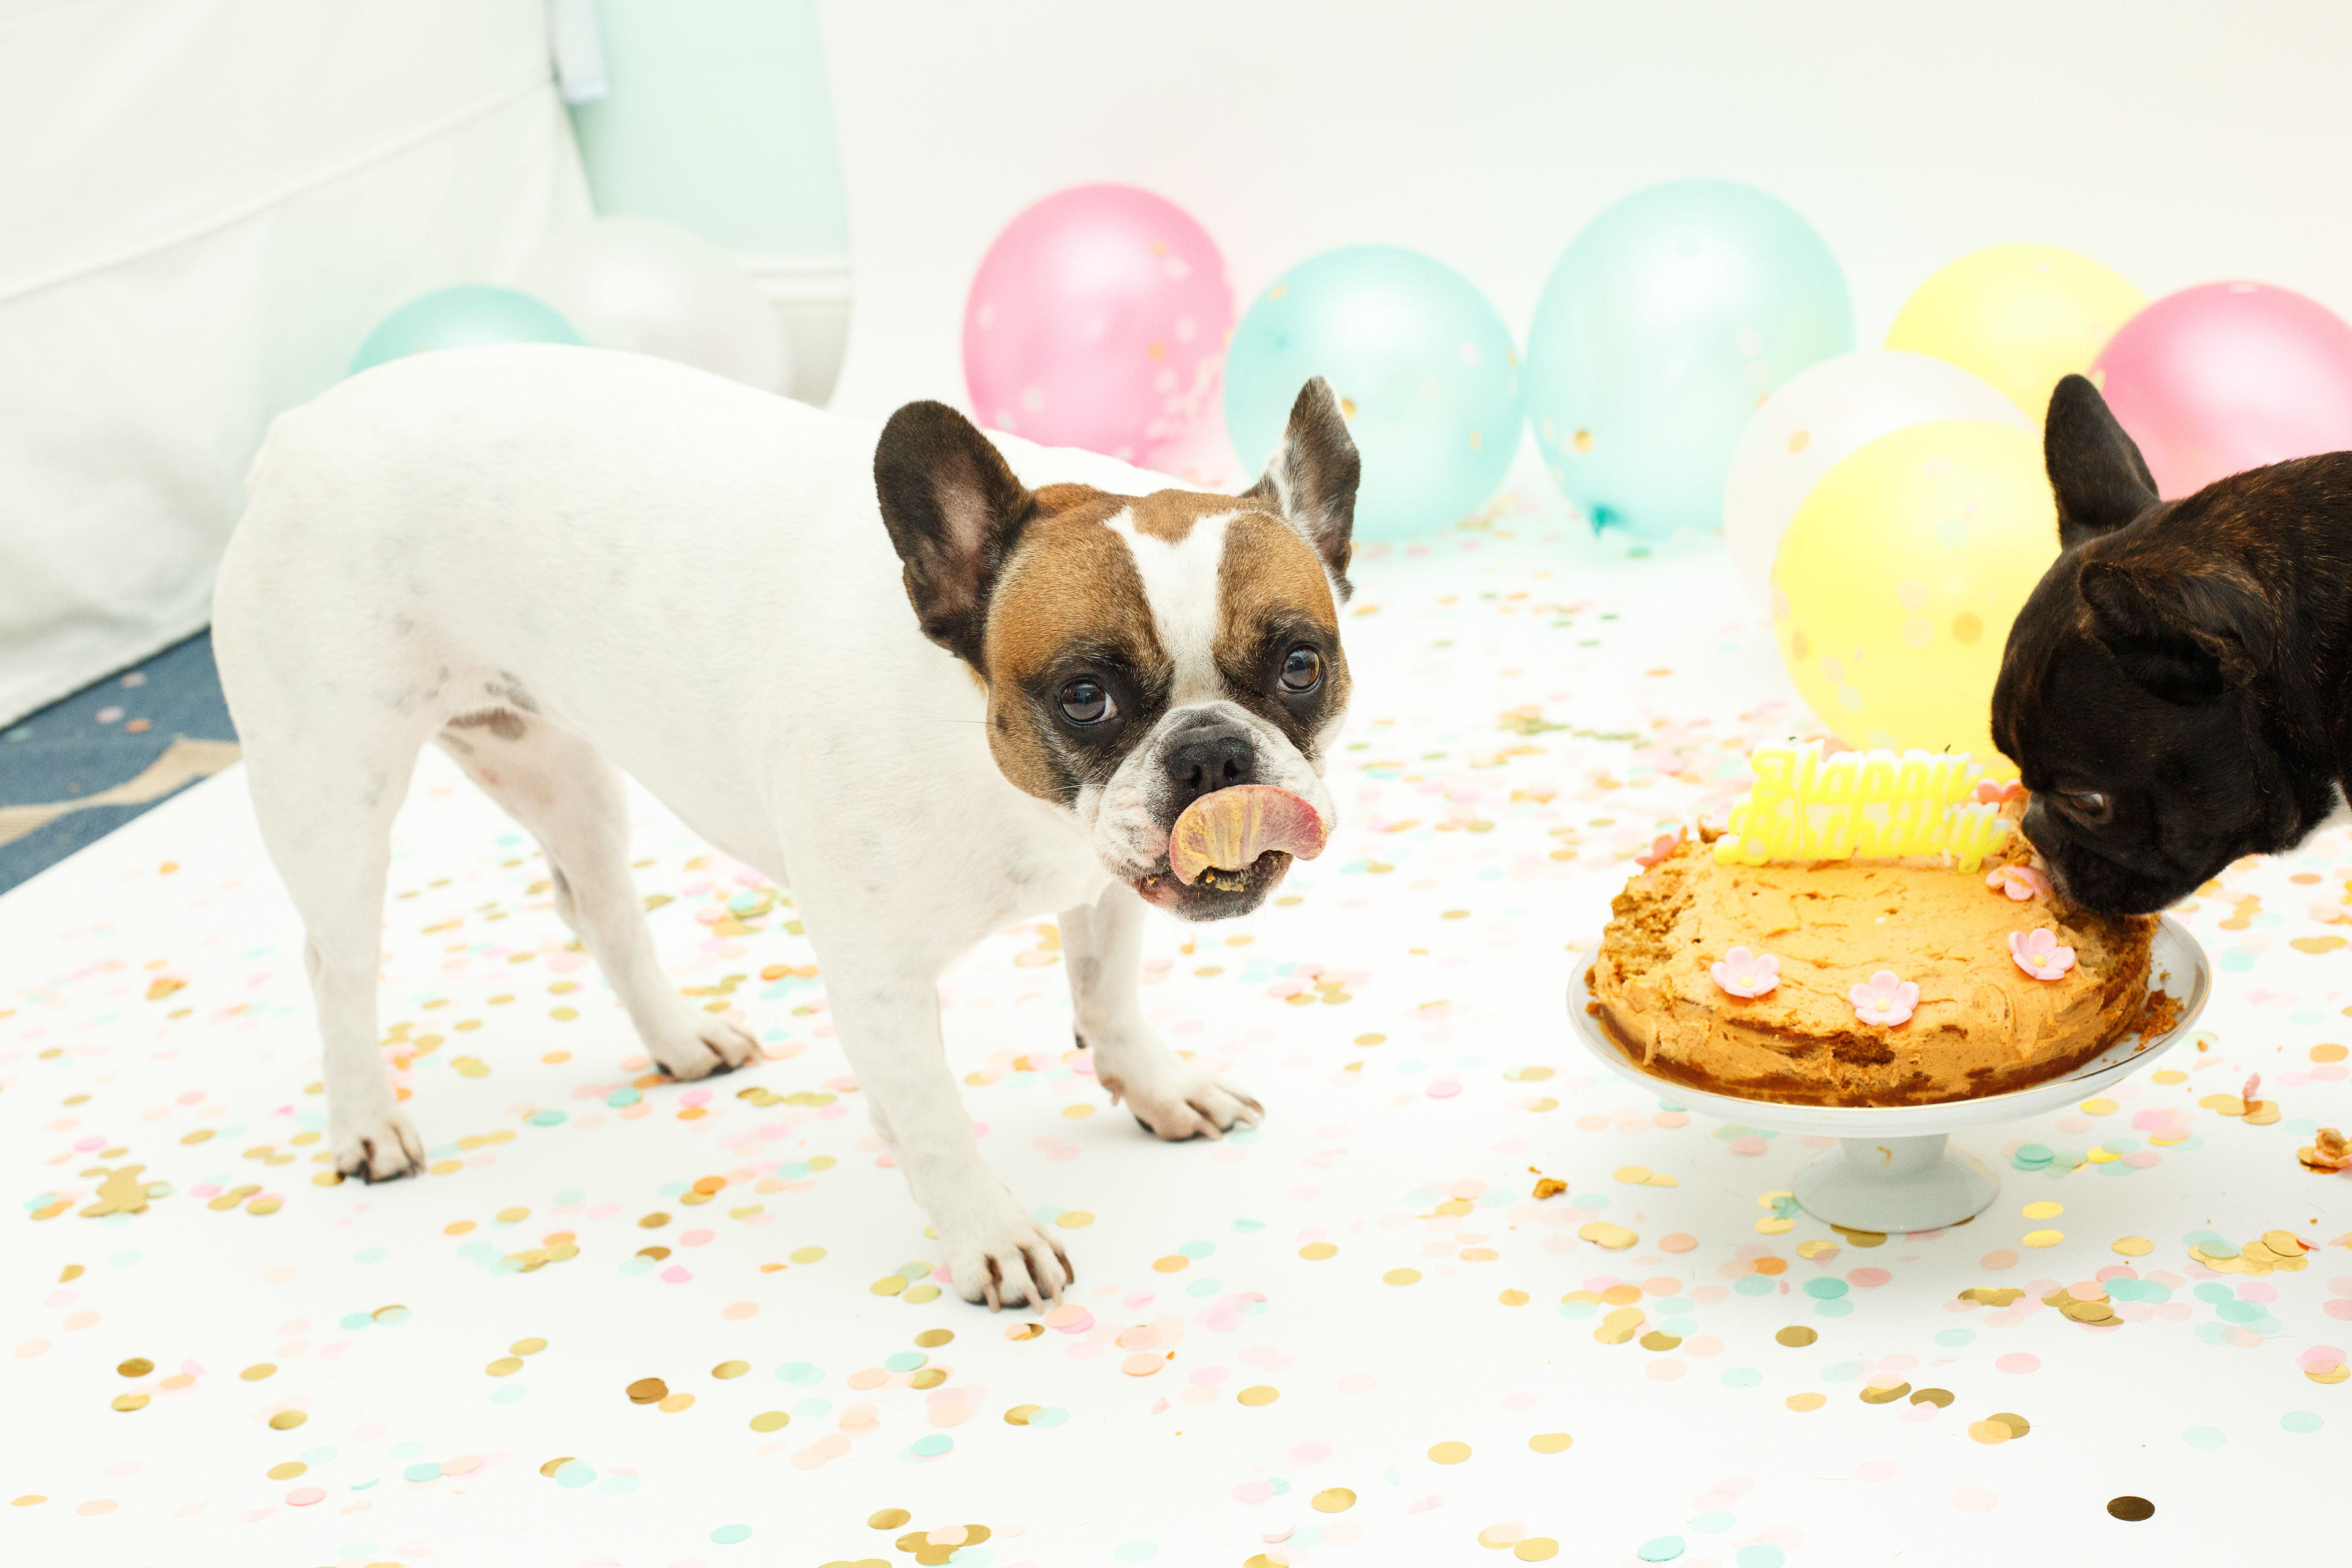
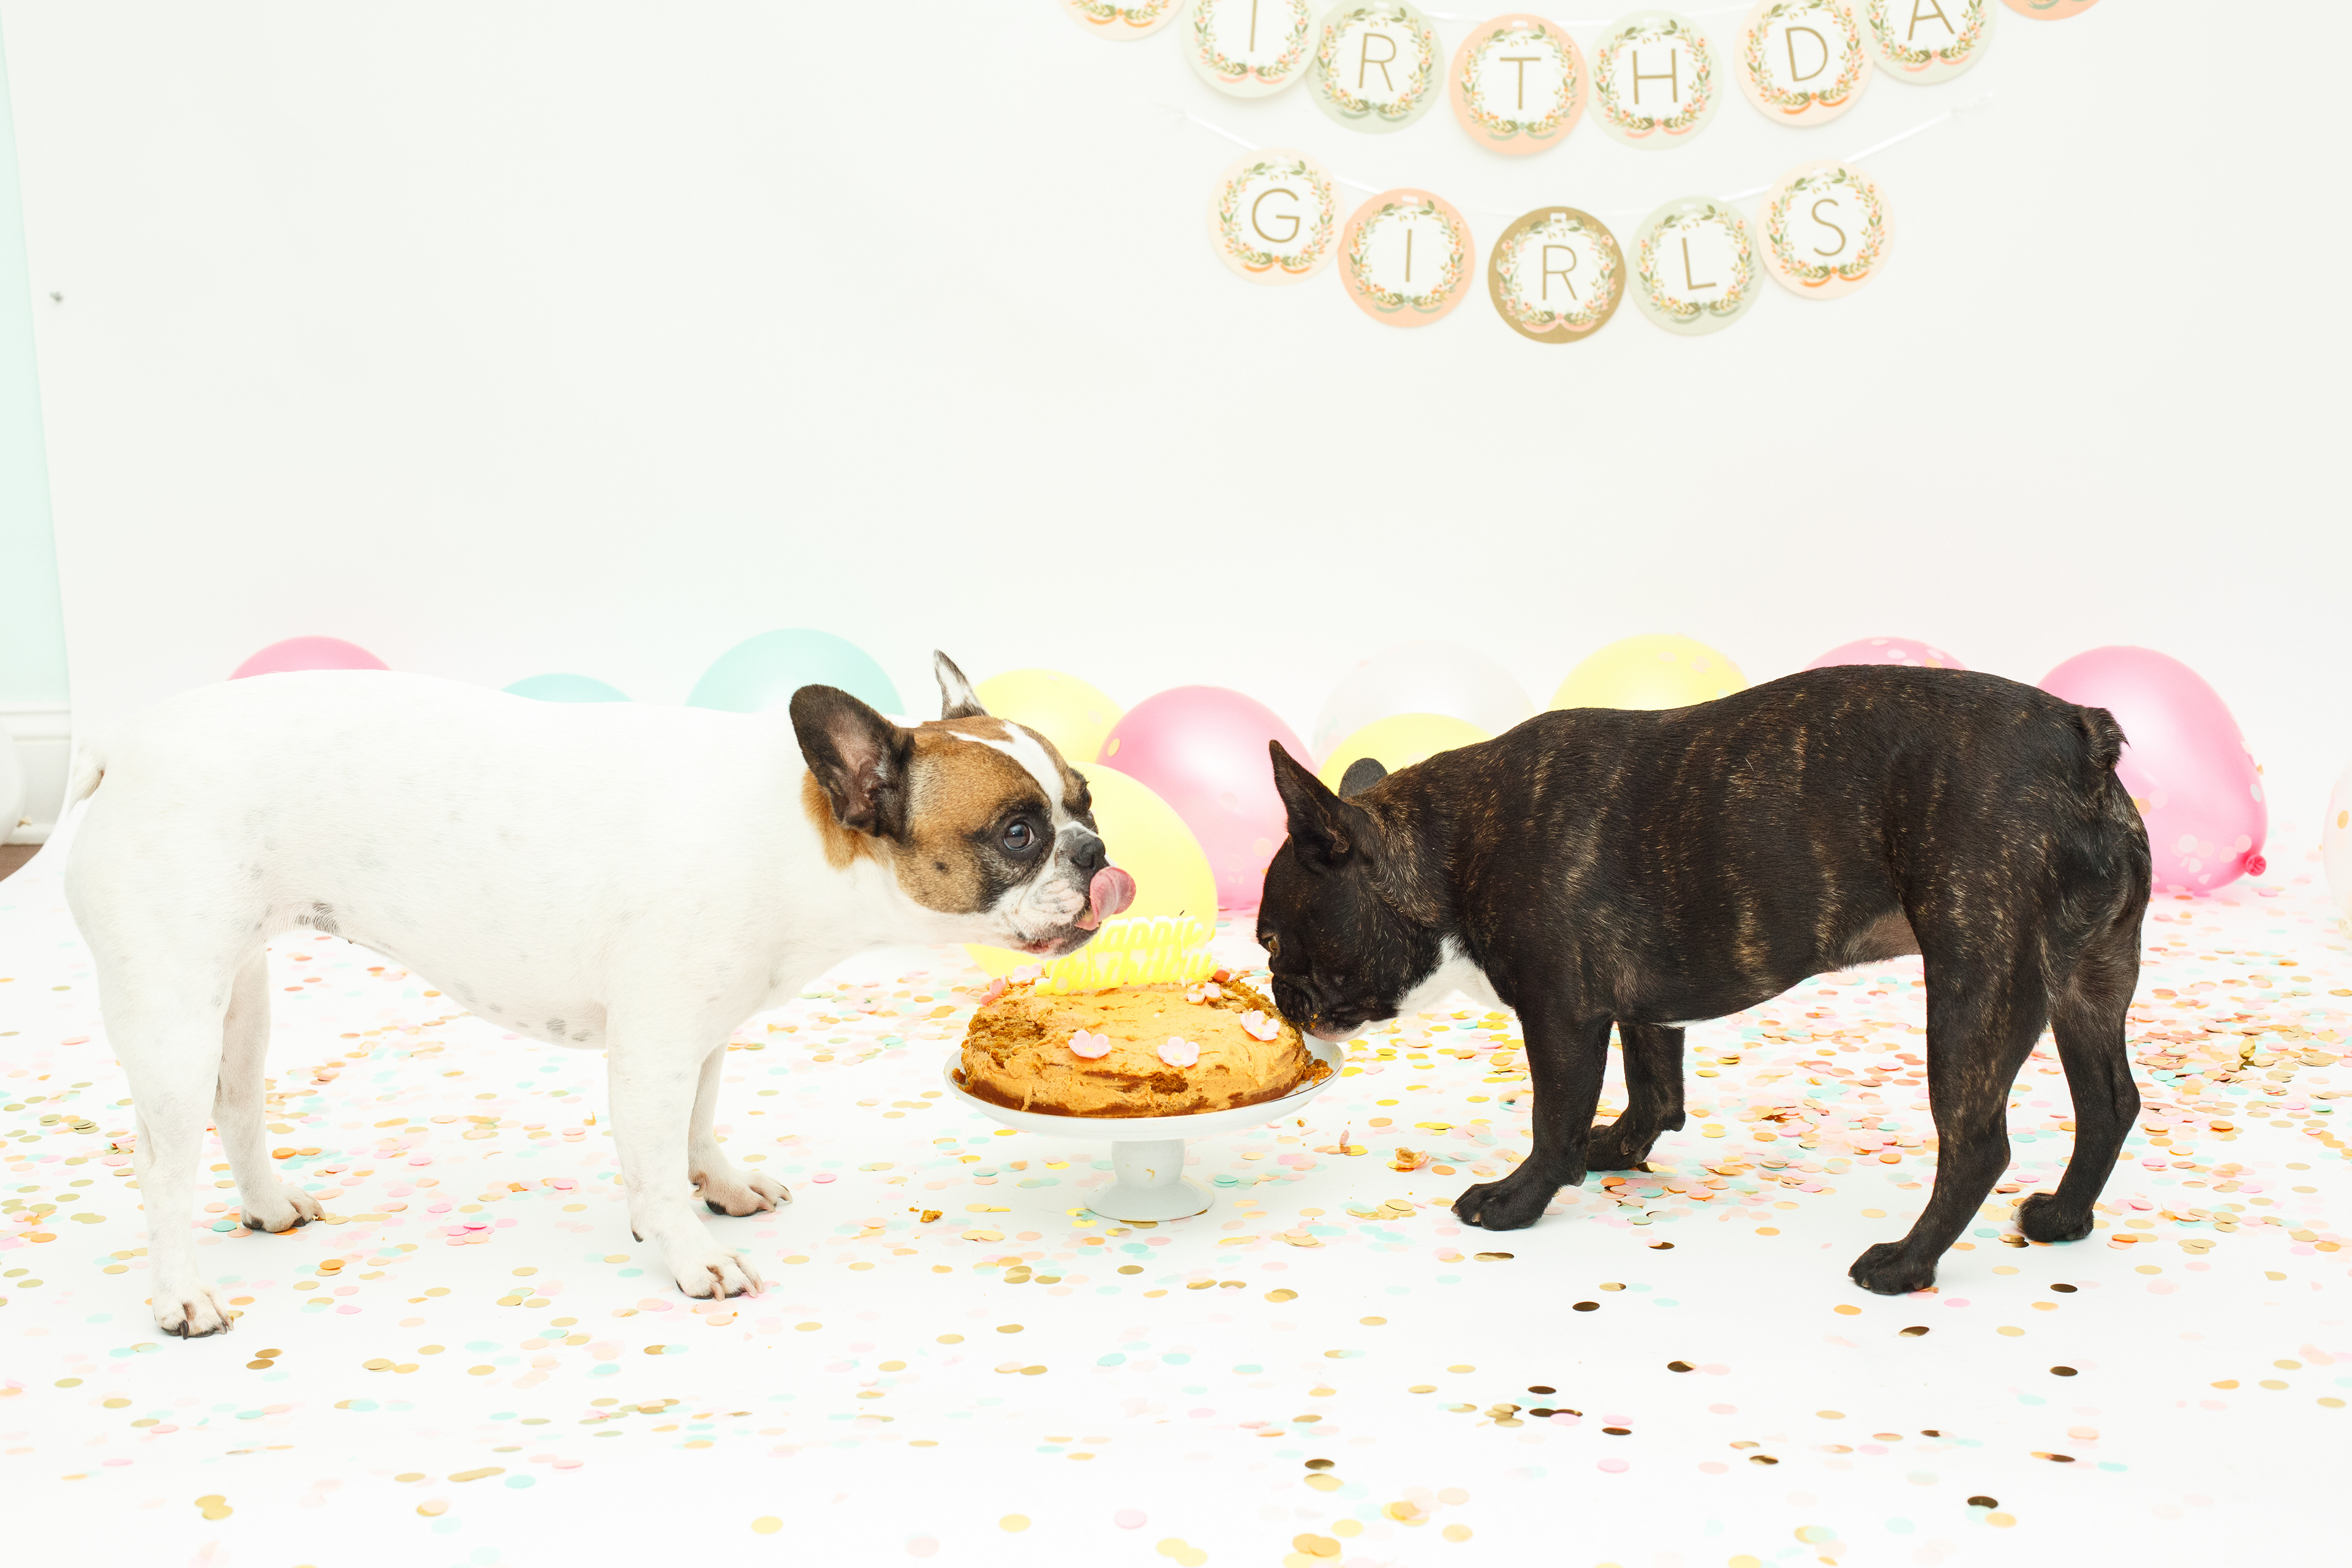
In lieu of this discovery, I thought it would be fun to plan a styled photoshoot for the girl’s birthdays since they were both celebrating milestone birthdays: Our forever baby, Molly, was turning 5 (where did the time go?!) and Ruby was turning 1! I already had the vision in my head for the style and decor of the shoot so my next step was to simply execute. While I love photography, I decided it would be best if I hired a professional photographer because I knew I’d realistically need to devote my energy to bribe the pups to somehow successfully sit still long enough (and side by side might I add) to get some good shots. I hired Will Ferman of @puparazzinyc as he shot our family photo for our holiday card last year and is known as Hoboken’s premier dog photographer. It look lots of patience, many slices of prosciutto and one epic cake smash, but we managed to successfully pull off a fantastic birthday shoot! I am so happy with how the final photos came out and even love all the silly outtakes and plan to frame them to enjoy for years to come!
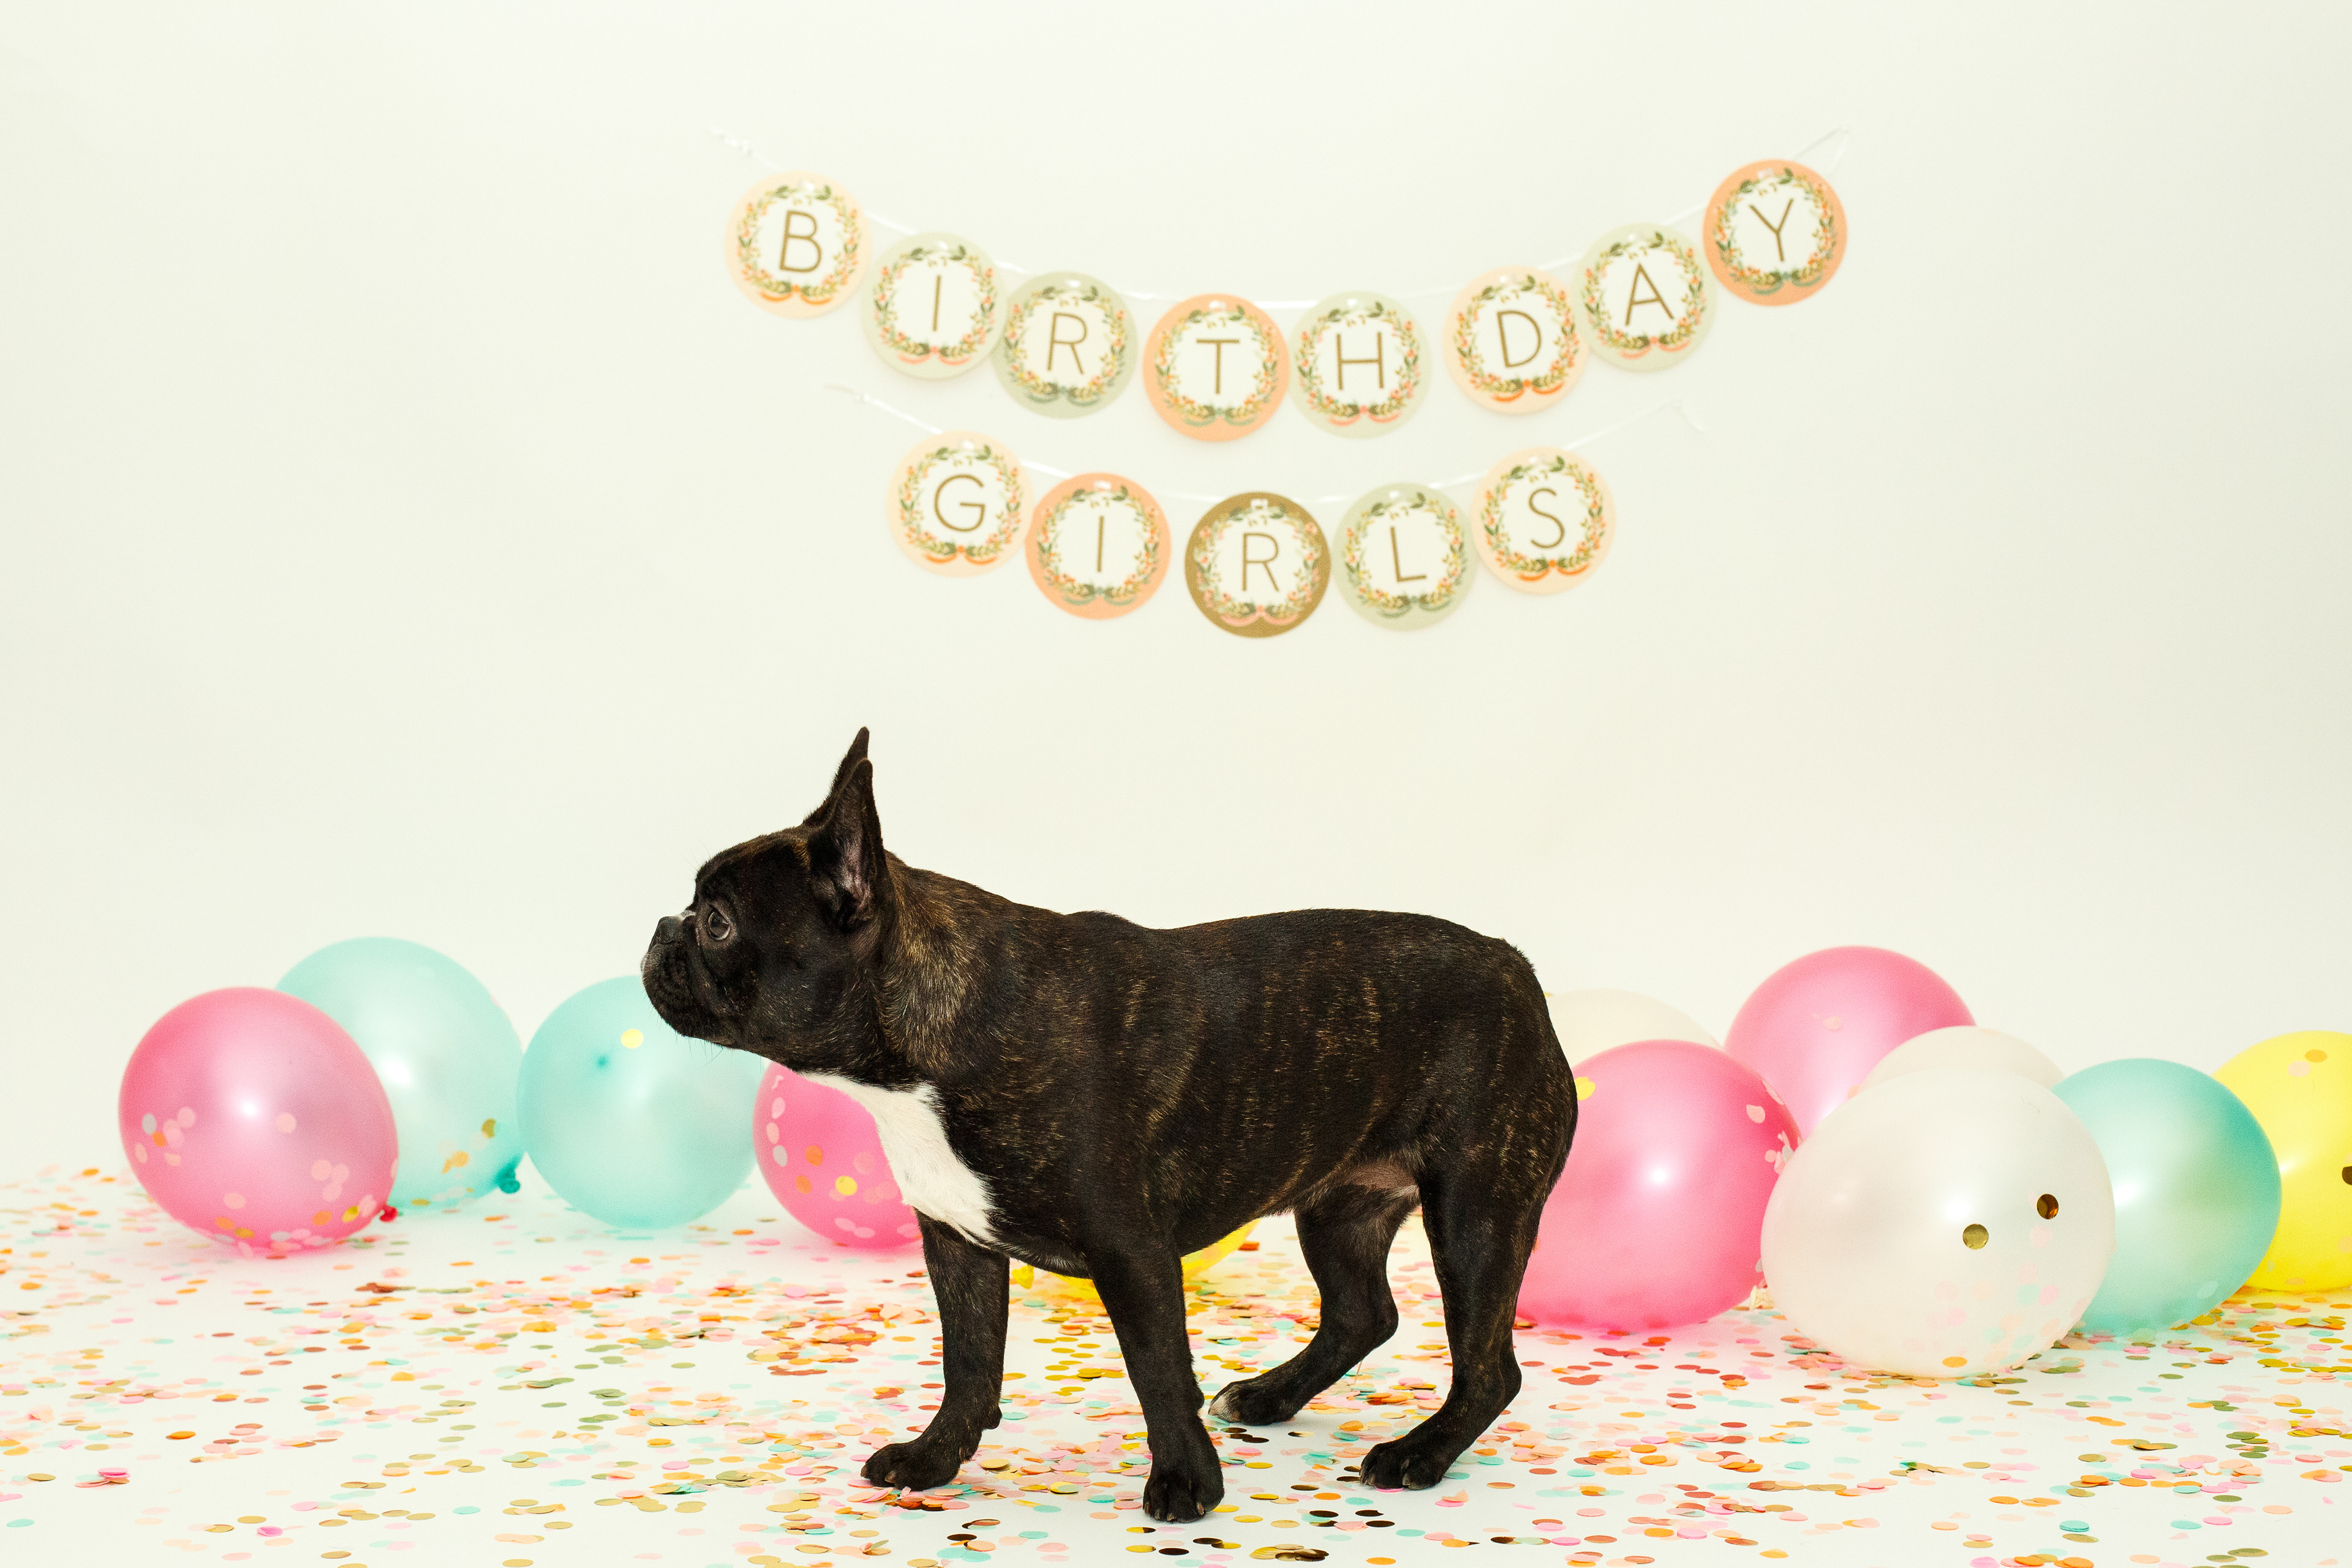
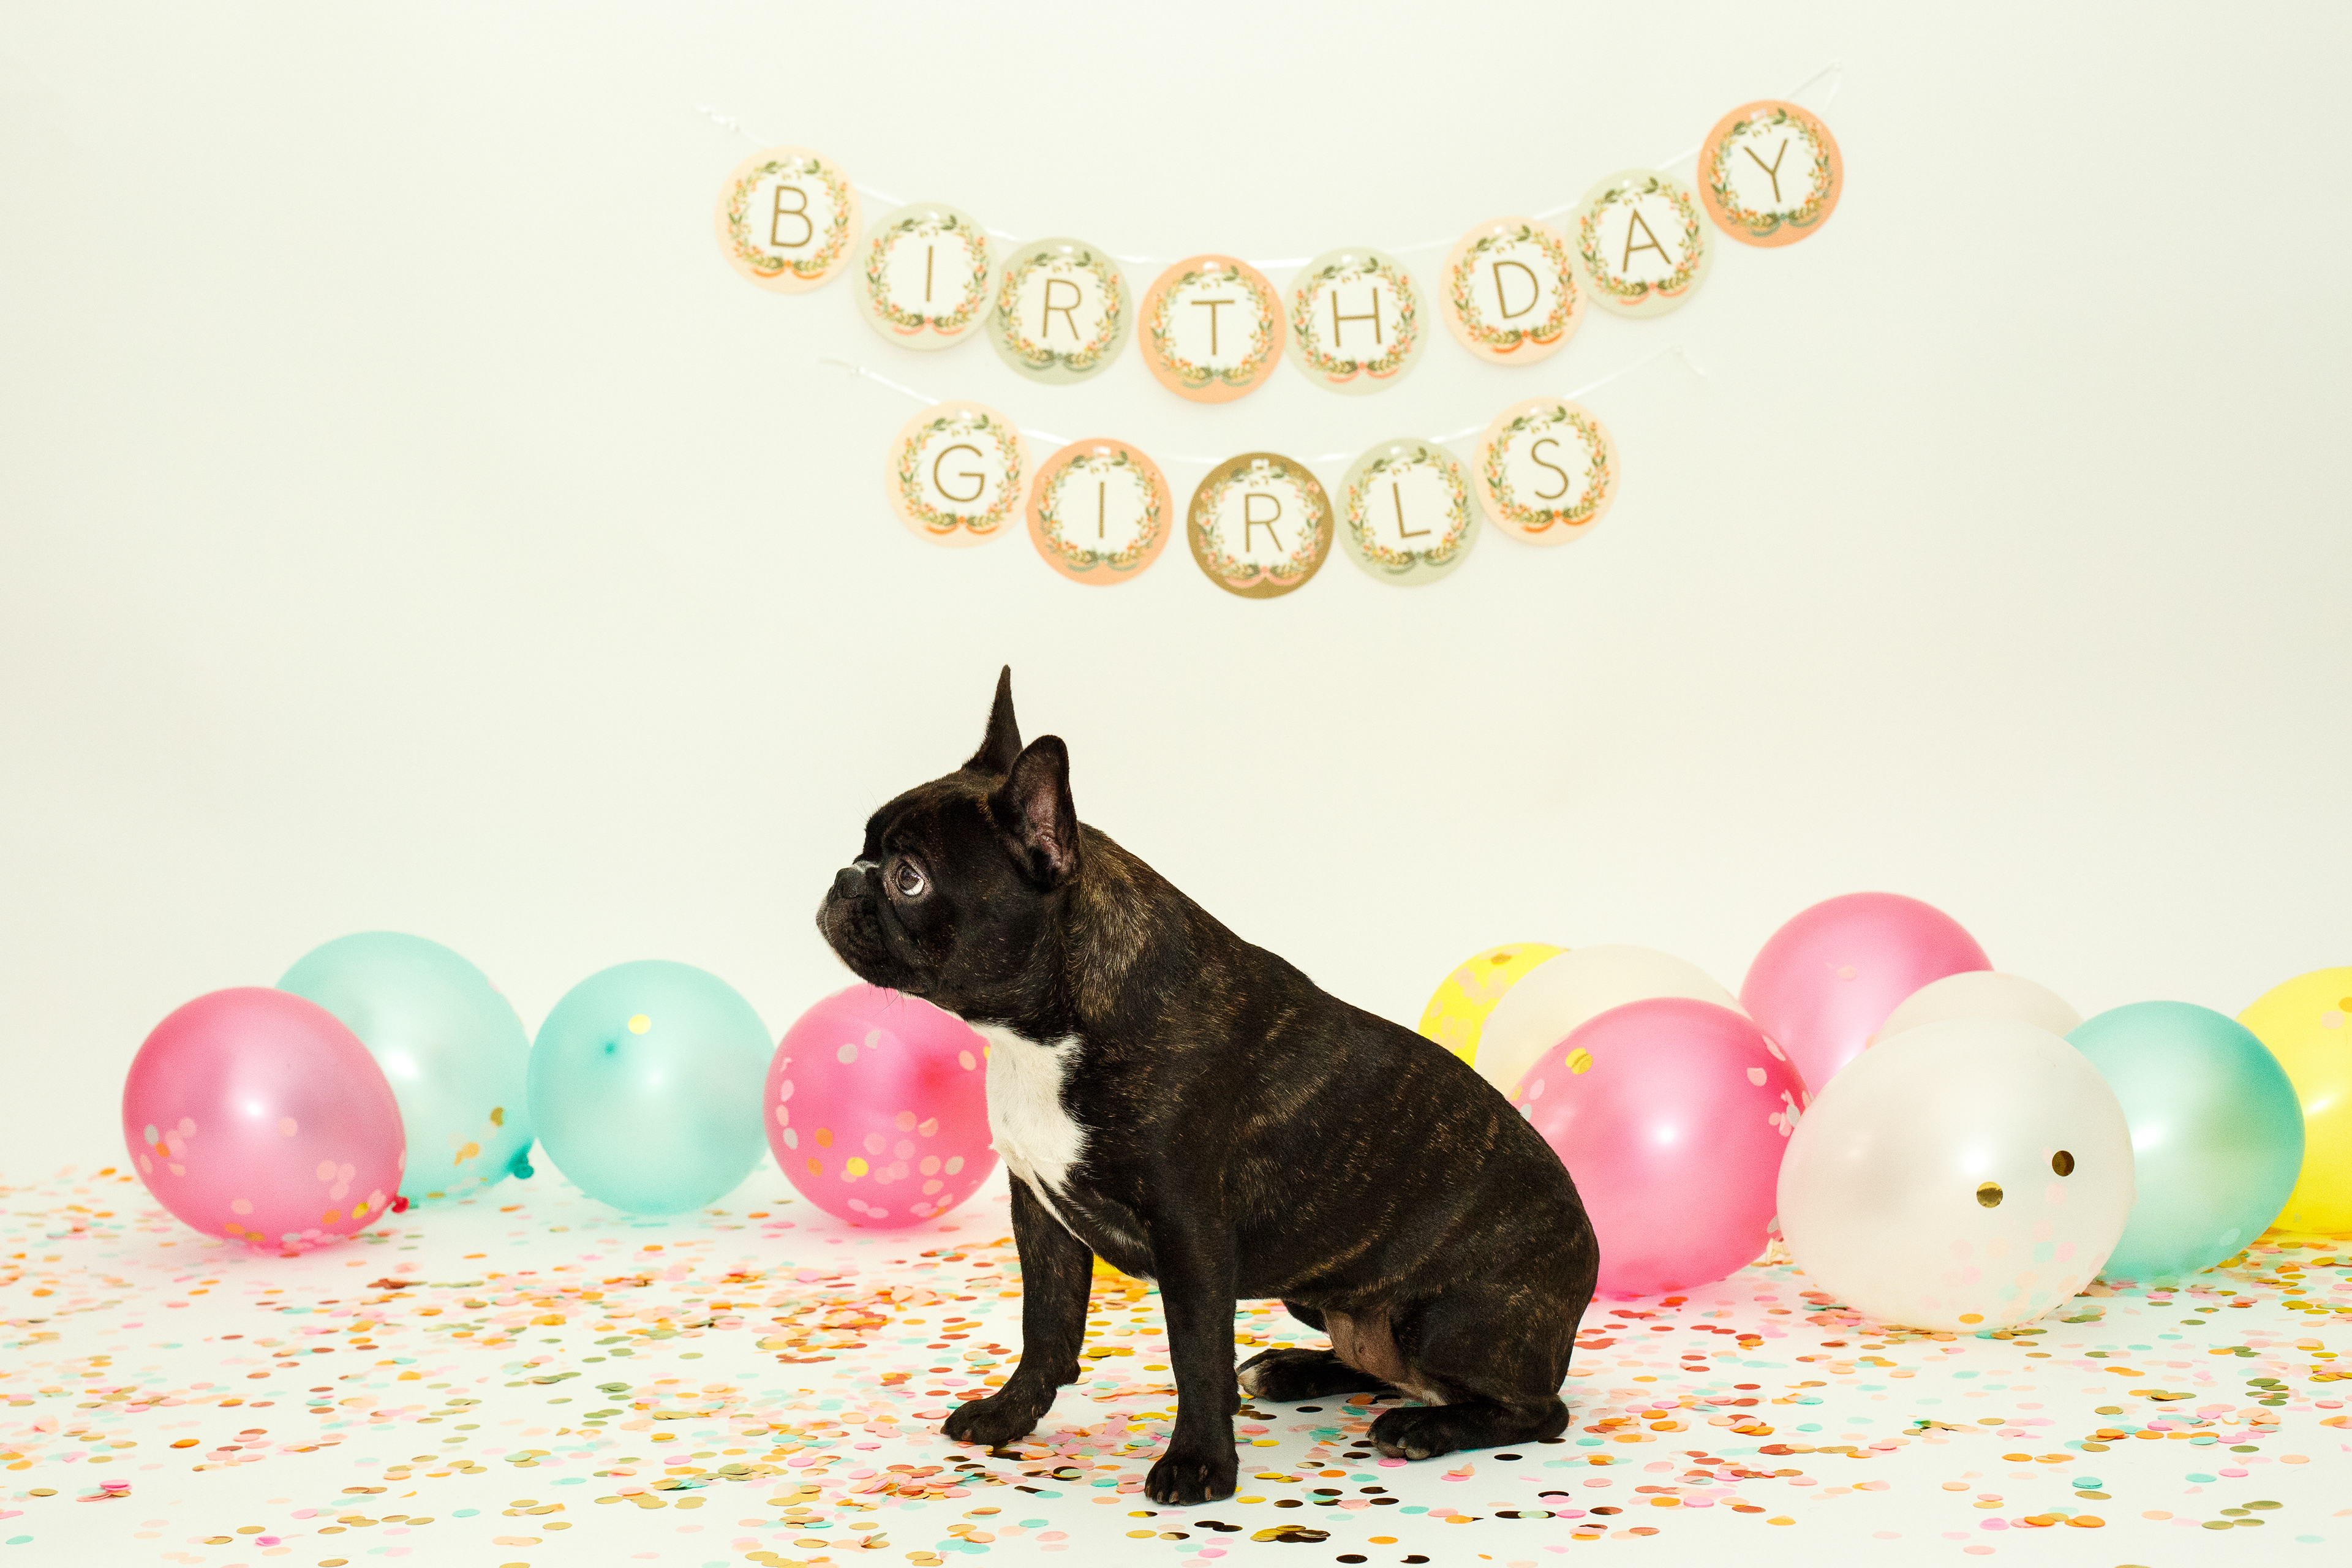
I hope these photos bring a smile to your face!!
Xx
PS: For those interested in baking their own dog-friendly cake, scroll to the bottom of this post for the recipe!

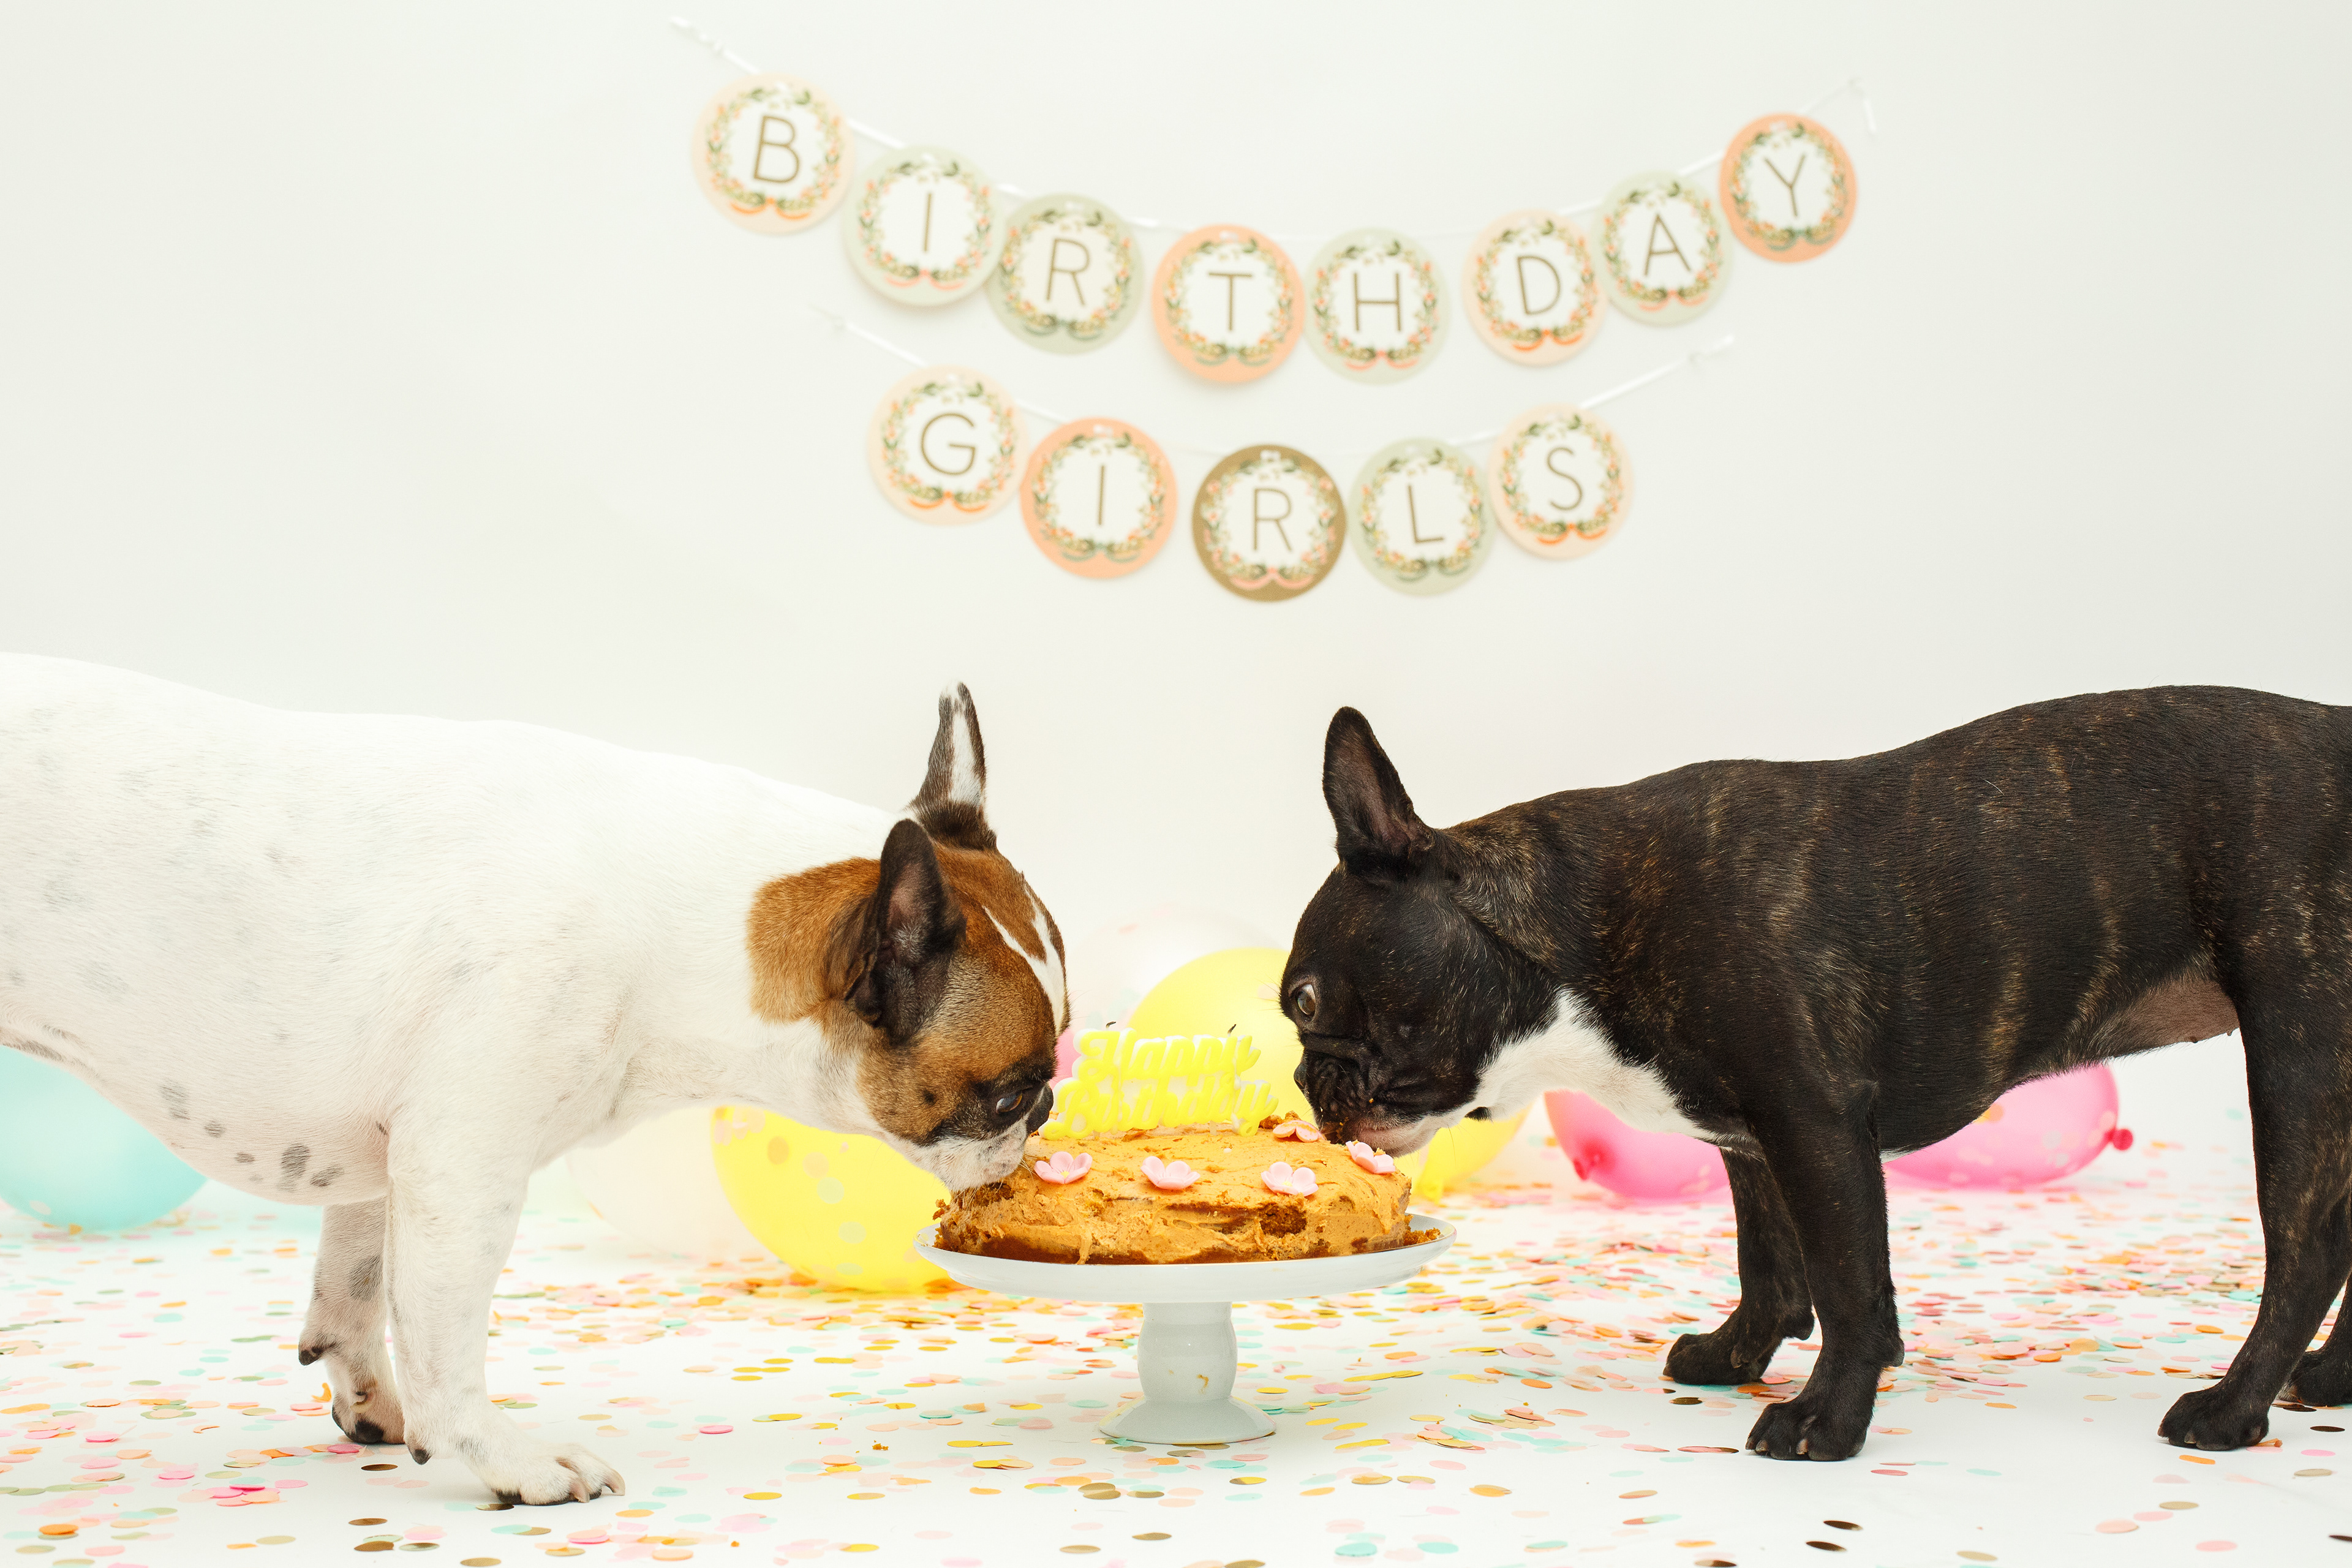


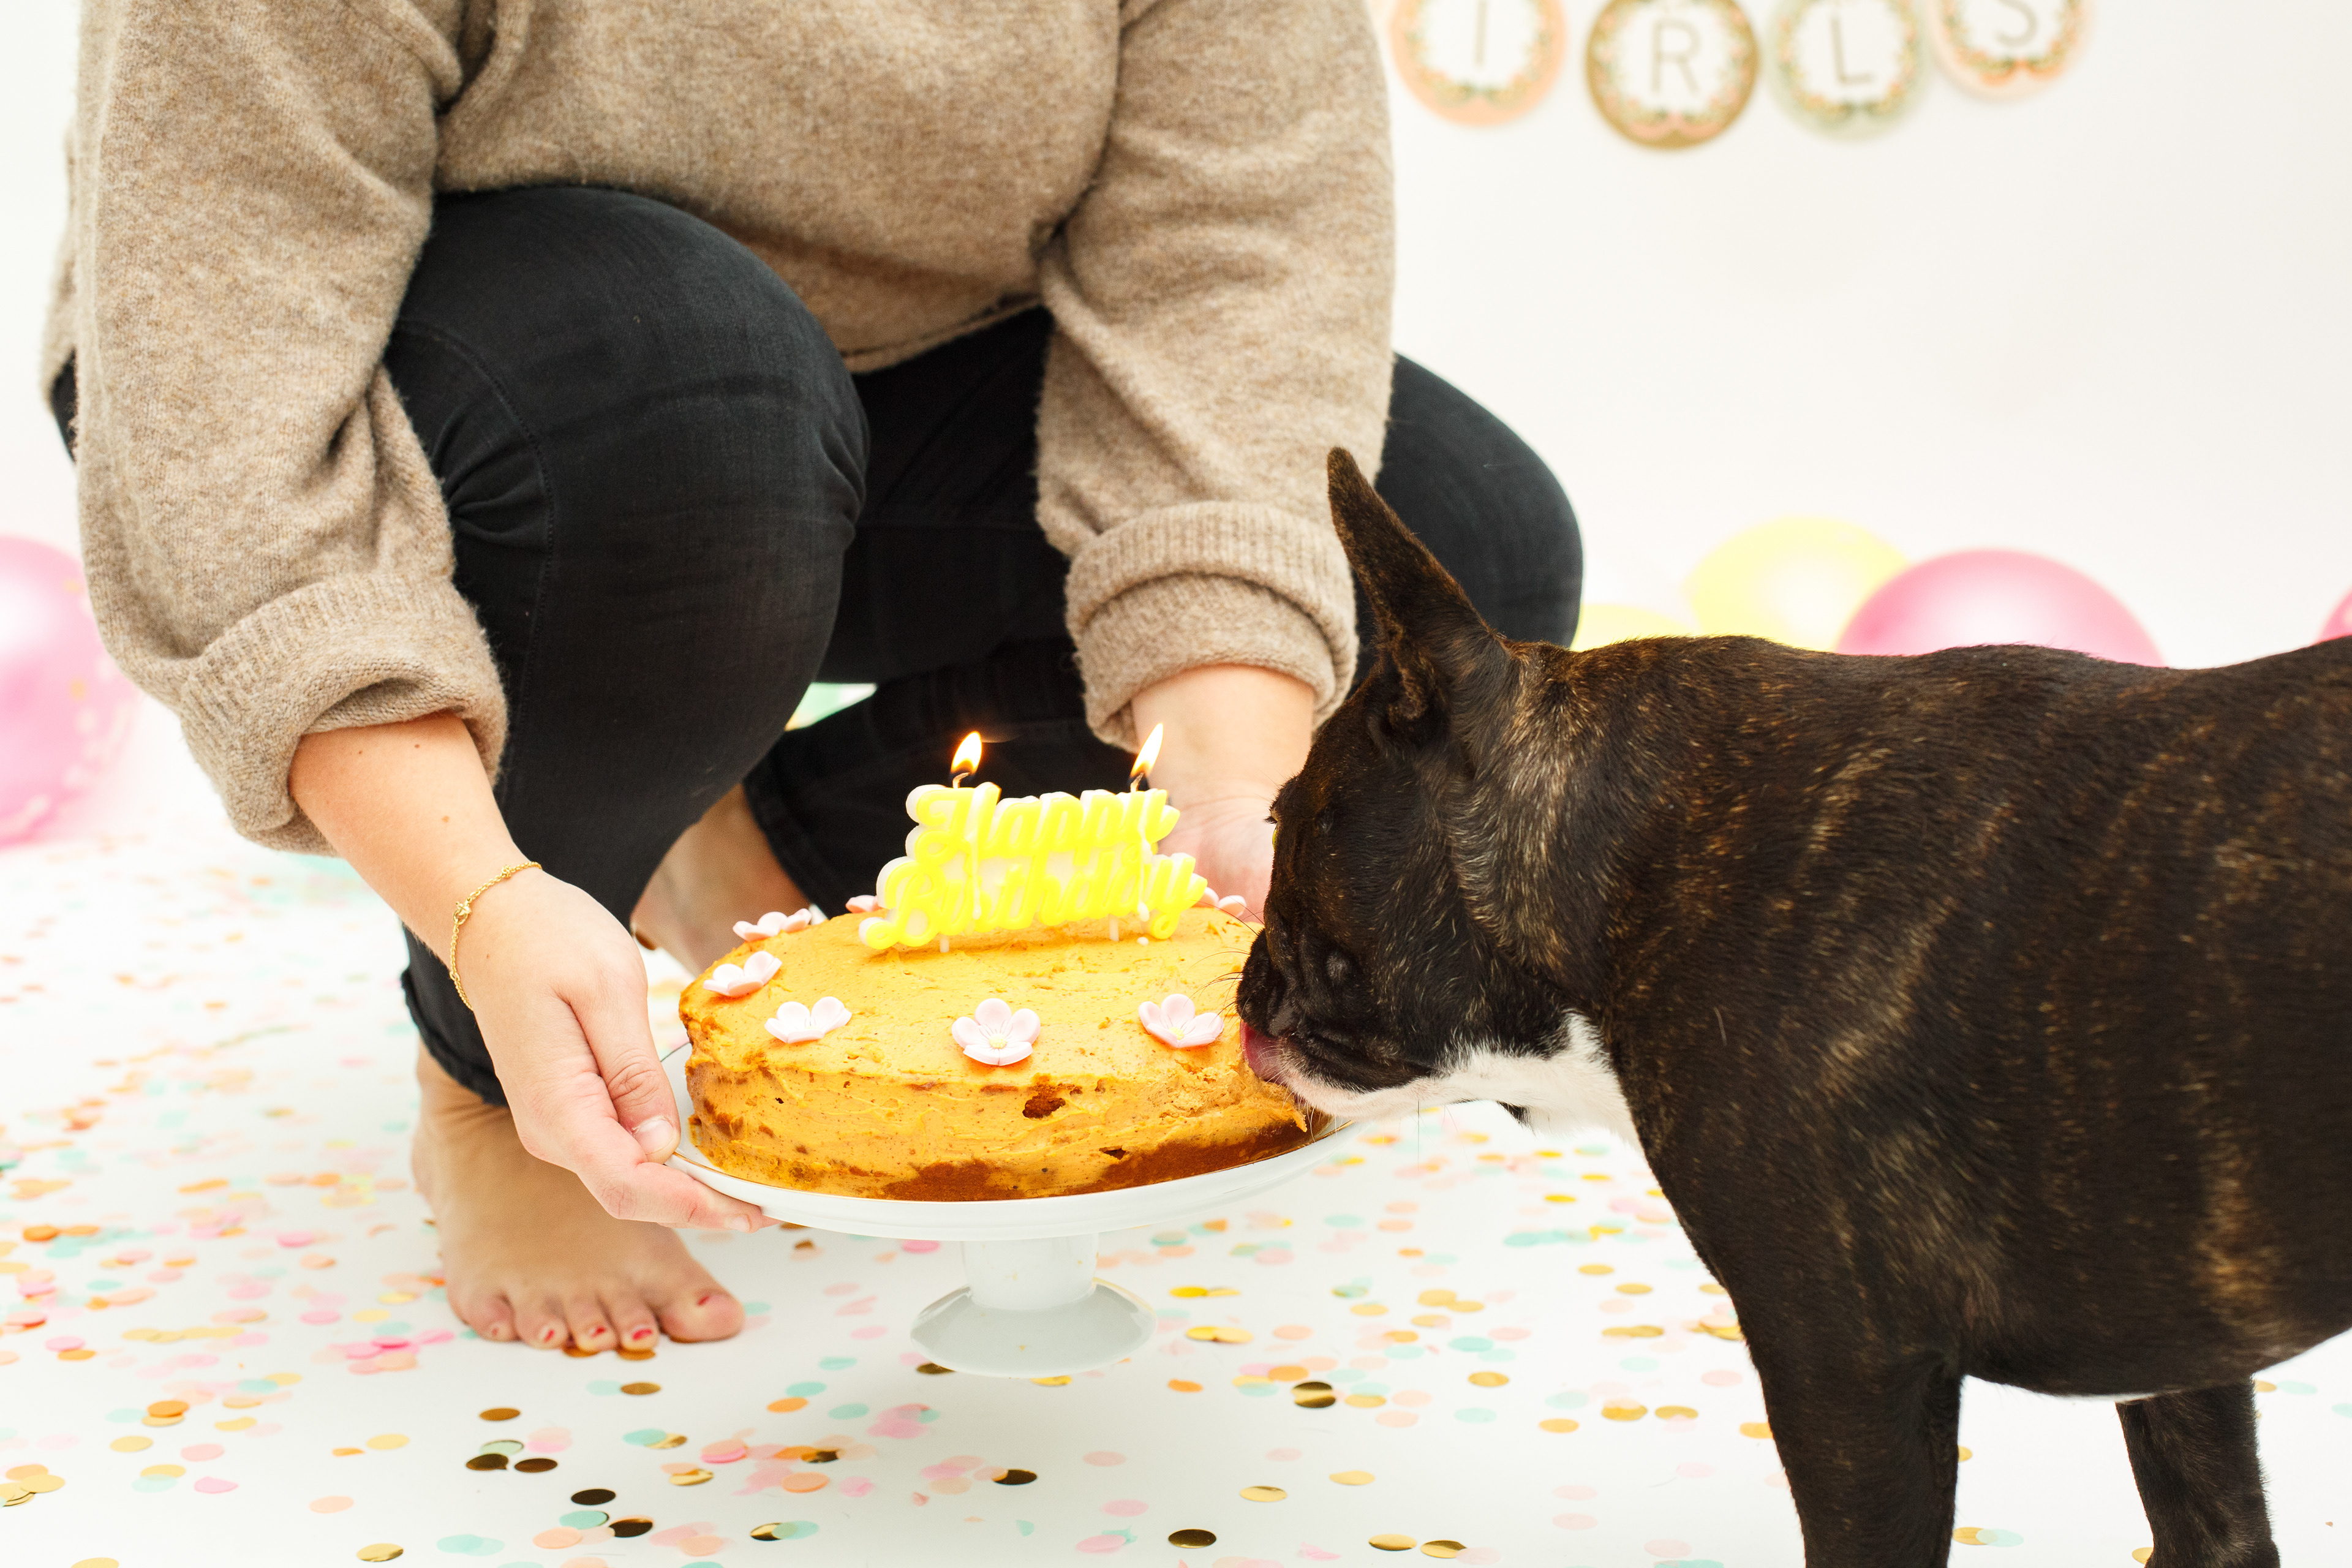
Dog Cake Recipe
Ingredients
Cake:
1 cup flour
1/2 tsp baking soda
1/8 cup vegetable oil
1/4 cup peanut butter
1/2 cup applesauce
1/2 cup pumpkin puree
1 egg
Frosting:
1/2 cup plain Greek yogurt
1/4 cup peanut butter
Instructions
Cake:
Preheat oven to 350 degrees.
Combine flour and baking soda in a large bowl.
In a separate bowl mix together vegetable oil, peanut butter, applesauce and pumpkin puree. Once combined, mix in egg and mix until combined.
Combine and stir together the wet and dry ingredients.
Pour mixture into an 8" round greased pan.
Bake for approximately 25-30 minutes.
After cooling, add frosting if desired.
Frosting:
Mix Greek yogurt and peanut butter until well combined. Spread over cake.
Note: Recipe can easily be doubled to make a layer cake
RECIPE: RAINBOW WAFFLE-WICHES
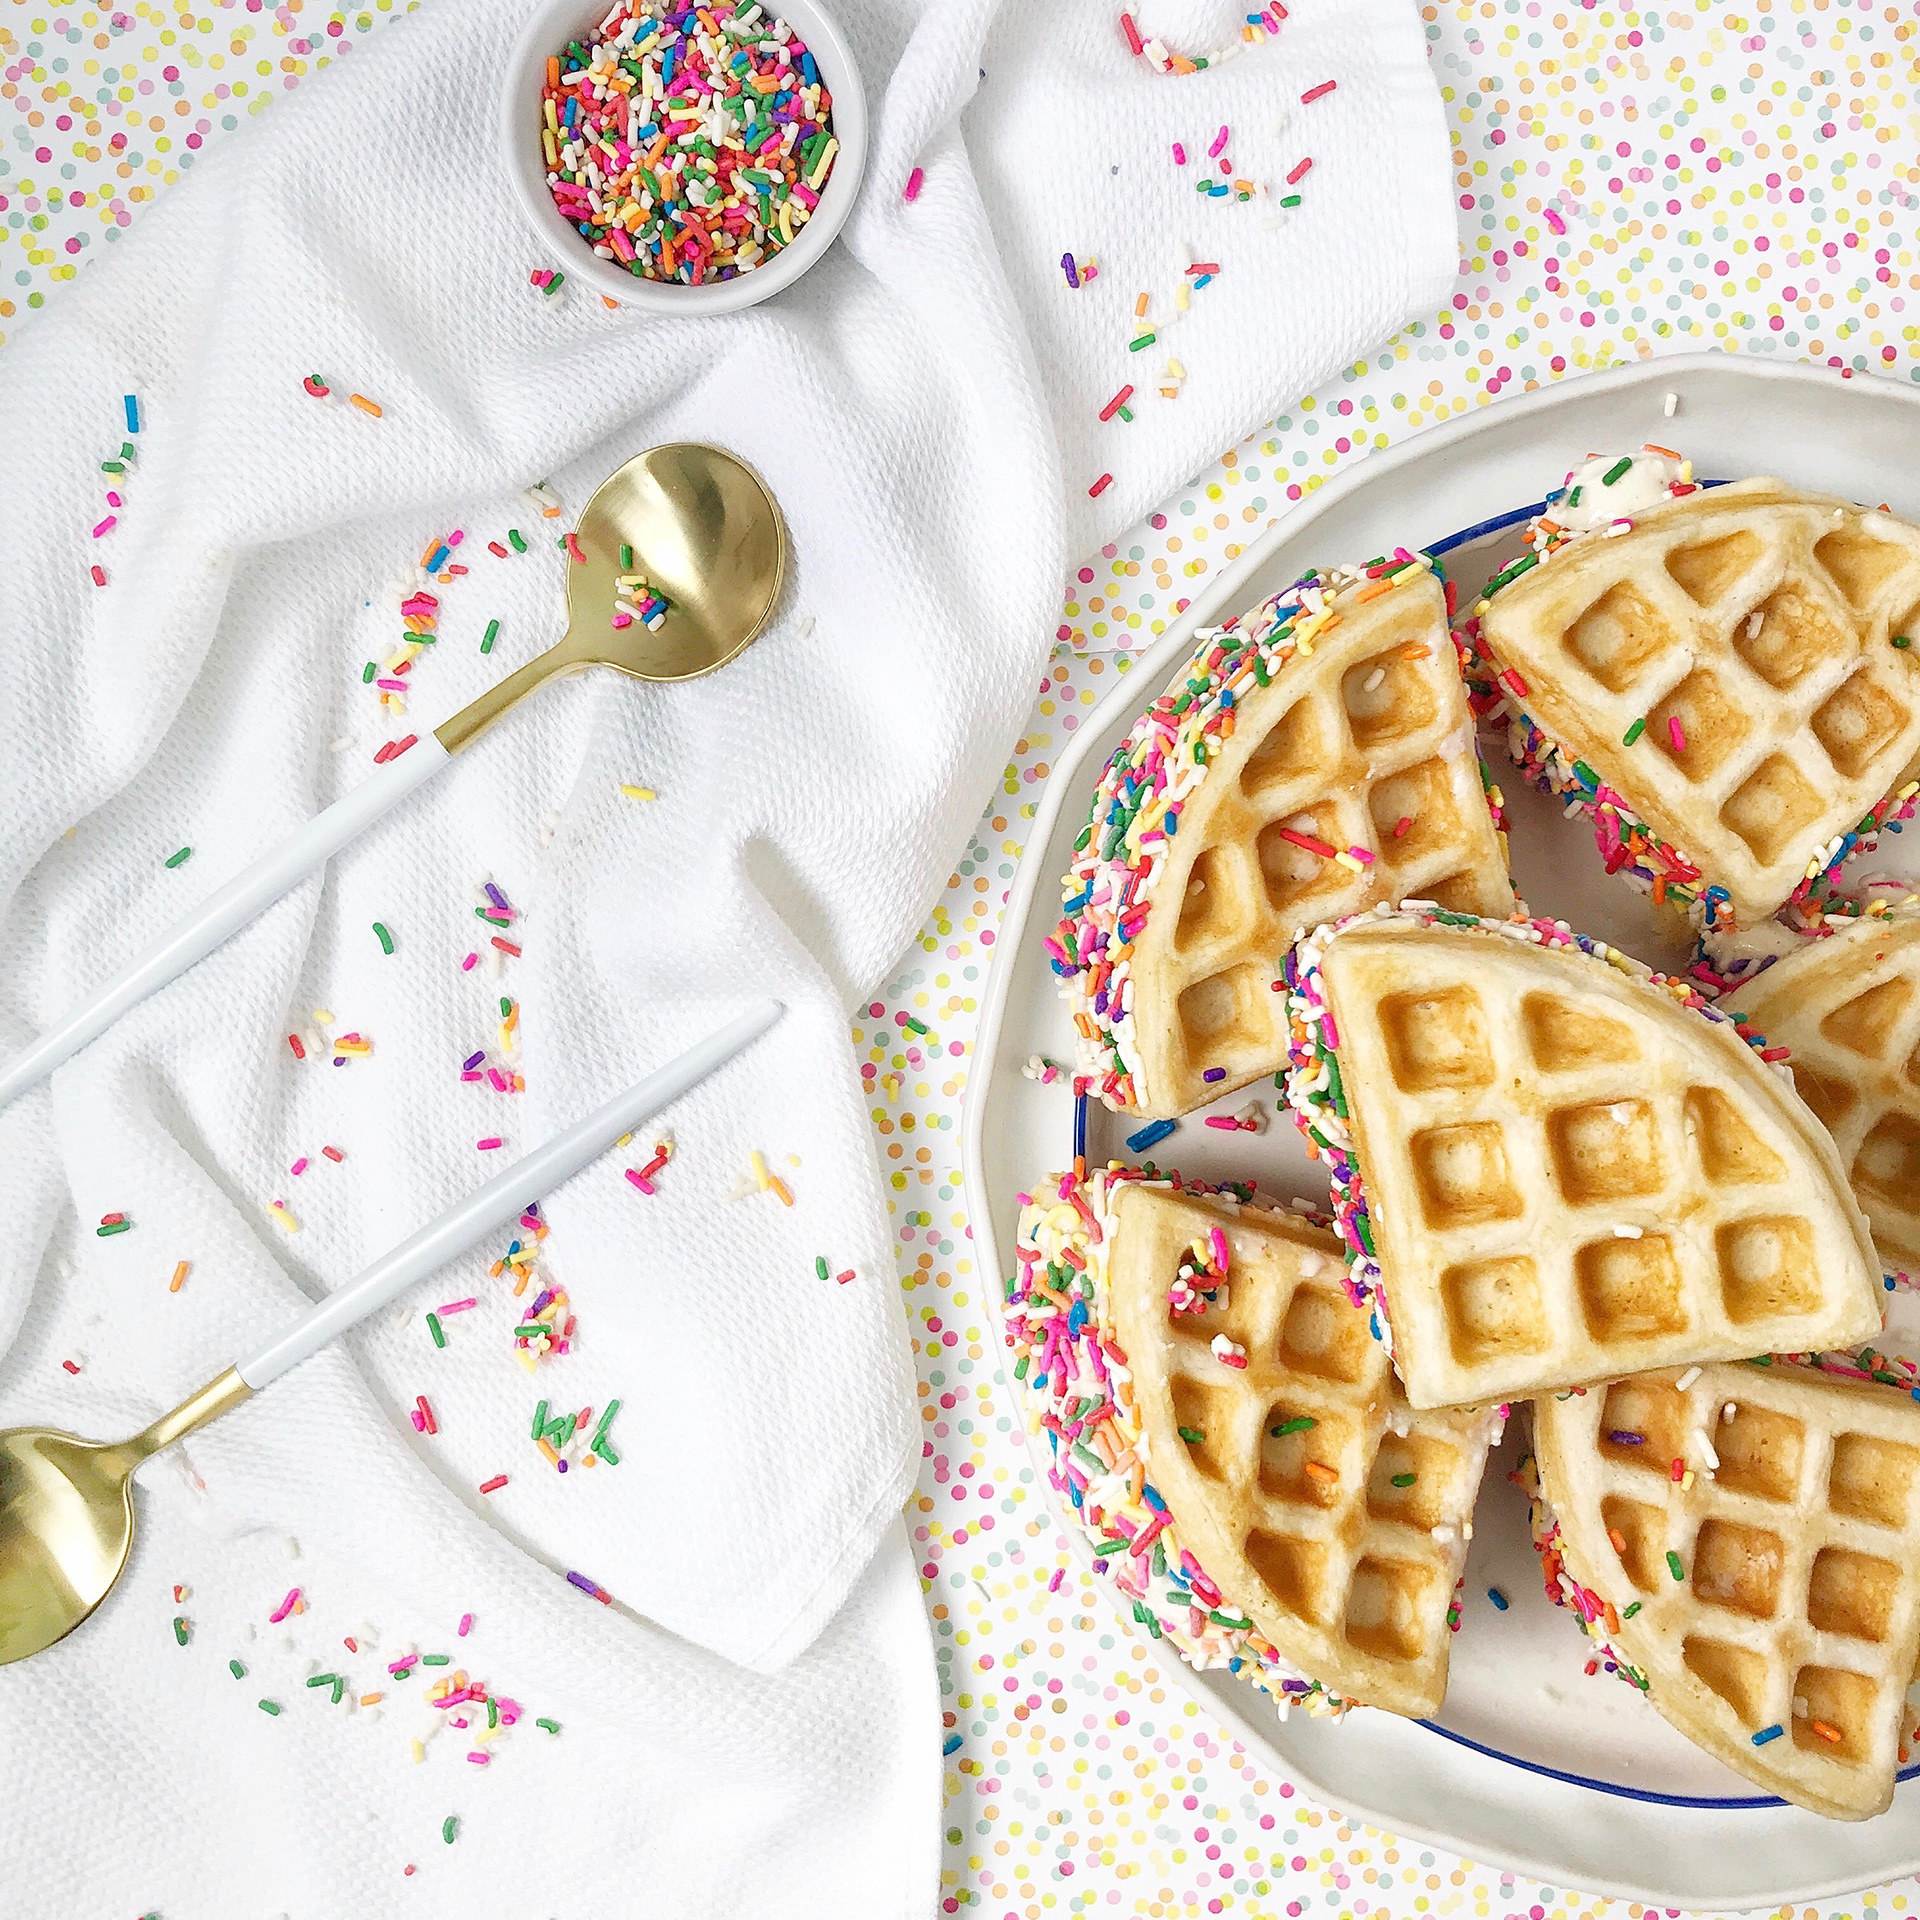
Happy Summer Solstice!!!
To kick off the first day of summer, I decided to make these yummy rainbow “waffle-wiches” after drooling over them in the June issue of Country Living magazine. Not only are they SO easy to make, but they taste (and look) delicious too! Here’s to a great summer season filled with lots of tasty treats!!
Tersey’s Tip: In lieu of America’s upcoming birthday, swap out the rainbow sprinkles with red, white and blue sprinkles for a festive twist!
INGREDIENTS
2 cups flour
2 eggs
1 tablespoon sugar
1 tablespoon baking powder
1/2 teaspoon baking soda
4 tablespoons (1/2 stick) butter, melted
2 pints vanilla ice cream, softened
Rainbow sprinkles
DIRECTIONS
1. Whisk together flour, eggs, sugar, baking soda, baking powder and melted butter in a bowl.
2. Heat waffle iron. Spoon 1 cup of batter into waffle iron and cook until light golden brown, then transfer to a cooling rack.
3. Scoop ice cream onto half of the waffles, spreading evenly. Sandwich with the remaining waffles, gentle pushing ice cream out to the edges. Coat edges in sprinkles.
4. Freeze until firm; 4+ hours. Cut each waffle into 4 triangles just before serving.
DIY RENTAL UPGRADE: KITCHEN BEFORE & AFTER
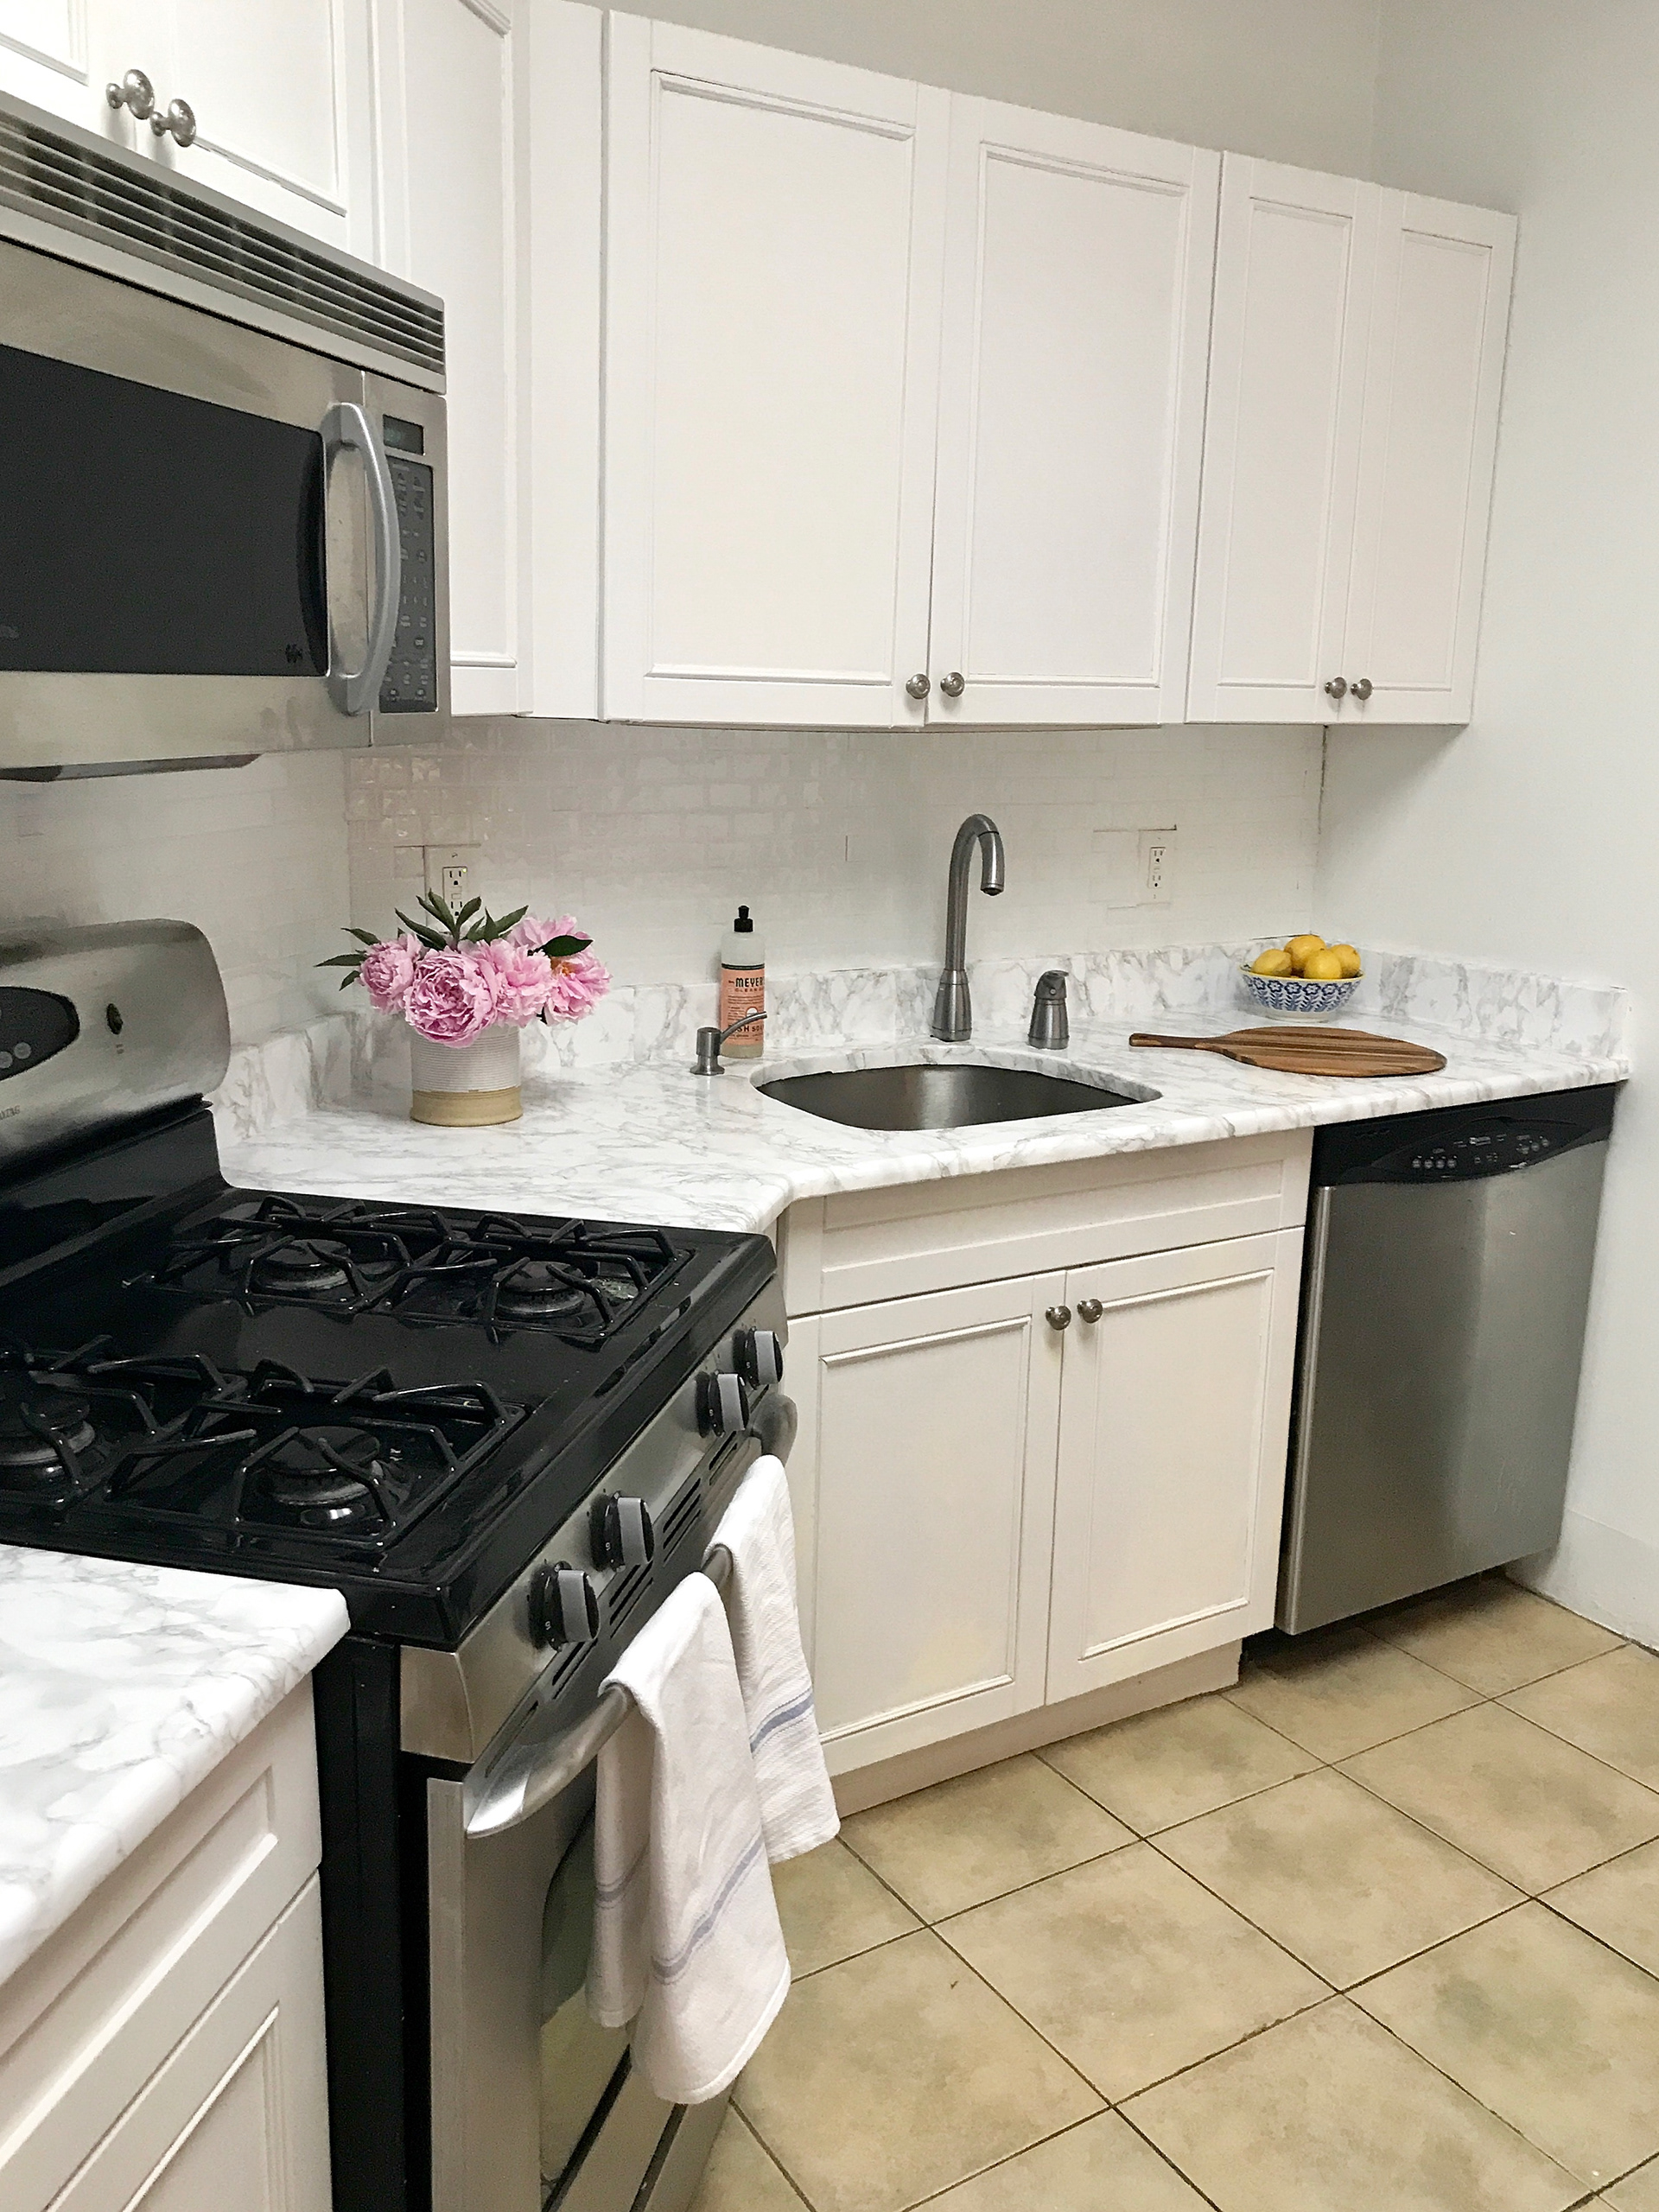
As a decor enthusiast and aspiring Interior Designer, there is nothing I have enjoyed more than transforming our apartment into a home that is a true reflection of my little family. My husband and I (plus our two fur babies, Molly and Ruby) are going on our sixth year in our apartment so it shouldn’t come as a surprise when I say that we absolutely love it and have yet to see anything else that compares within our little square mile! It’s hard to pin point my favorite thing about our apartment - it could be the twelve foot ceilings, the architectural details like the crown molding, the large windows, or maybe it’s the little “bonus” room complete with French doors and built-in mahogany bookshelves shelves that has now become our office space... whatever it may be, this apartment has become a part of my DNA. However, when it comes to my least favorite thing about the apartment, there is no debate required: the kitchen.
In the wonderful world of rentals, the kitchen is almost always one of the most generic and bland spaces in within an apartment. Add on the extra restriction of not being able to alter the space yourself and you’ve got one challenging room make your own. While I didn’t mind the layout of my kitchen per se, it’s the finishings that drive me crazy. I didn’t care for the green and brown mosaic tile backsplash nor the black marble countertops. In my eyes, both elements competed within the space and overpowered our small kitchen. Being that our kitchen is the first thing you see when you walk into the apartment, I so desperately wanted it to feel open, bright and welcoming; not dark and gloomy.
This realization lead me down a long road of extensive research to learn about anything and everything I could find on temporary tricks and tips to spruce up dull areas within a rental property. One of my first discoveries was stick-on faux decals from The Smart Tiles. I found these big square decals that looked like white subway tile and I immediately purchased a few sheets to try out. After successfully testing the initial sheets, I ended up buying enough to cover my entire backsplash. It was so easy to apply and was so happy with the results.
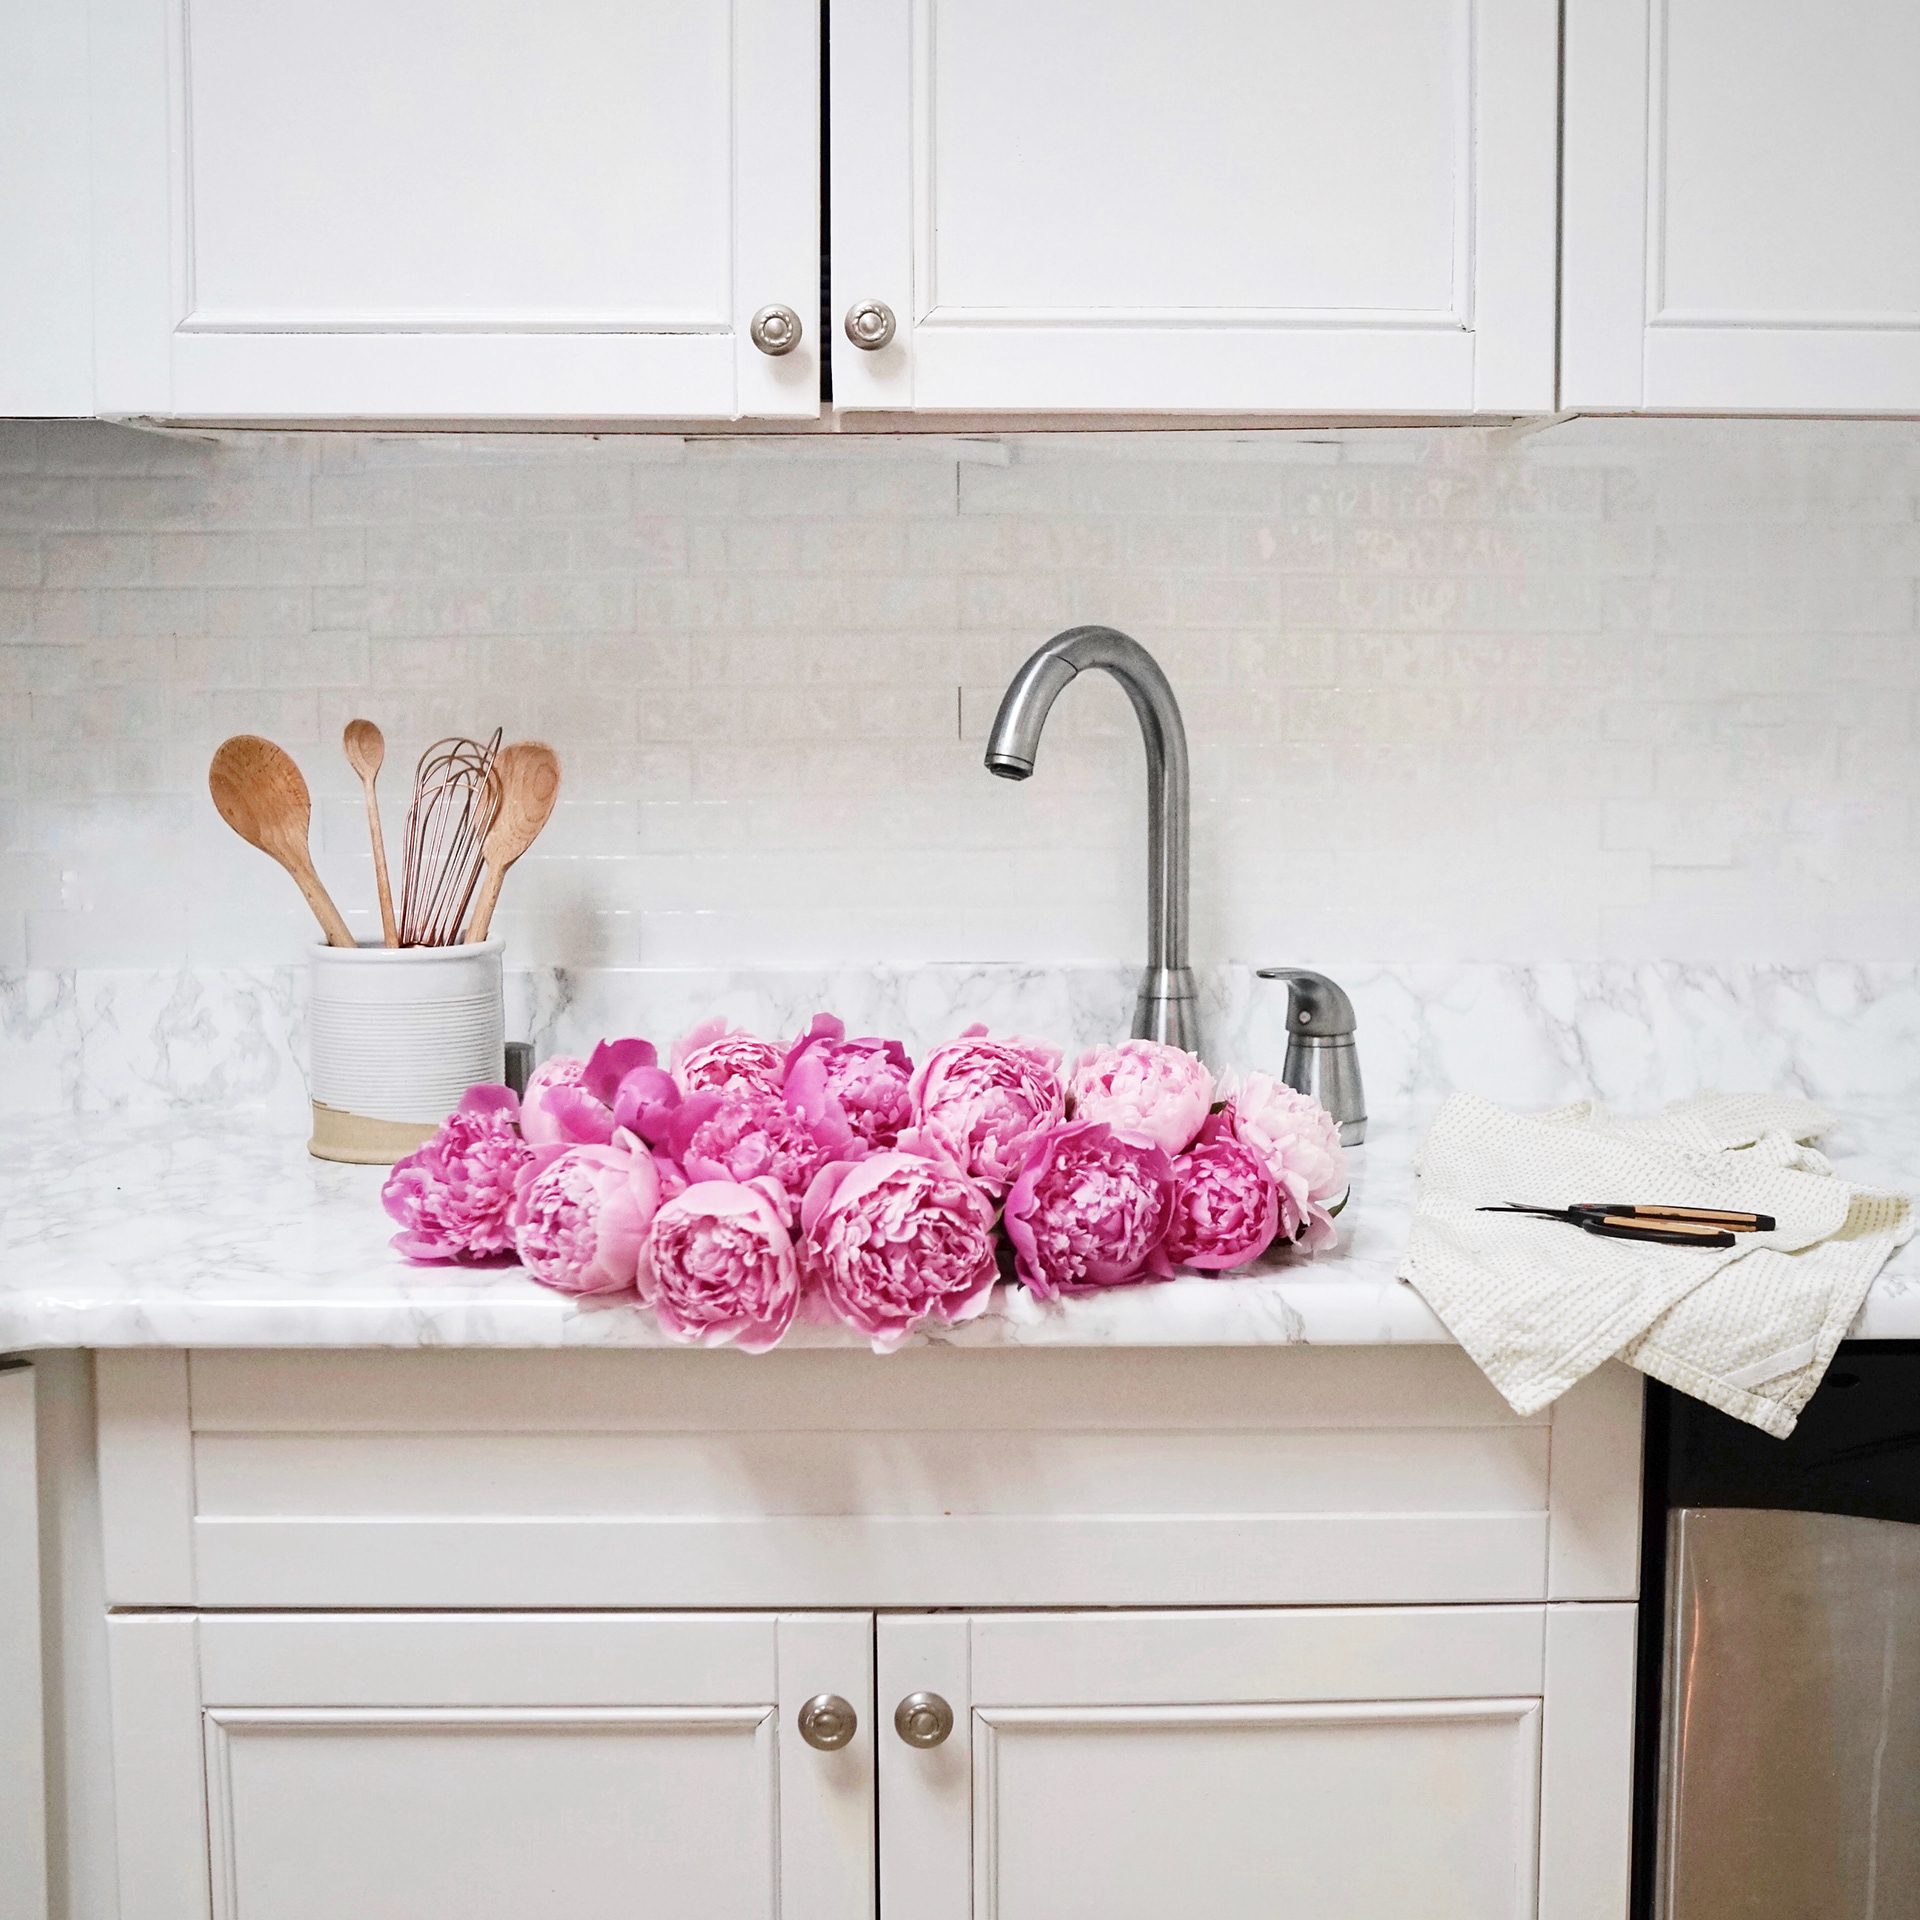
Fast forward a year and while the faux white subway tile decals are still going strong, I was still stumped on what to do about my black marble countertops. I did some more research and found tutorials on applying contact paper countertops. A major light went off in my head and I read all the blogs and watched every how-to video to familiarize myself with the process. I was able to find faux marble contact paper on Amazon and bought a few rolls to try it out myself. I tested it out on my kitchen island first and loved it immediately. While I had to re-do it a few times to master the art of removing all the air bubbles and perfect the counter edges, I was amazed by not only how natural it looked, but how much it brightened up the space with only one surface completed! I decided to continue with the rest of my countertops and I am in awe on how much it has transformed the space. I don’t know about you, but to me there’s nothing like a successful DIY project to make you feel like you deserve a solid pat on the back!!
Below you will find before and after pictures from each upgrade.
I cannot wait to hear your thoughts!!
Xx
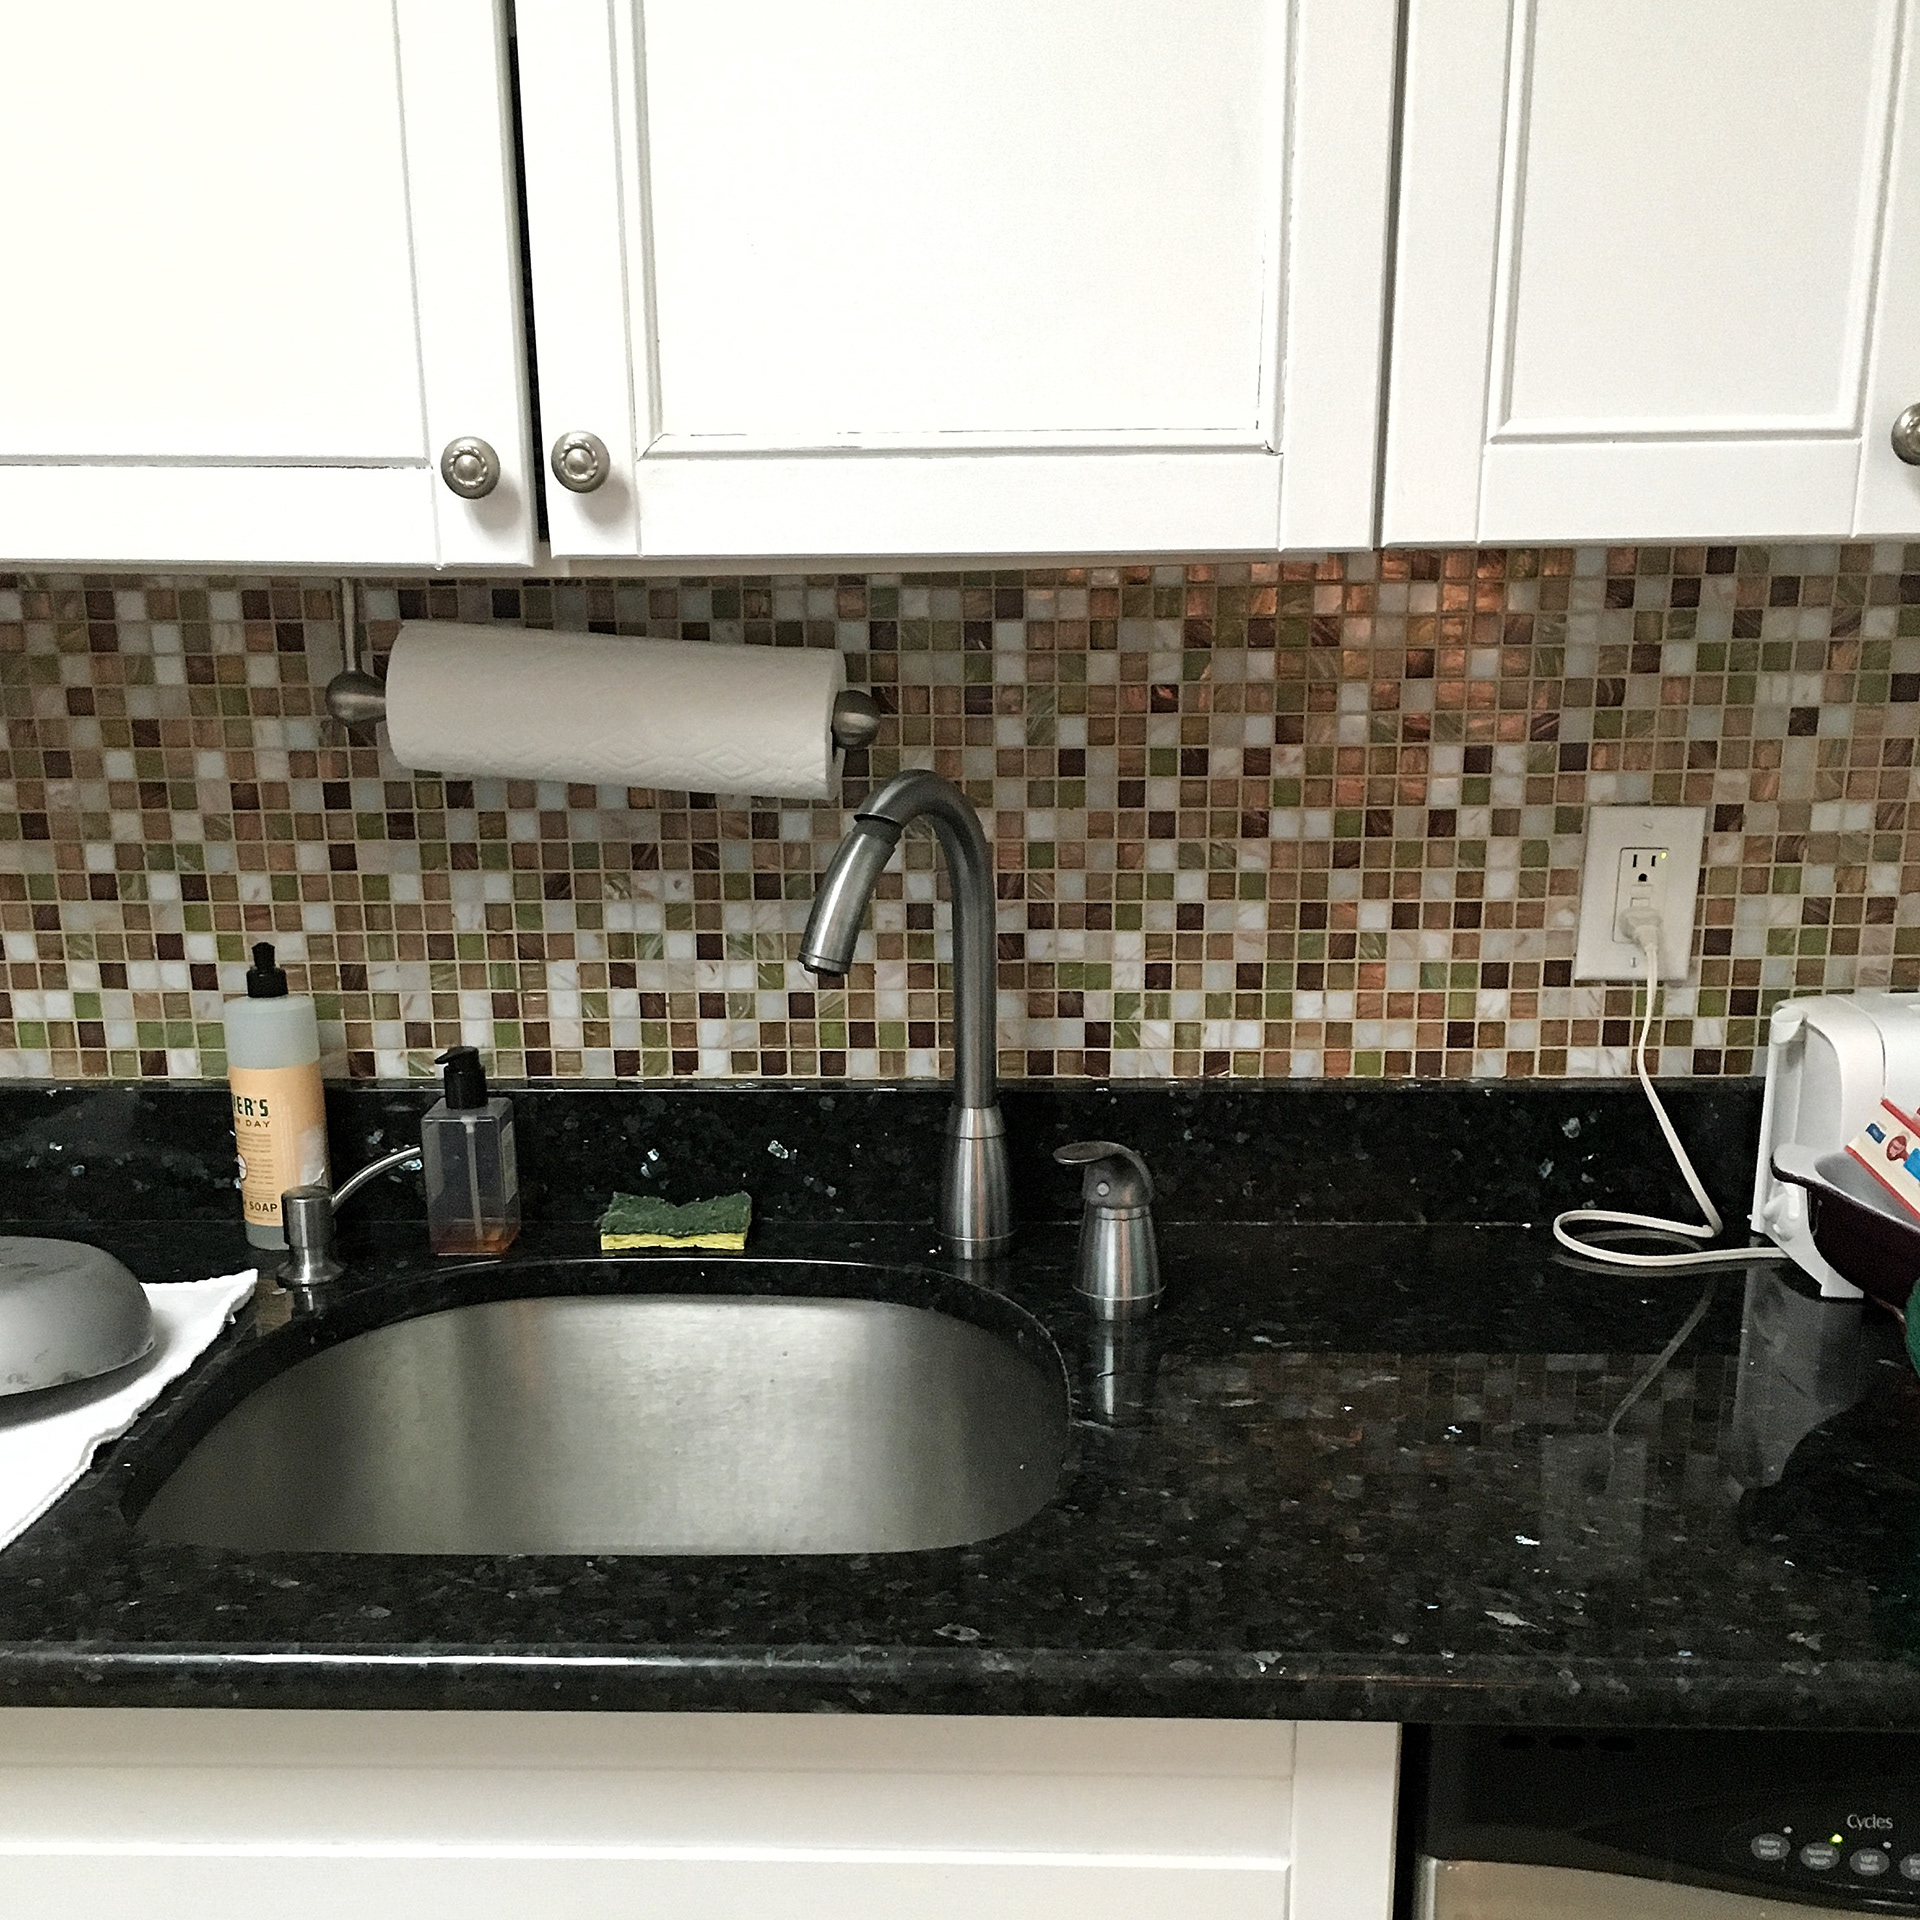
BEFORE: Original Mosaic Tile Backsplash
AFTER: Smart Tile Faux White Subway Tile Backsplash

AFTER: Smart Tile Faux White Subway Tile Backsplash
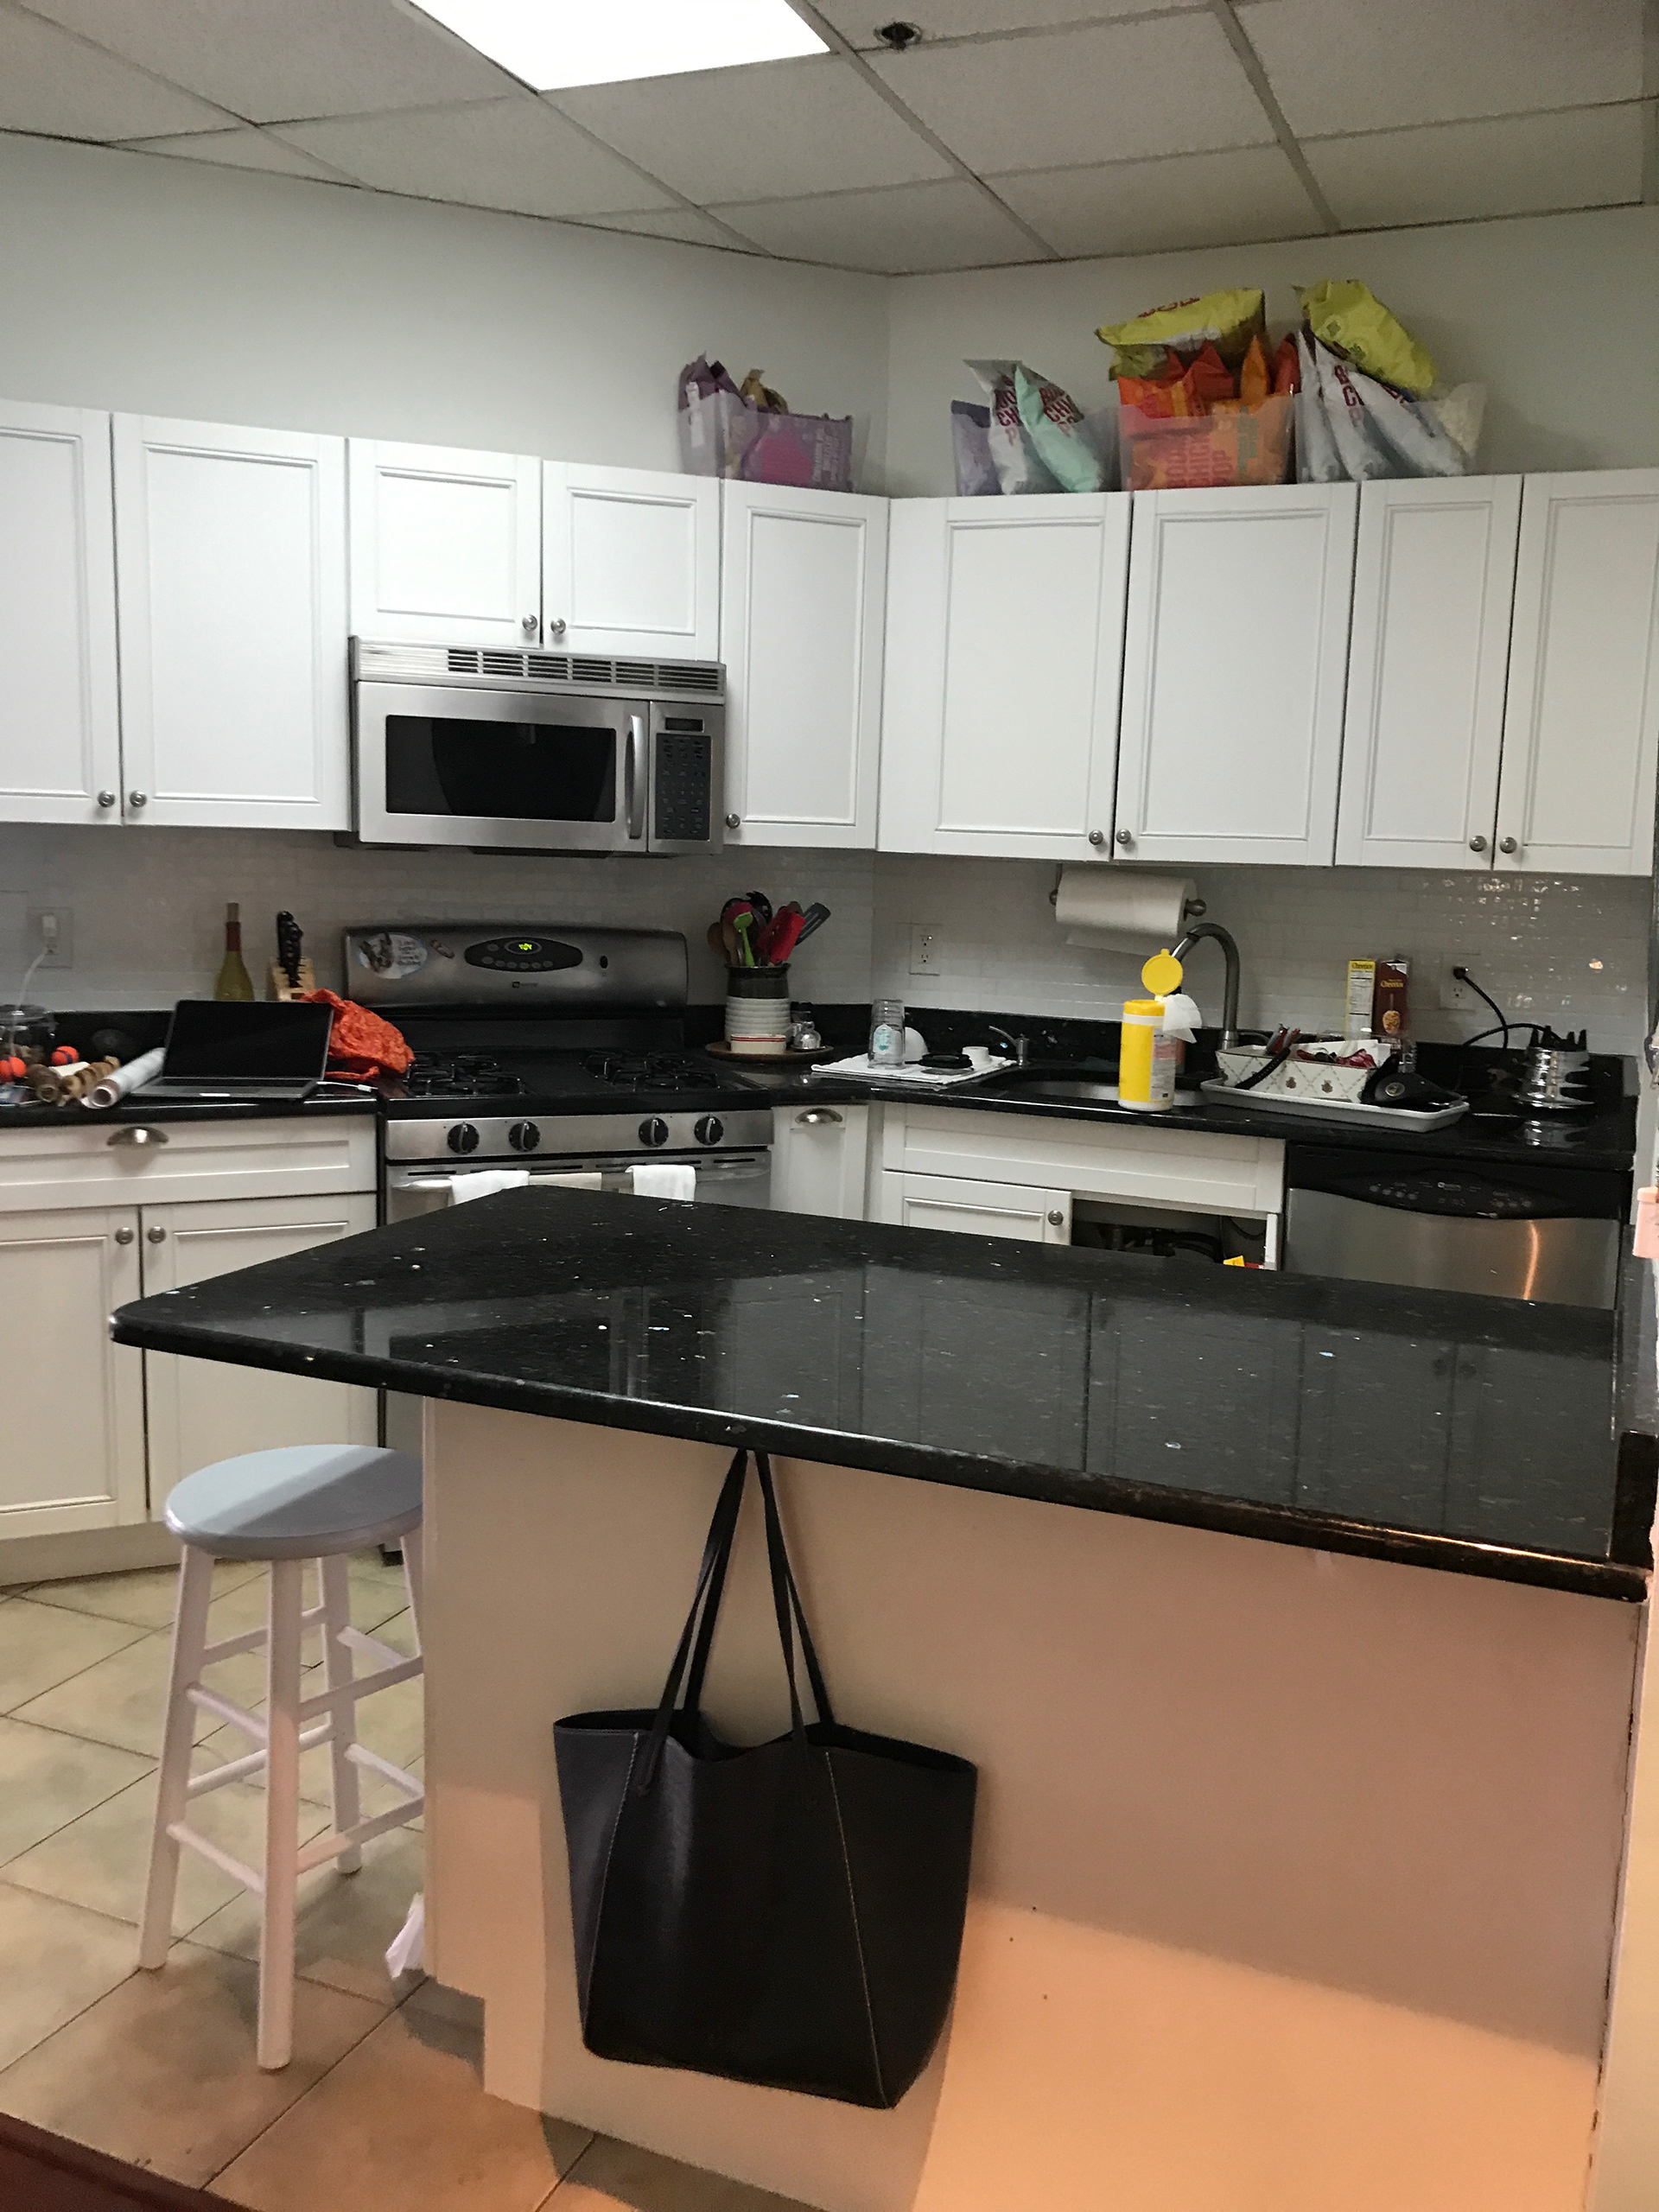
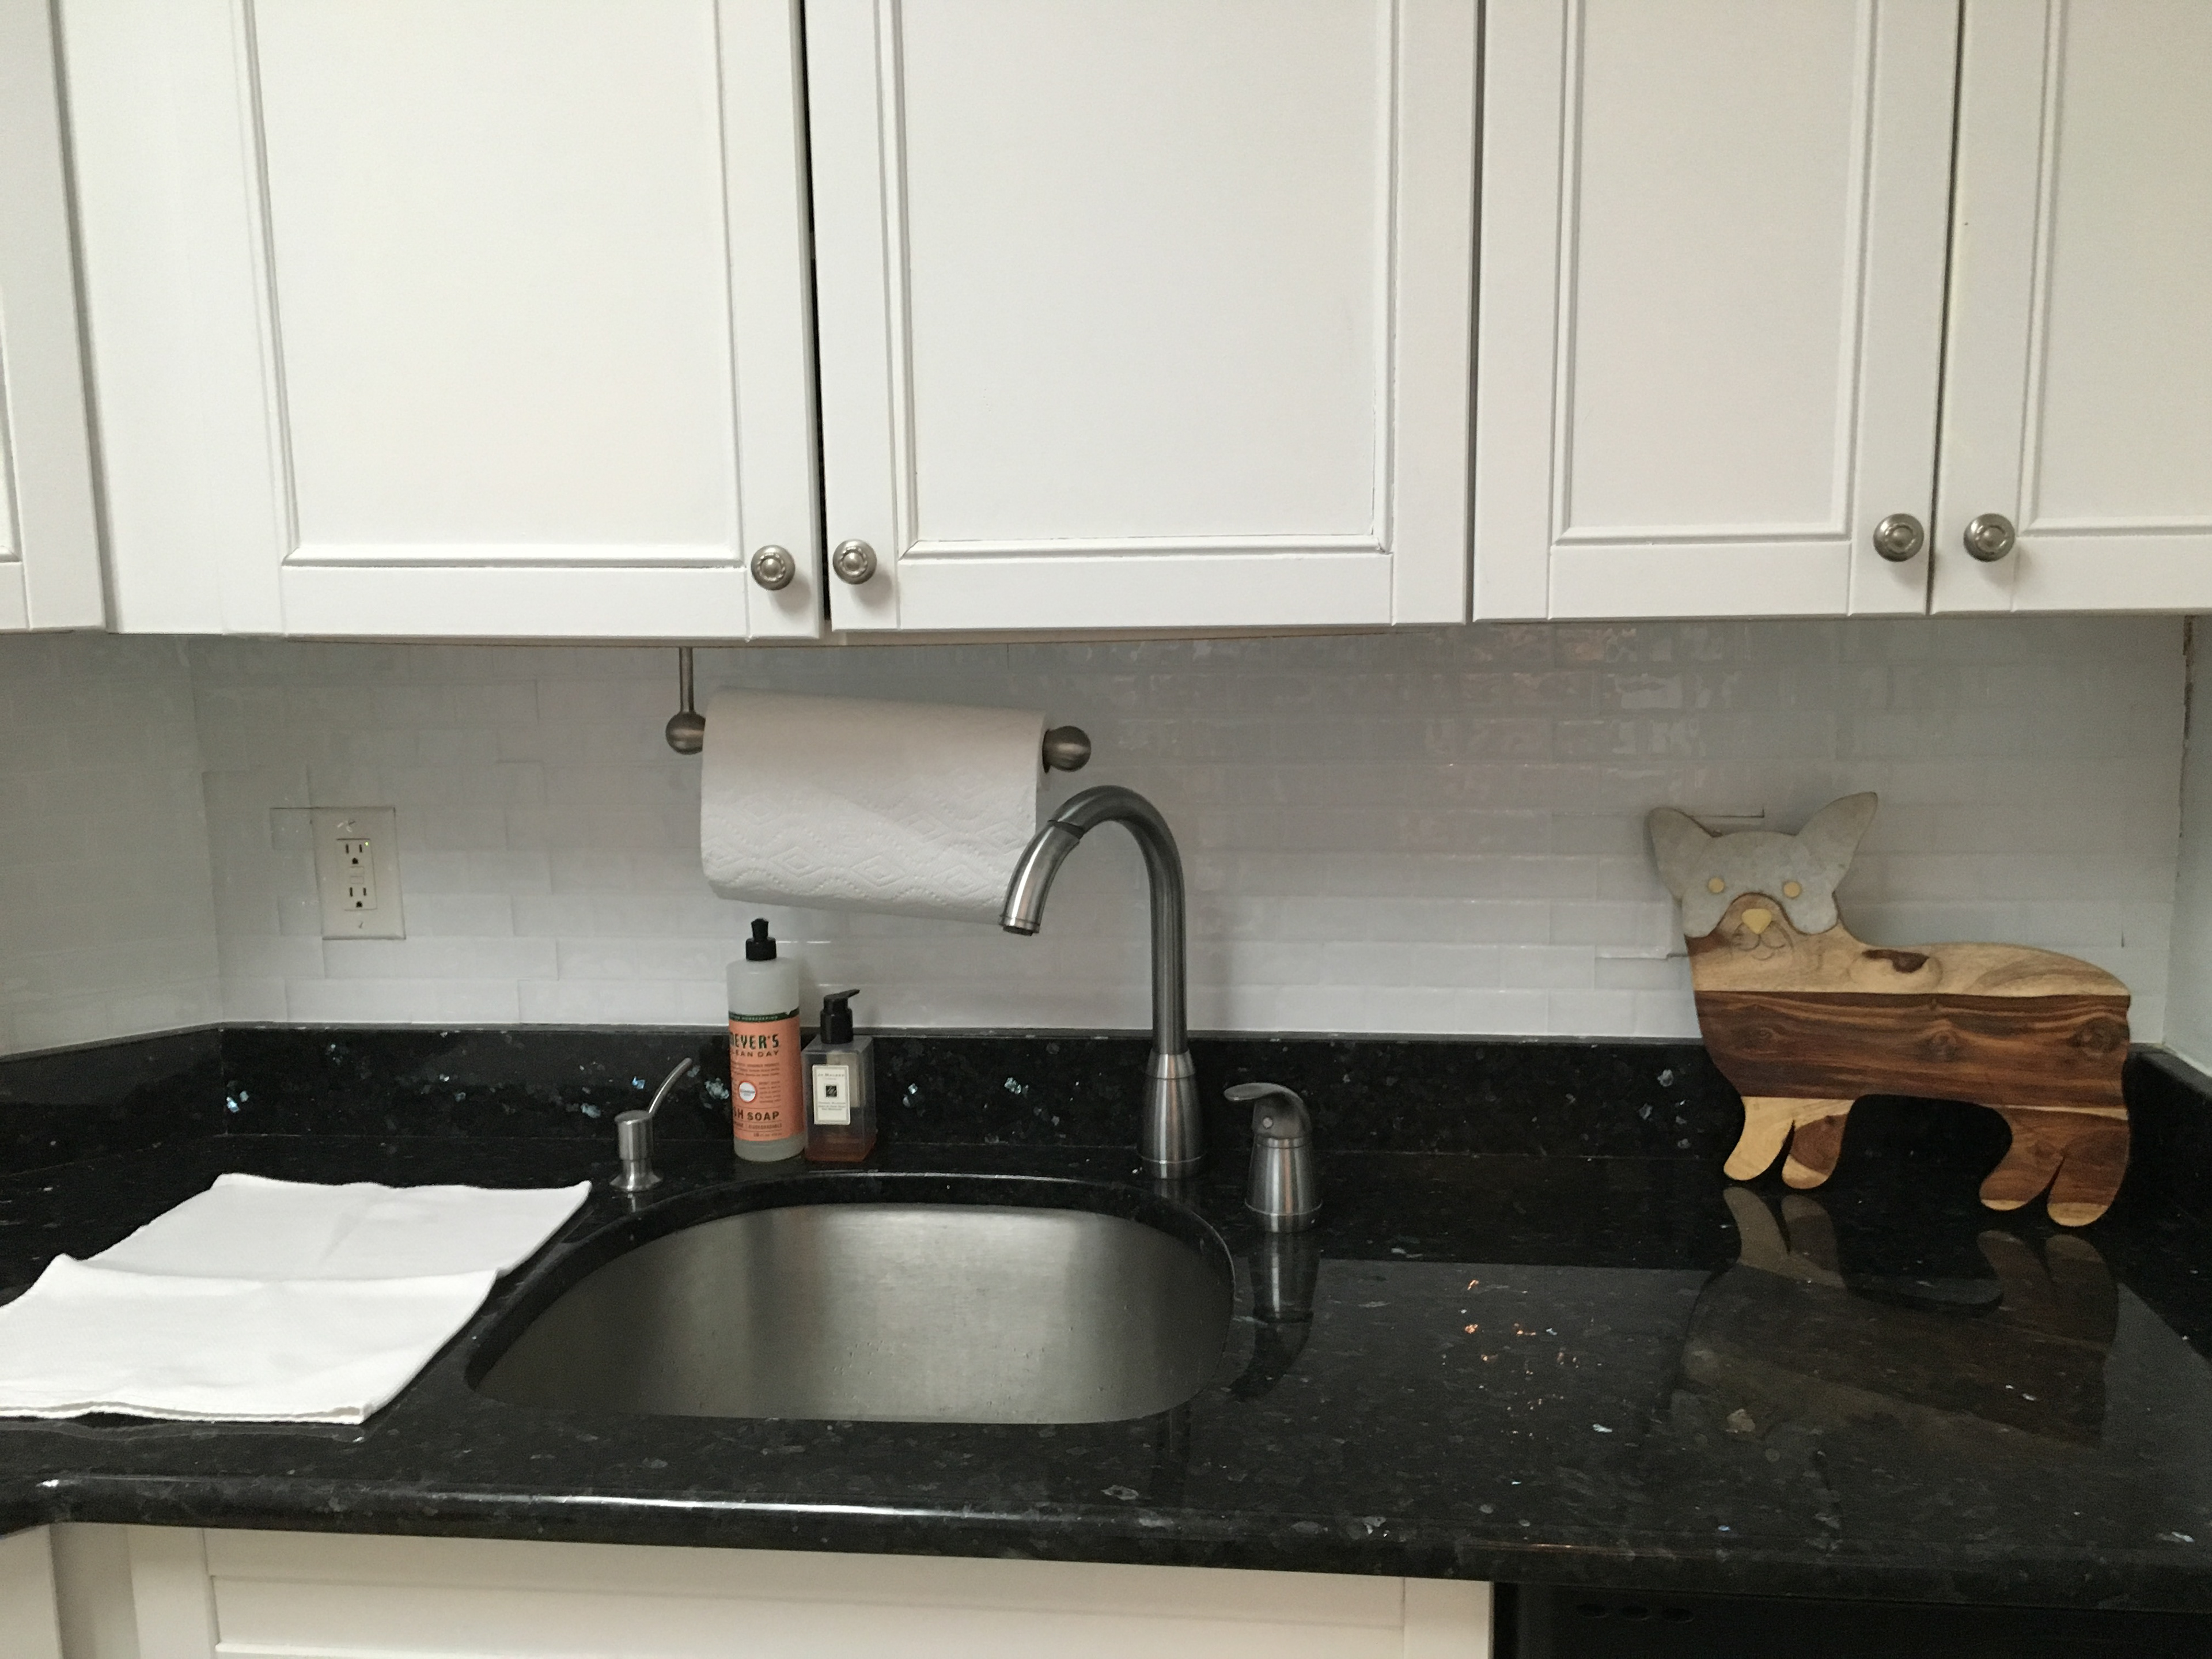
BEFORE: Black Marble Countertops
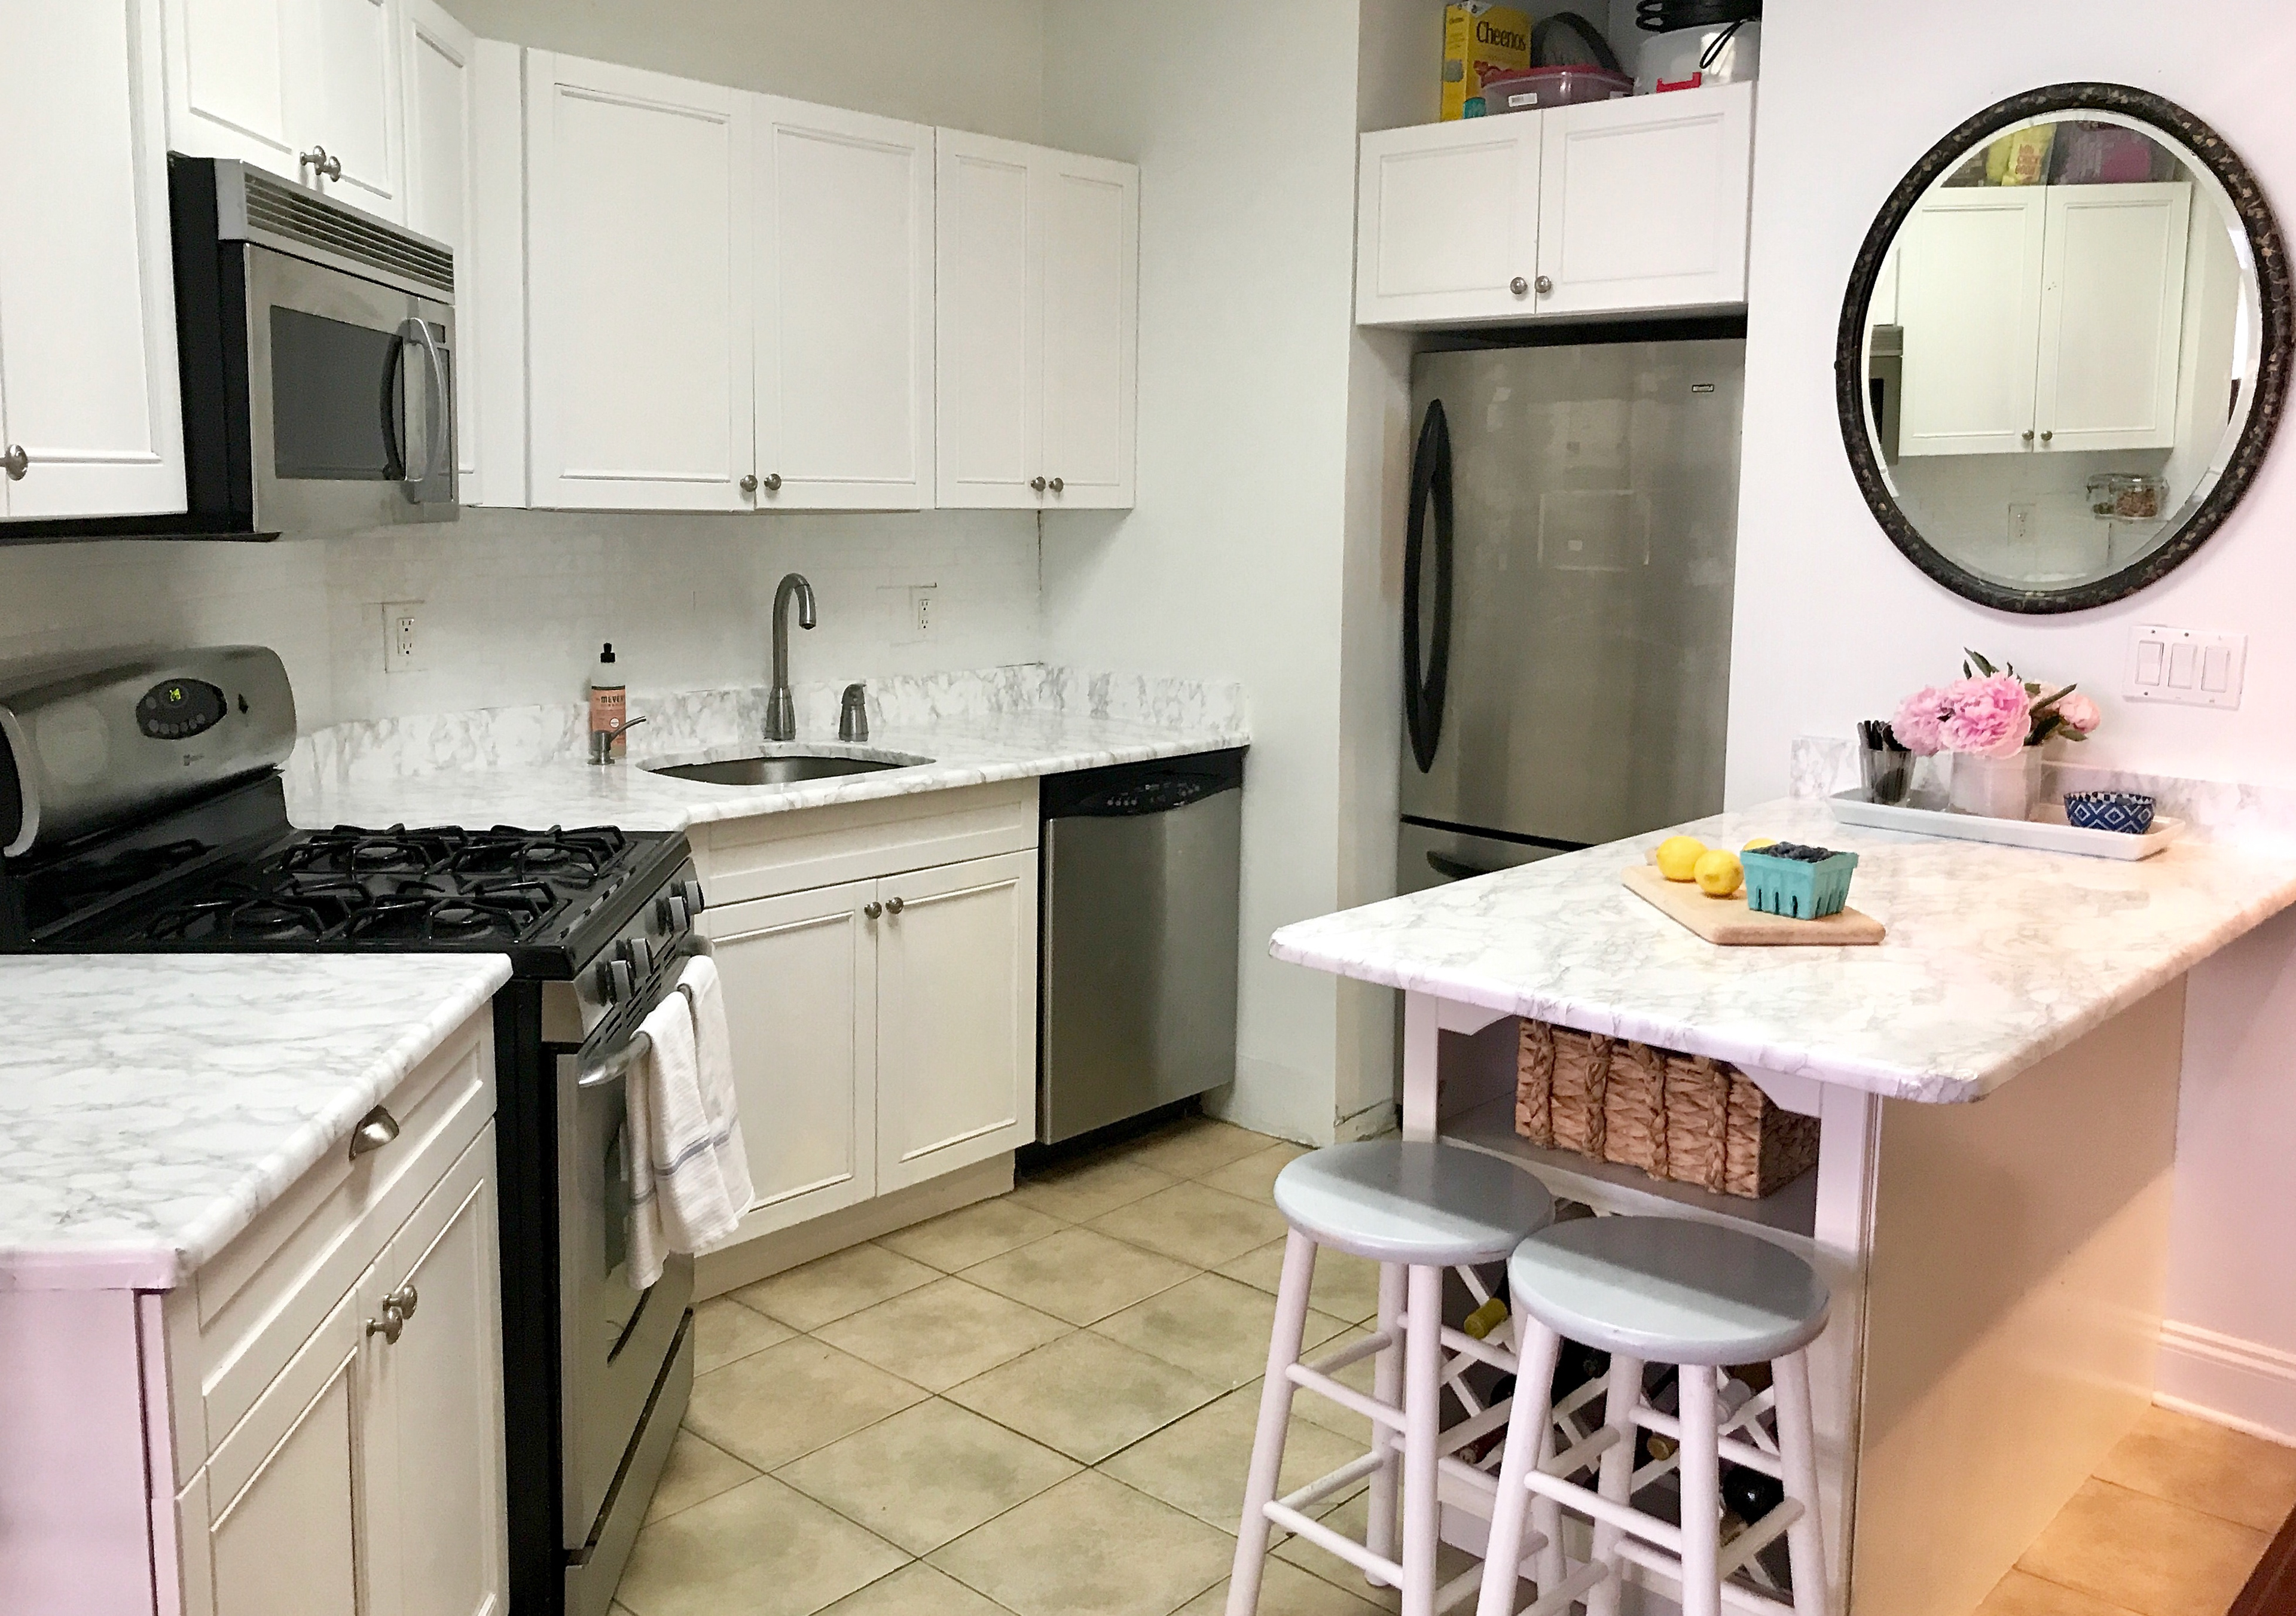
AFTER: Faux White Marble Countertops
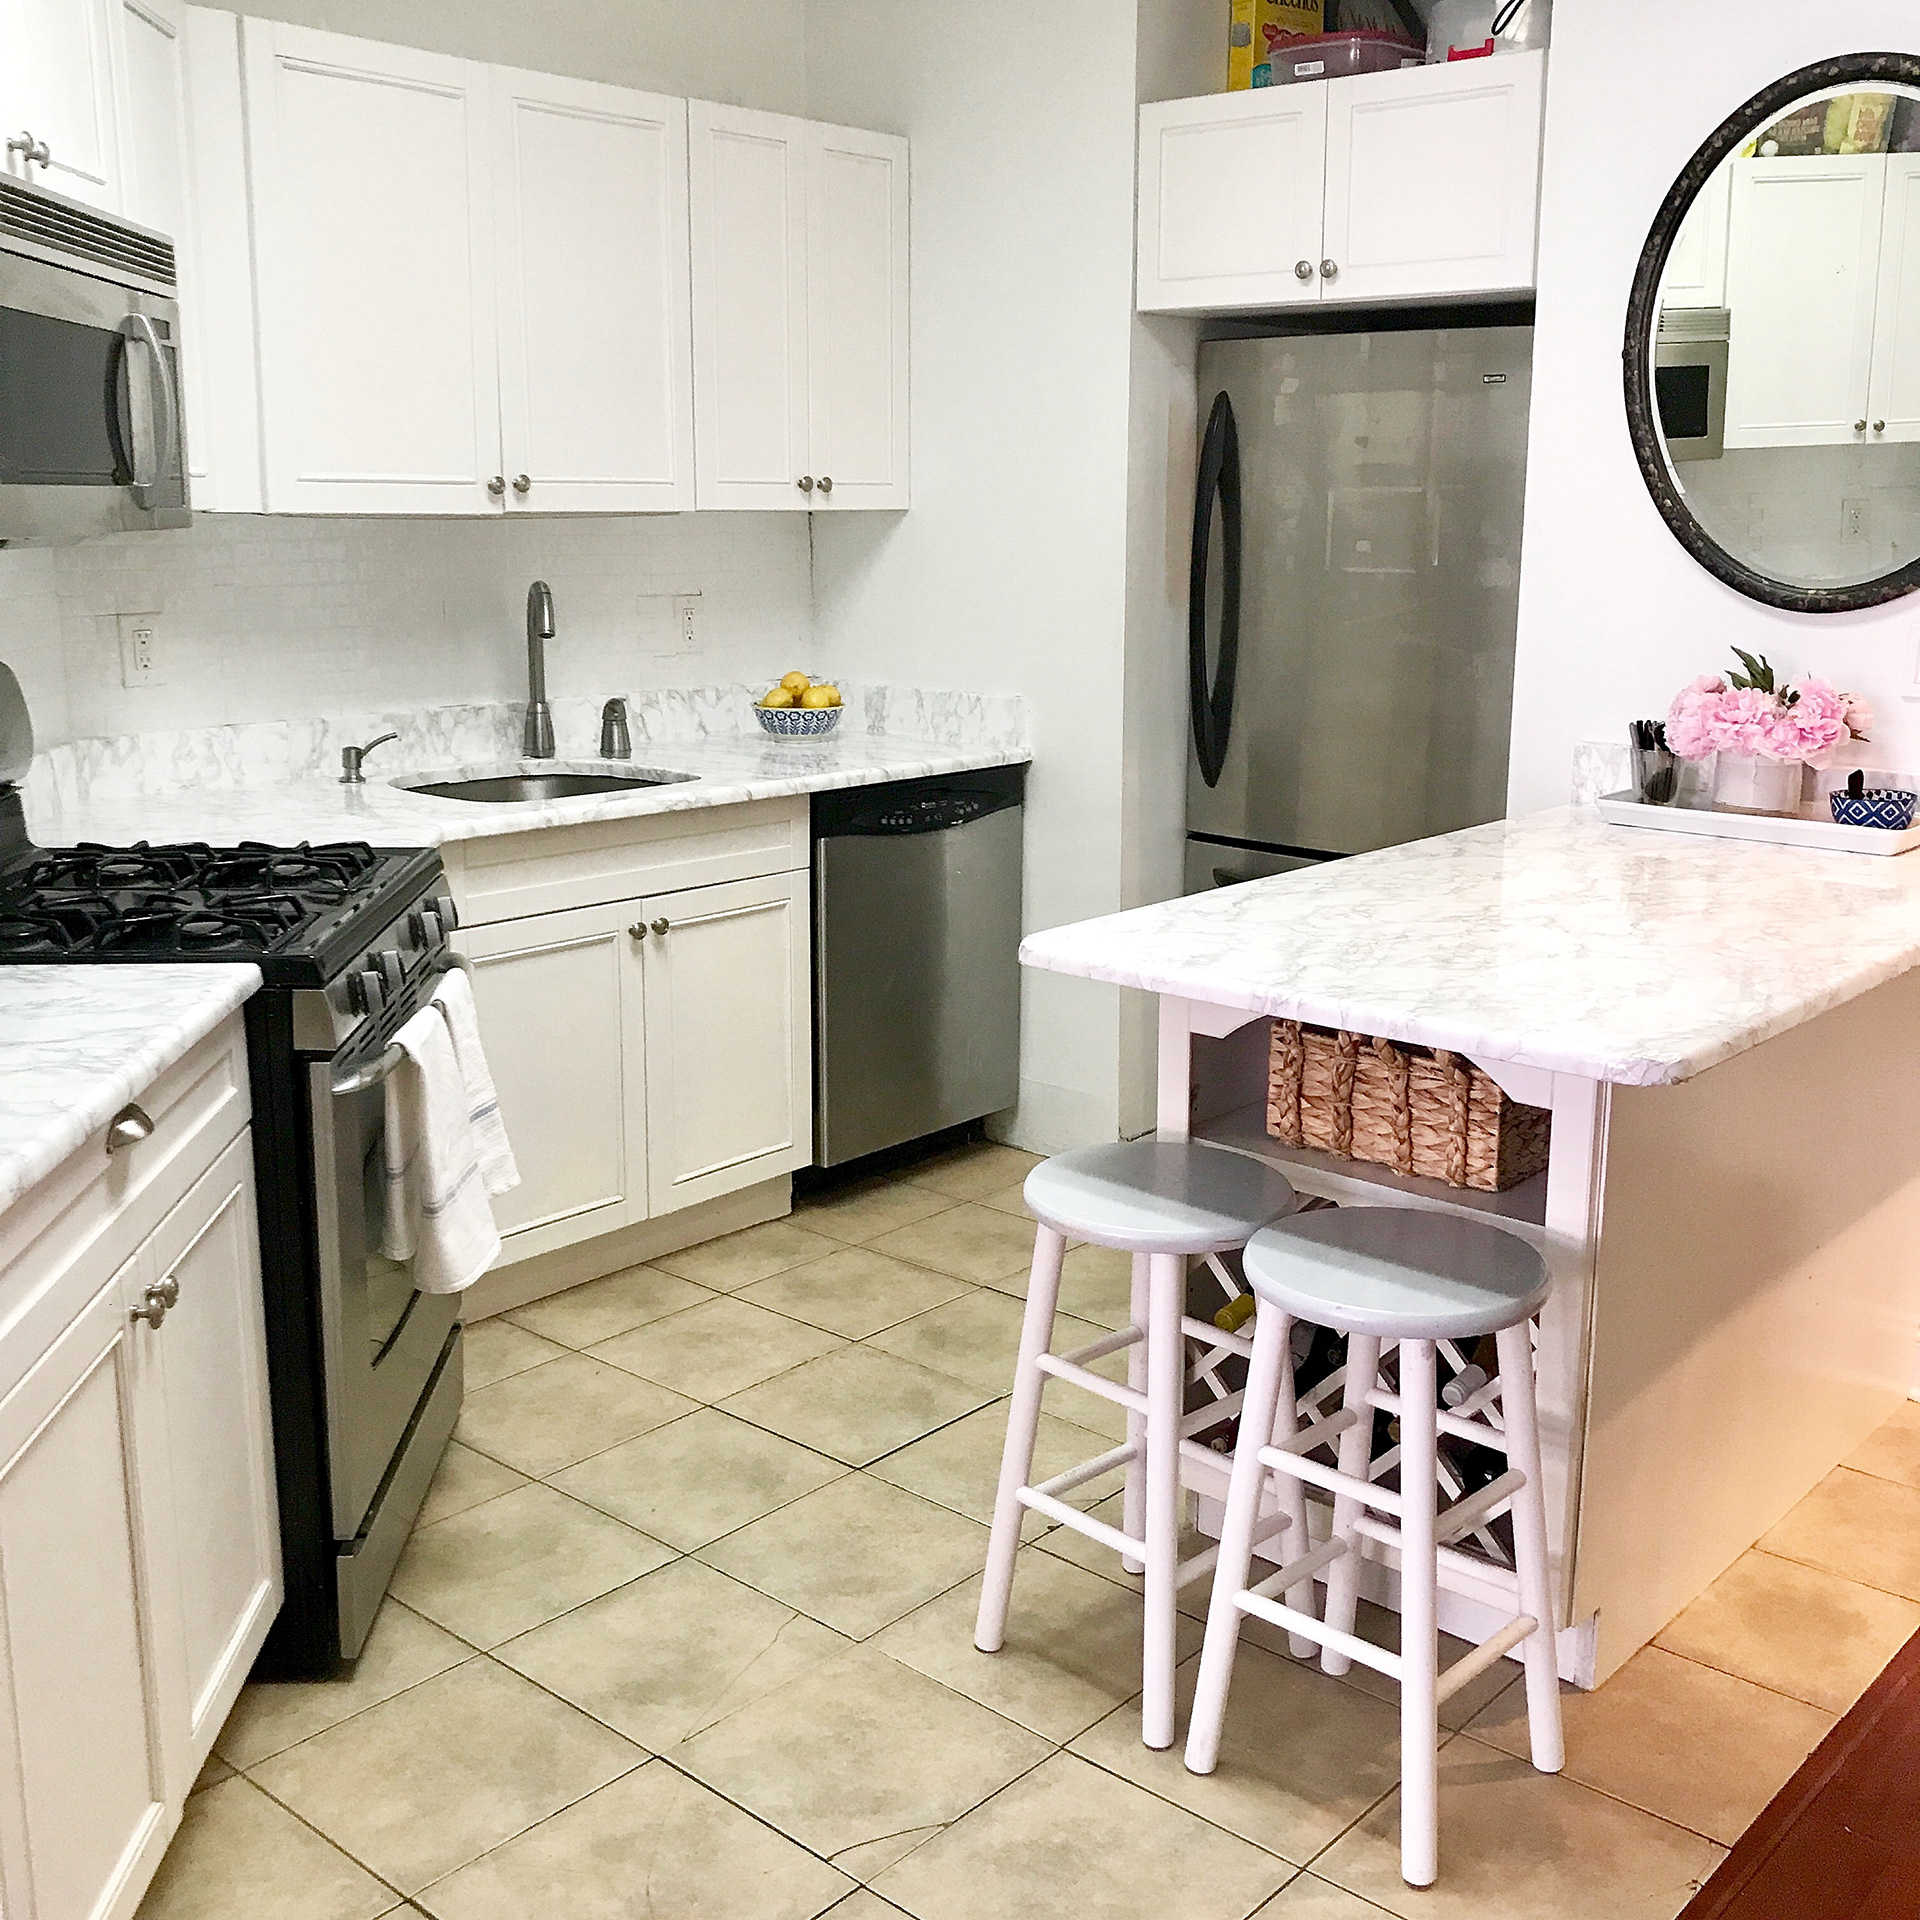
AFTER: Faux White Marble Countertops
AFTER: Faux White Marble Countertops
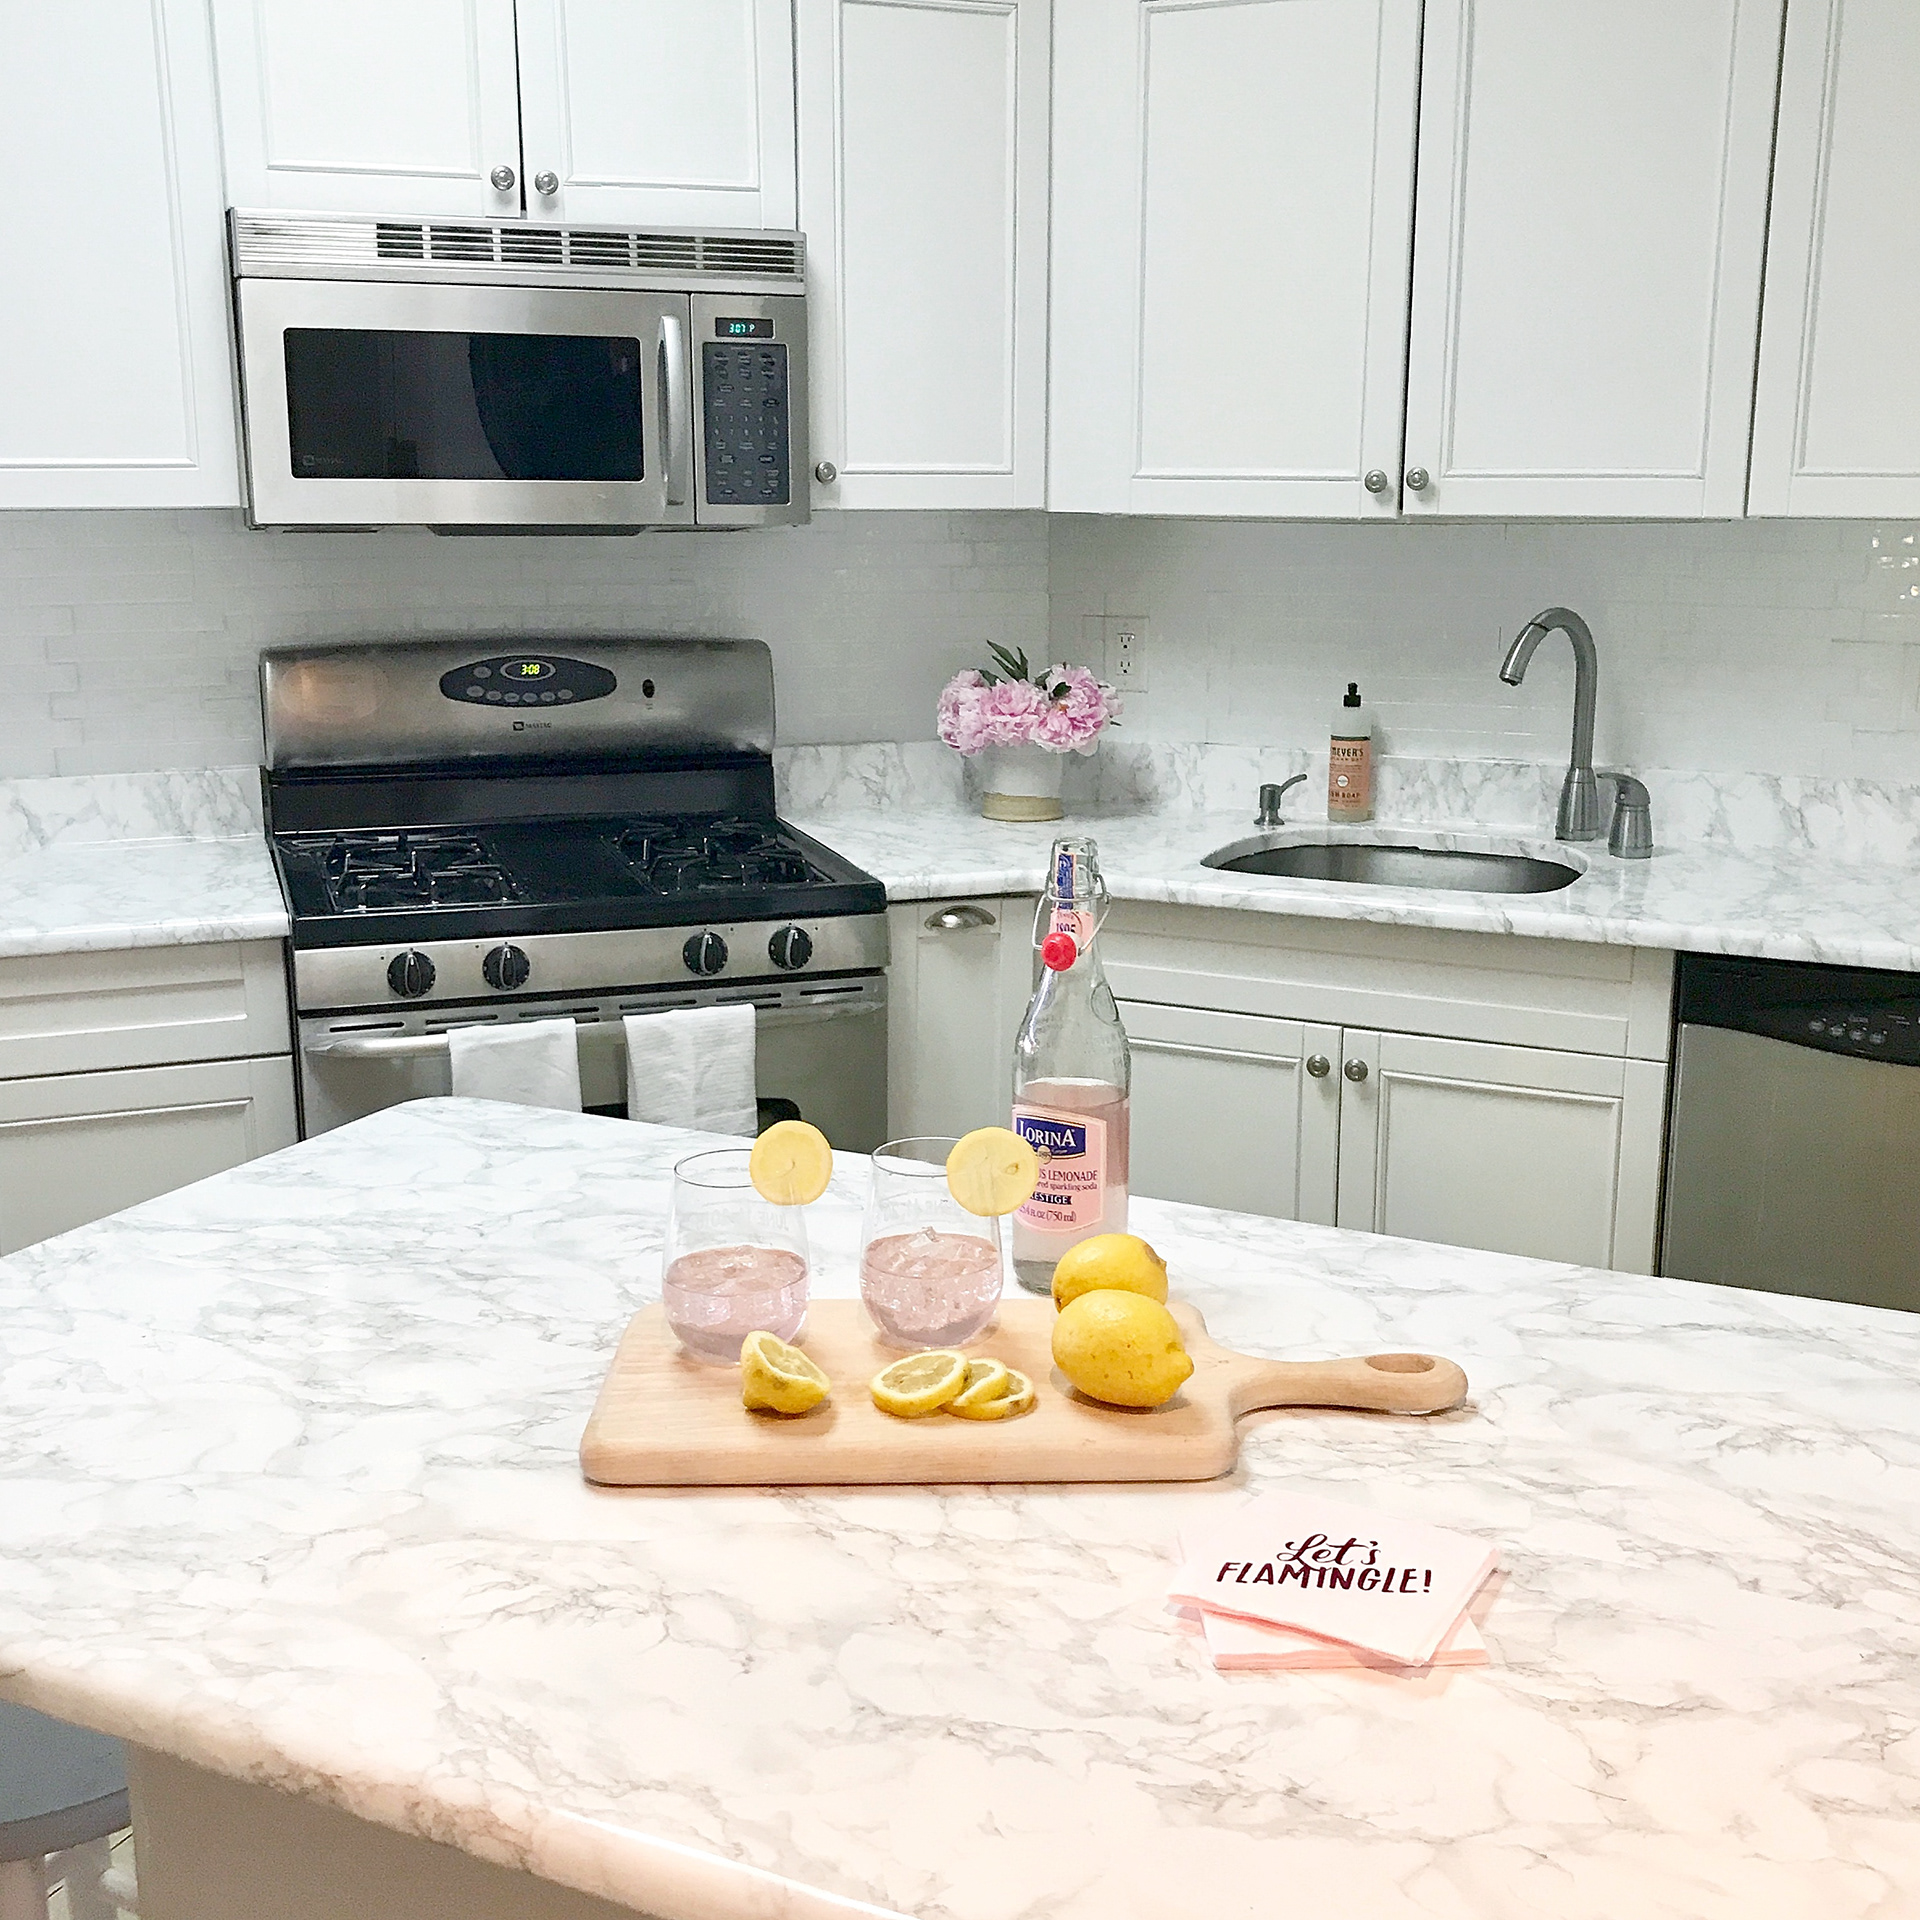
AFTER: Faux White Marble Countertops
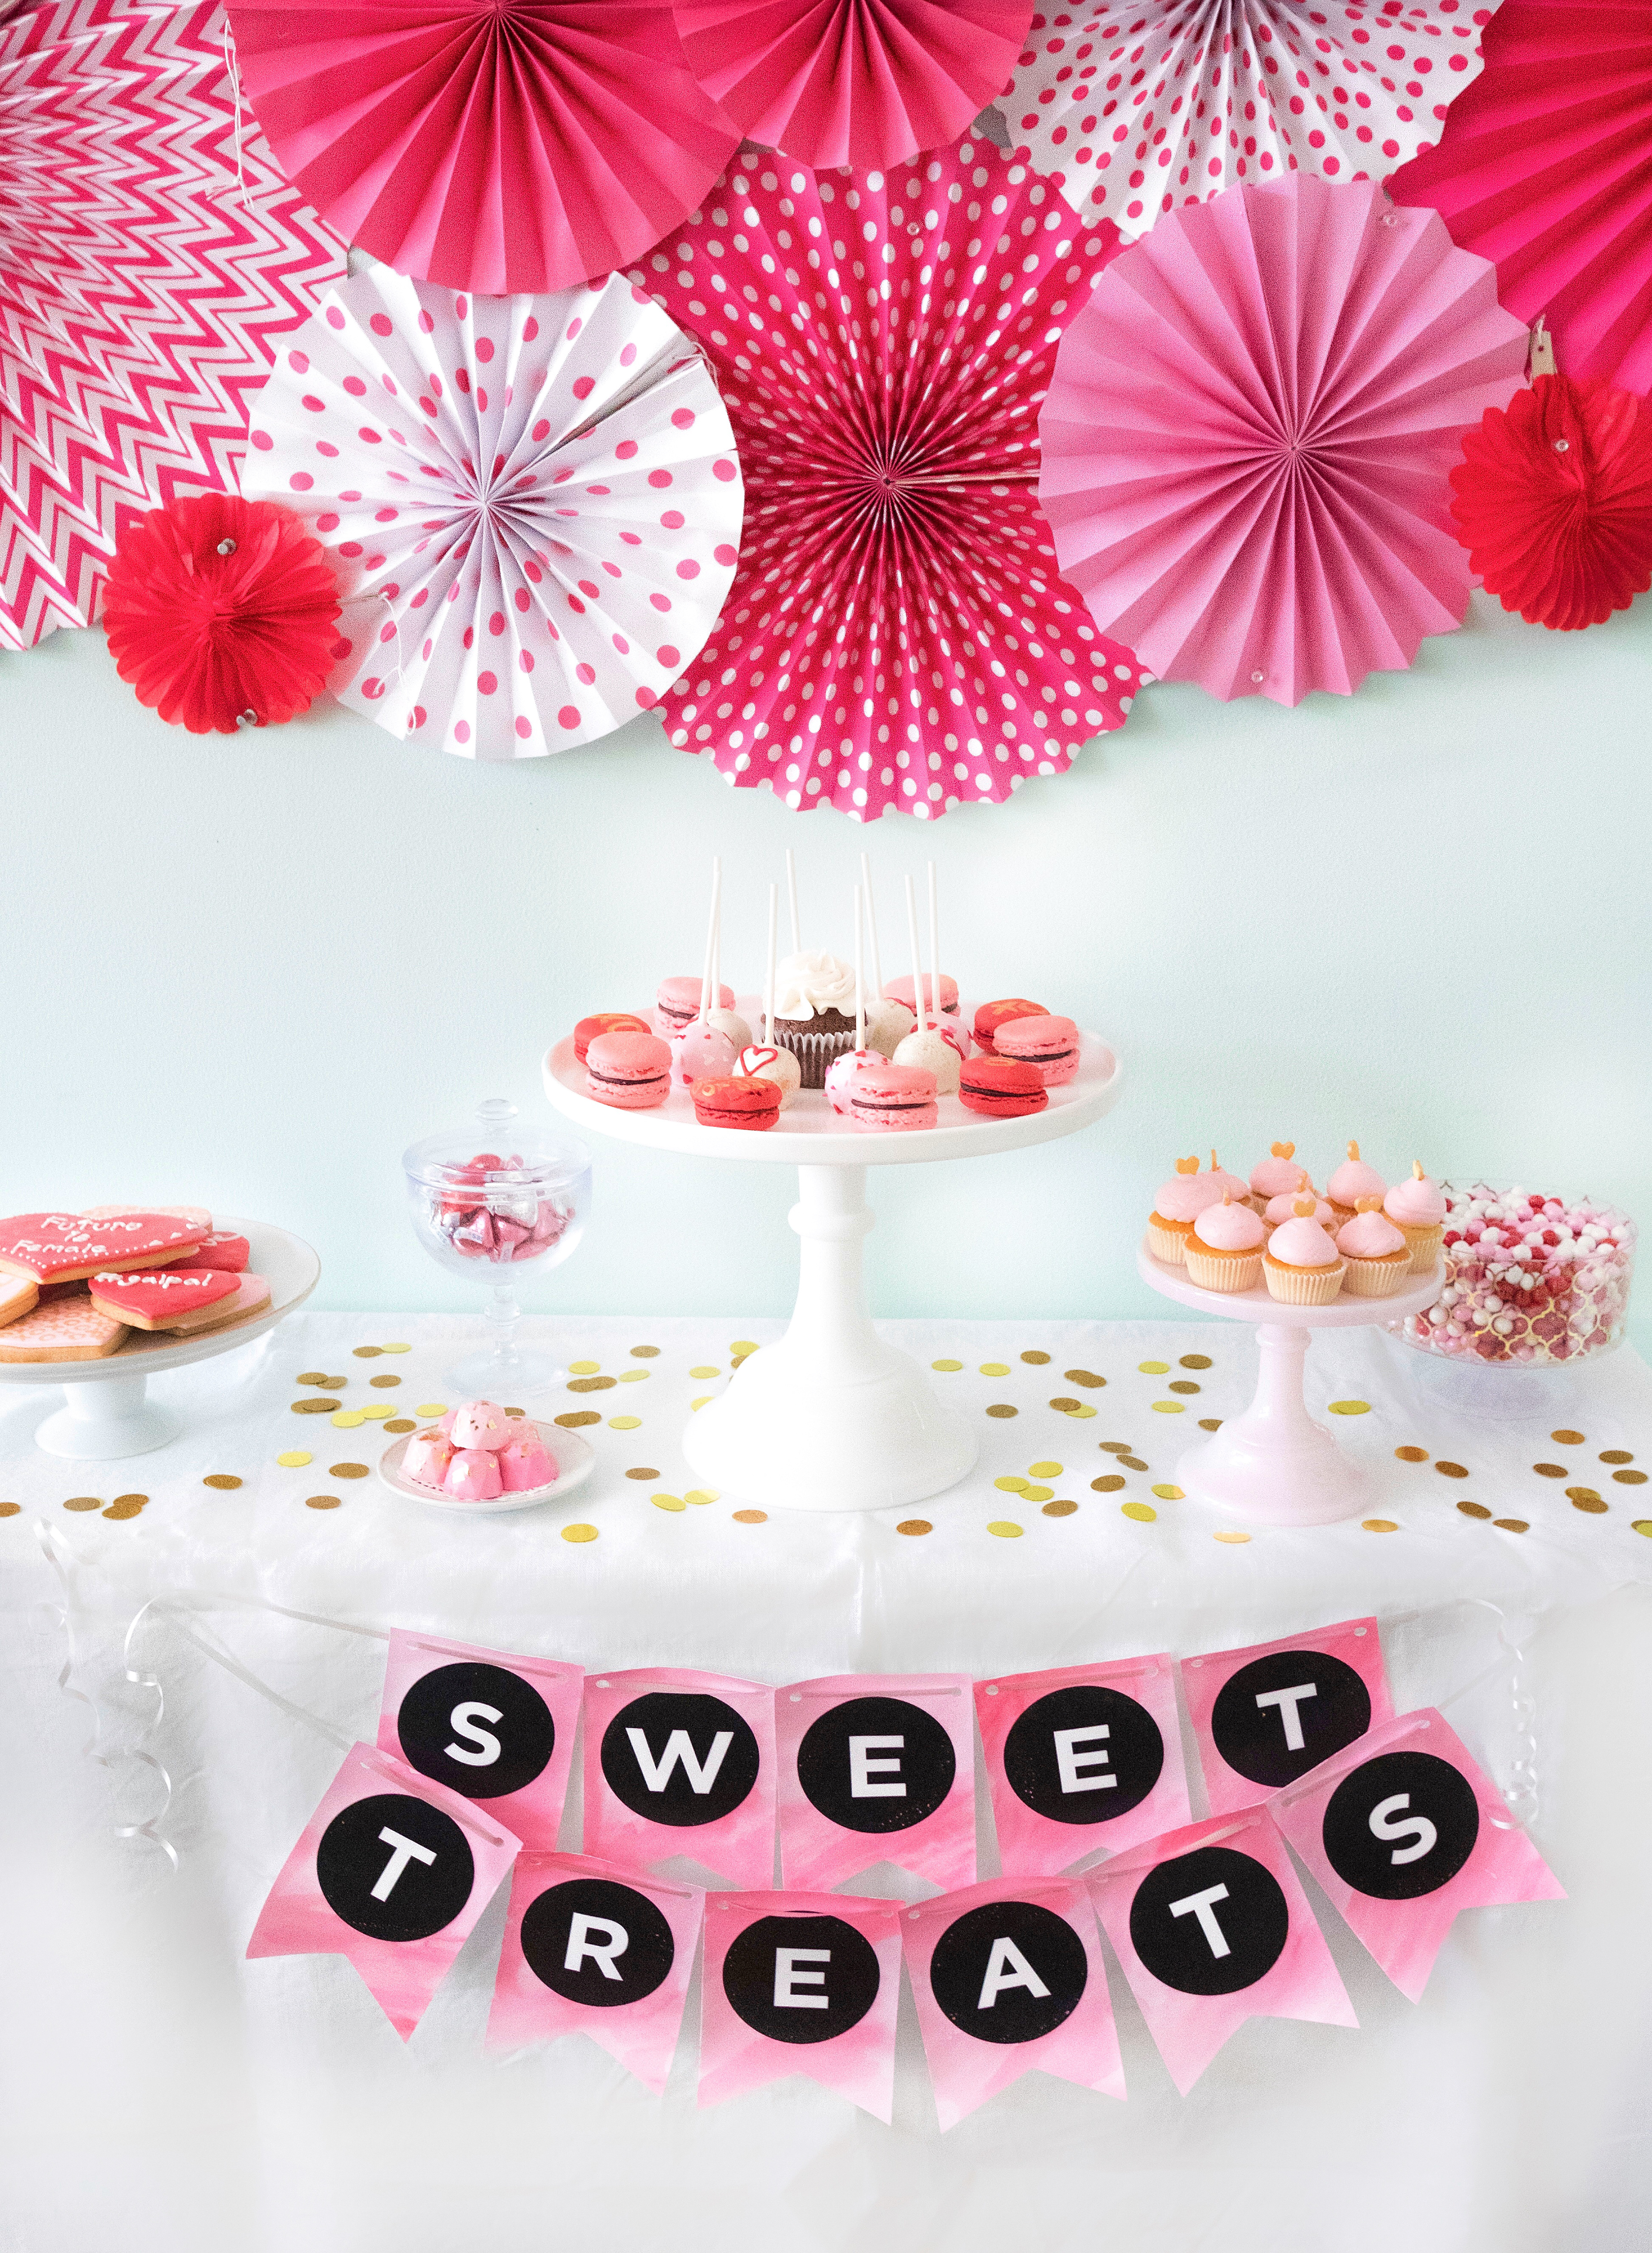
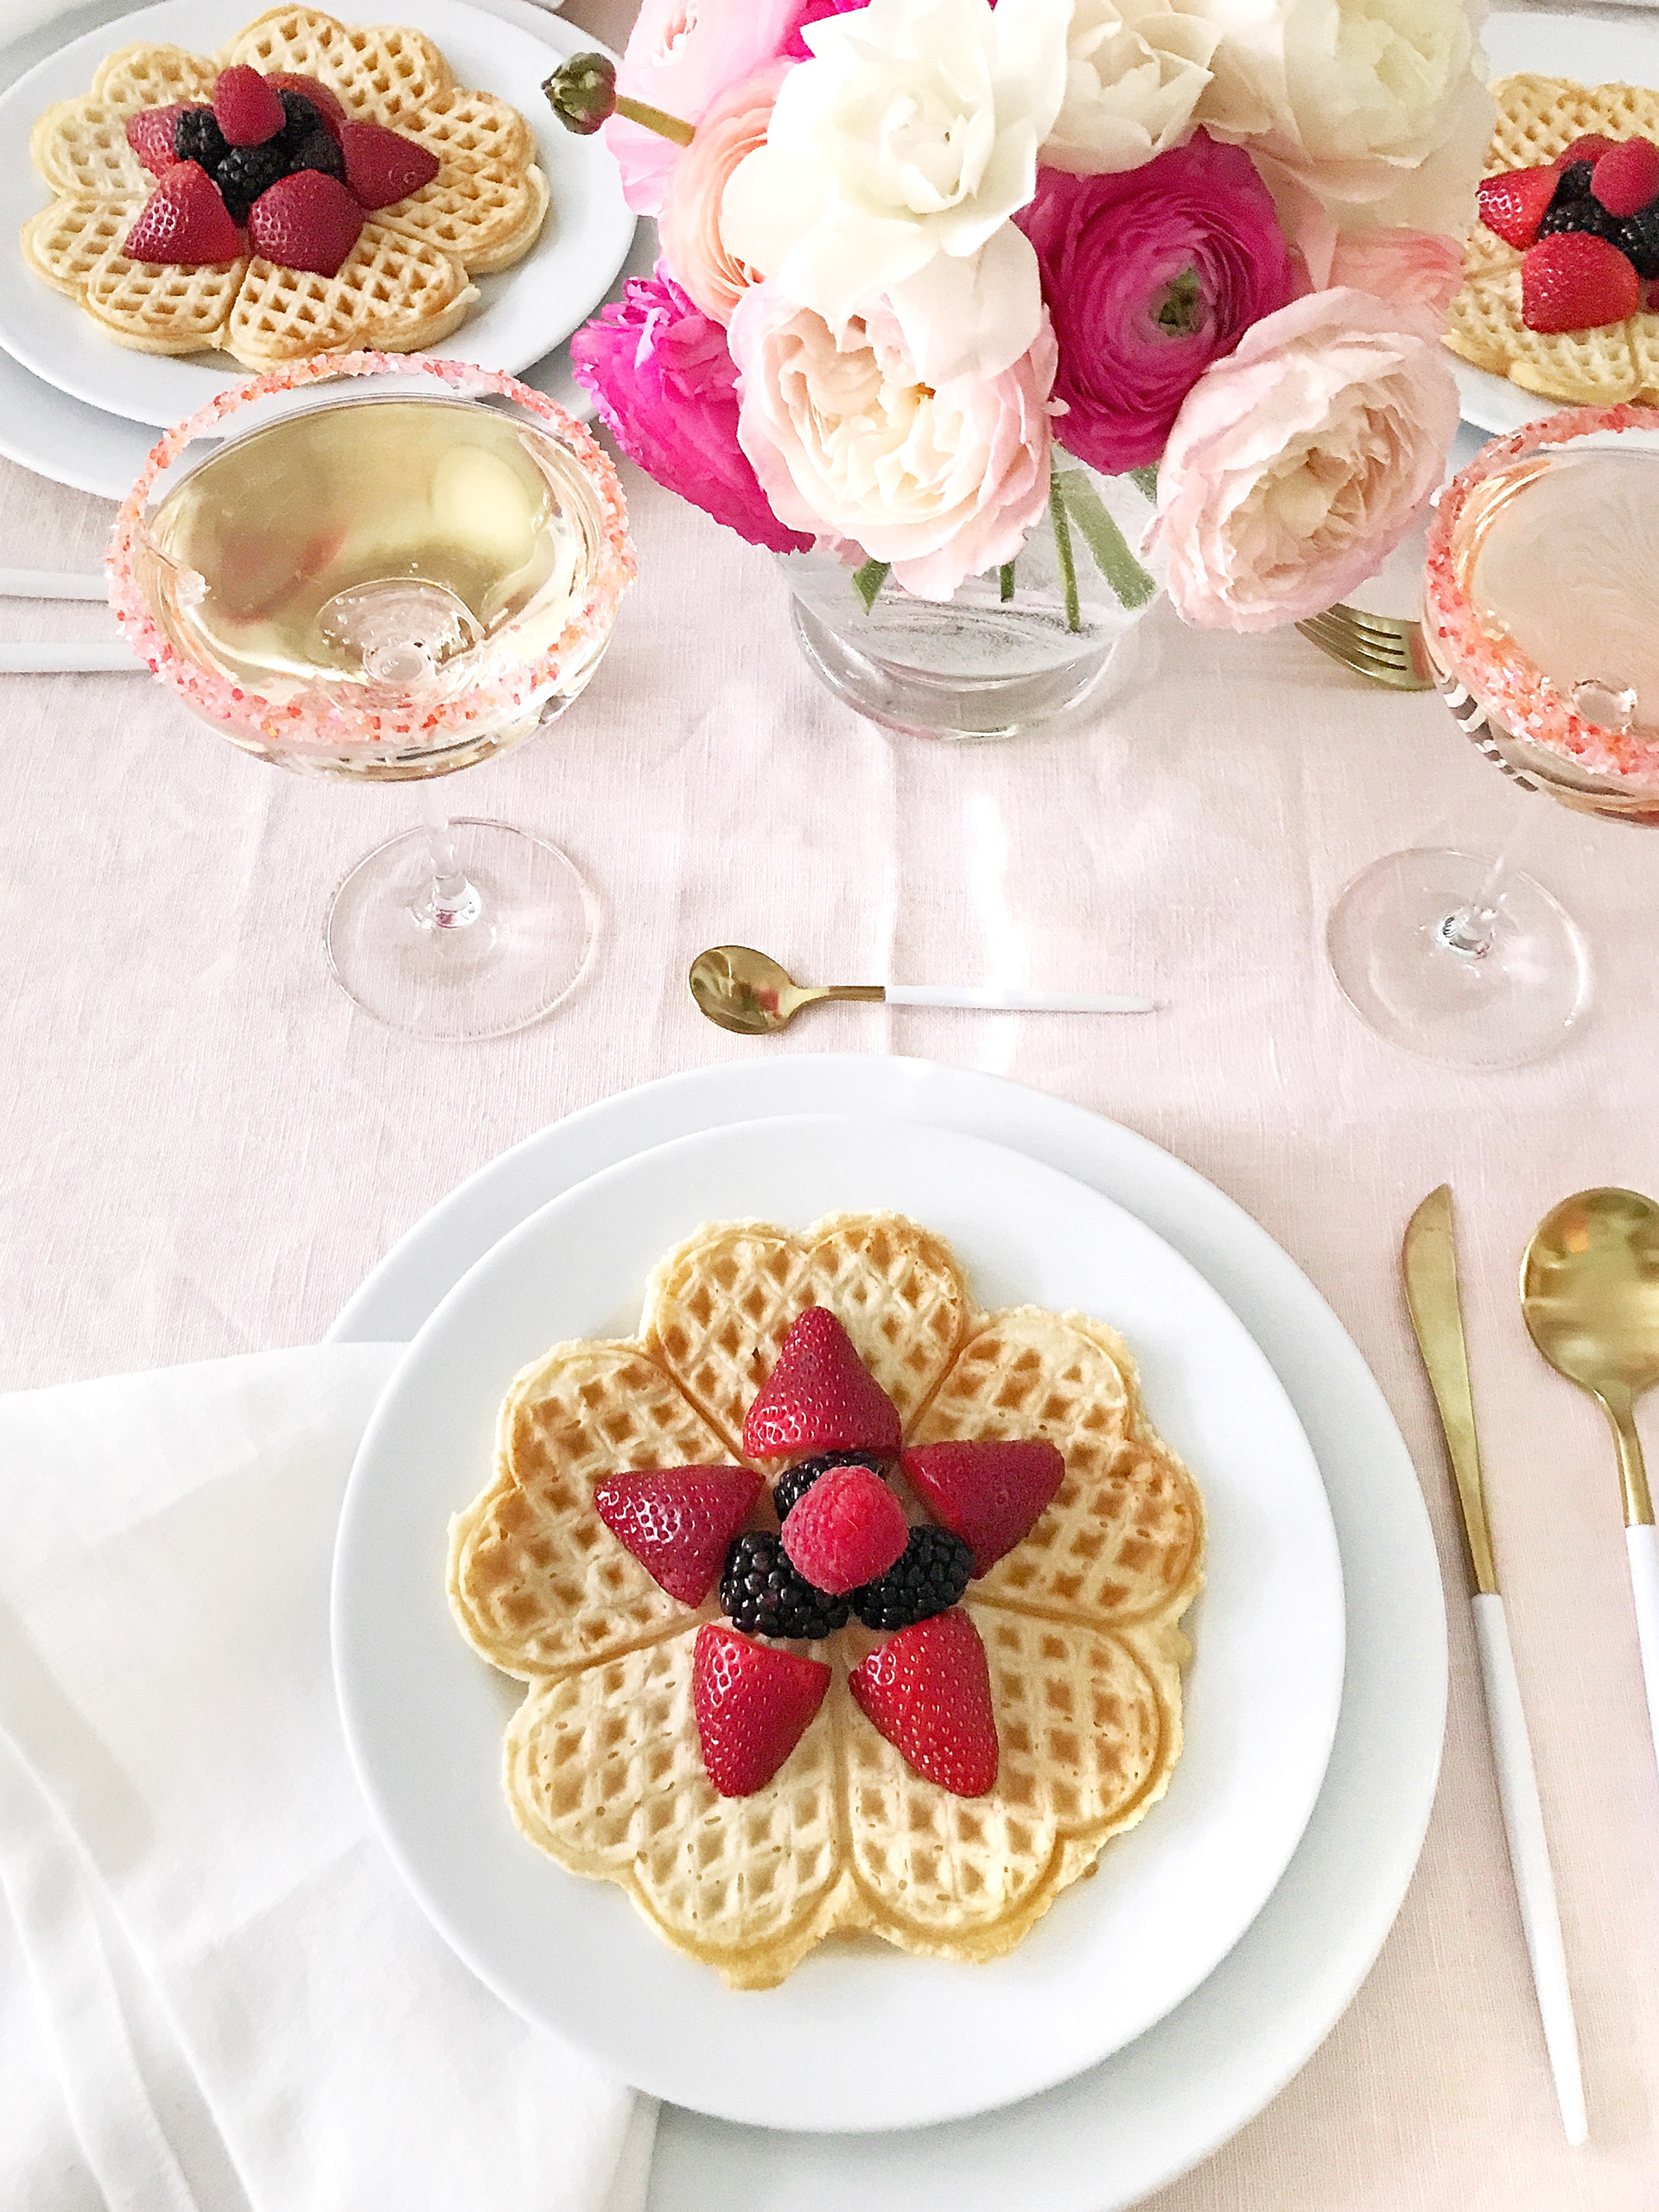
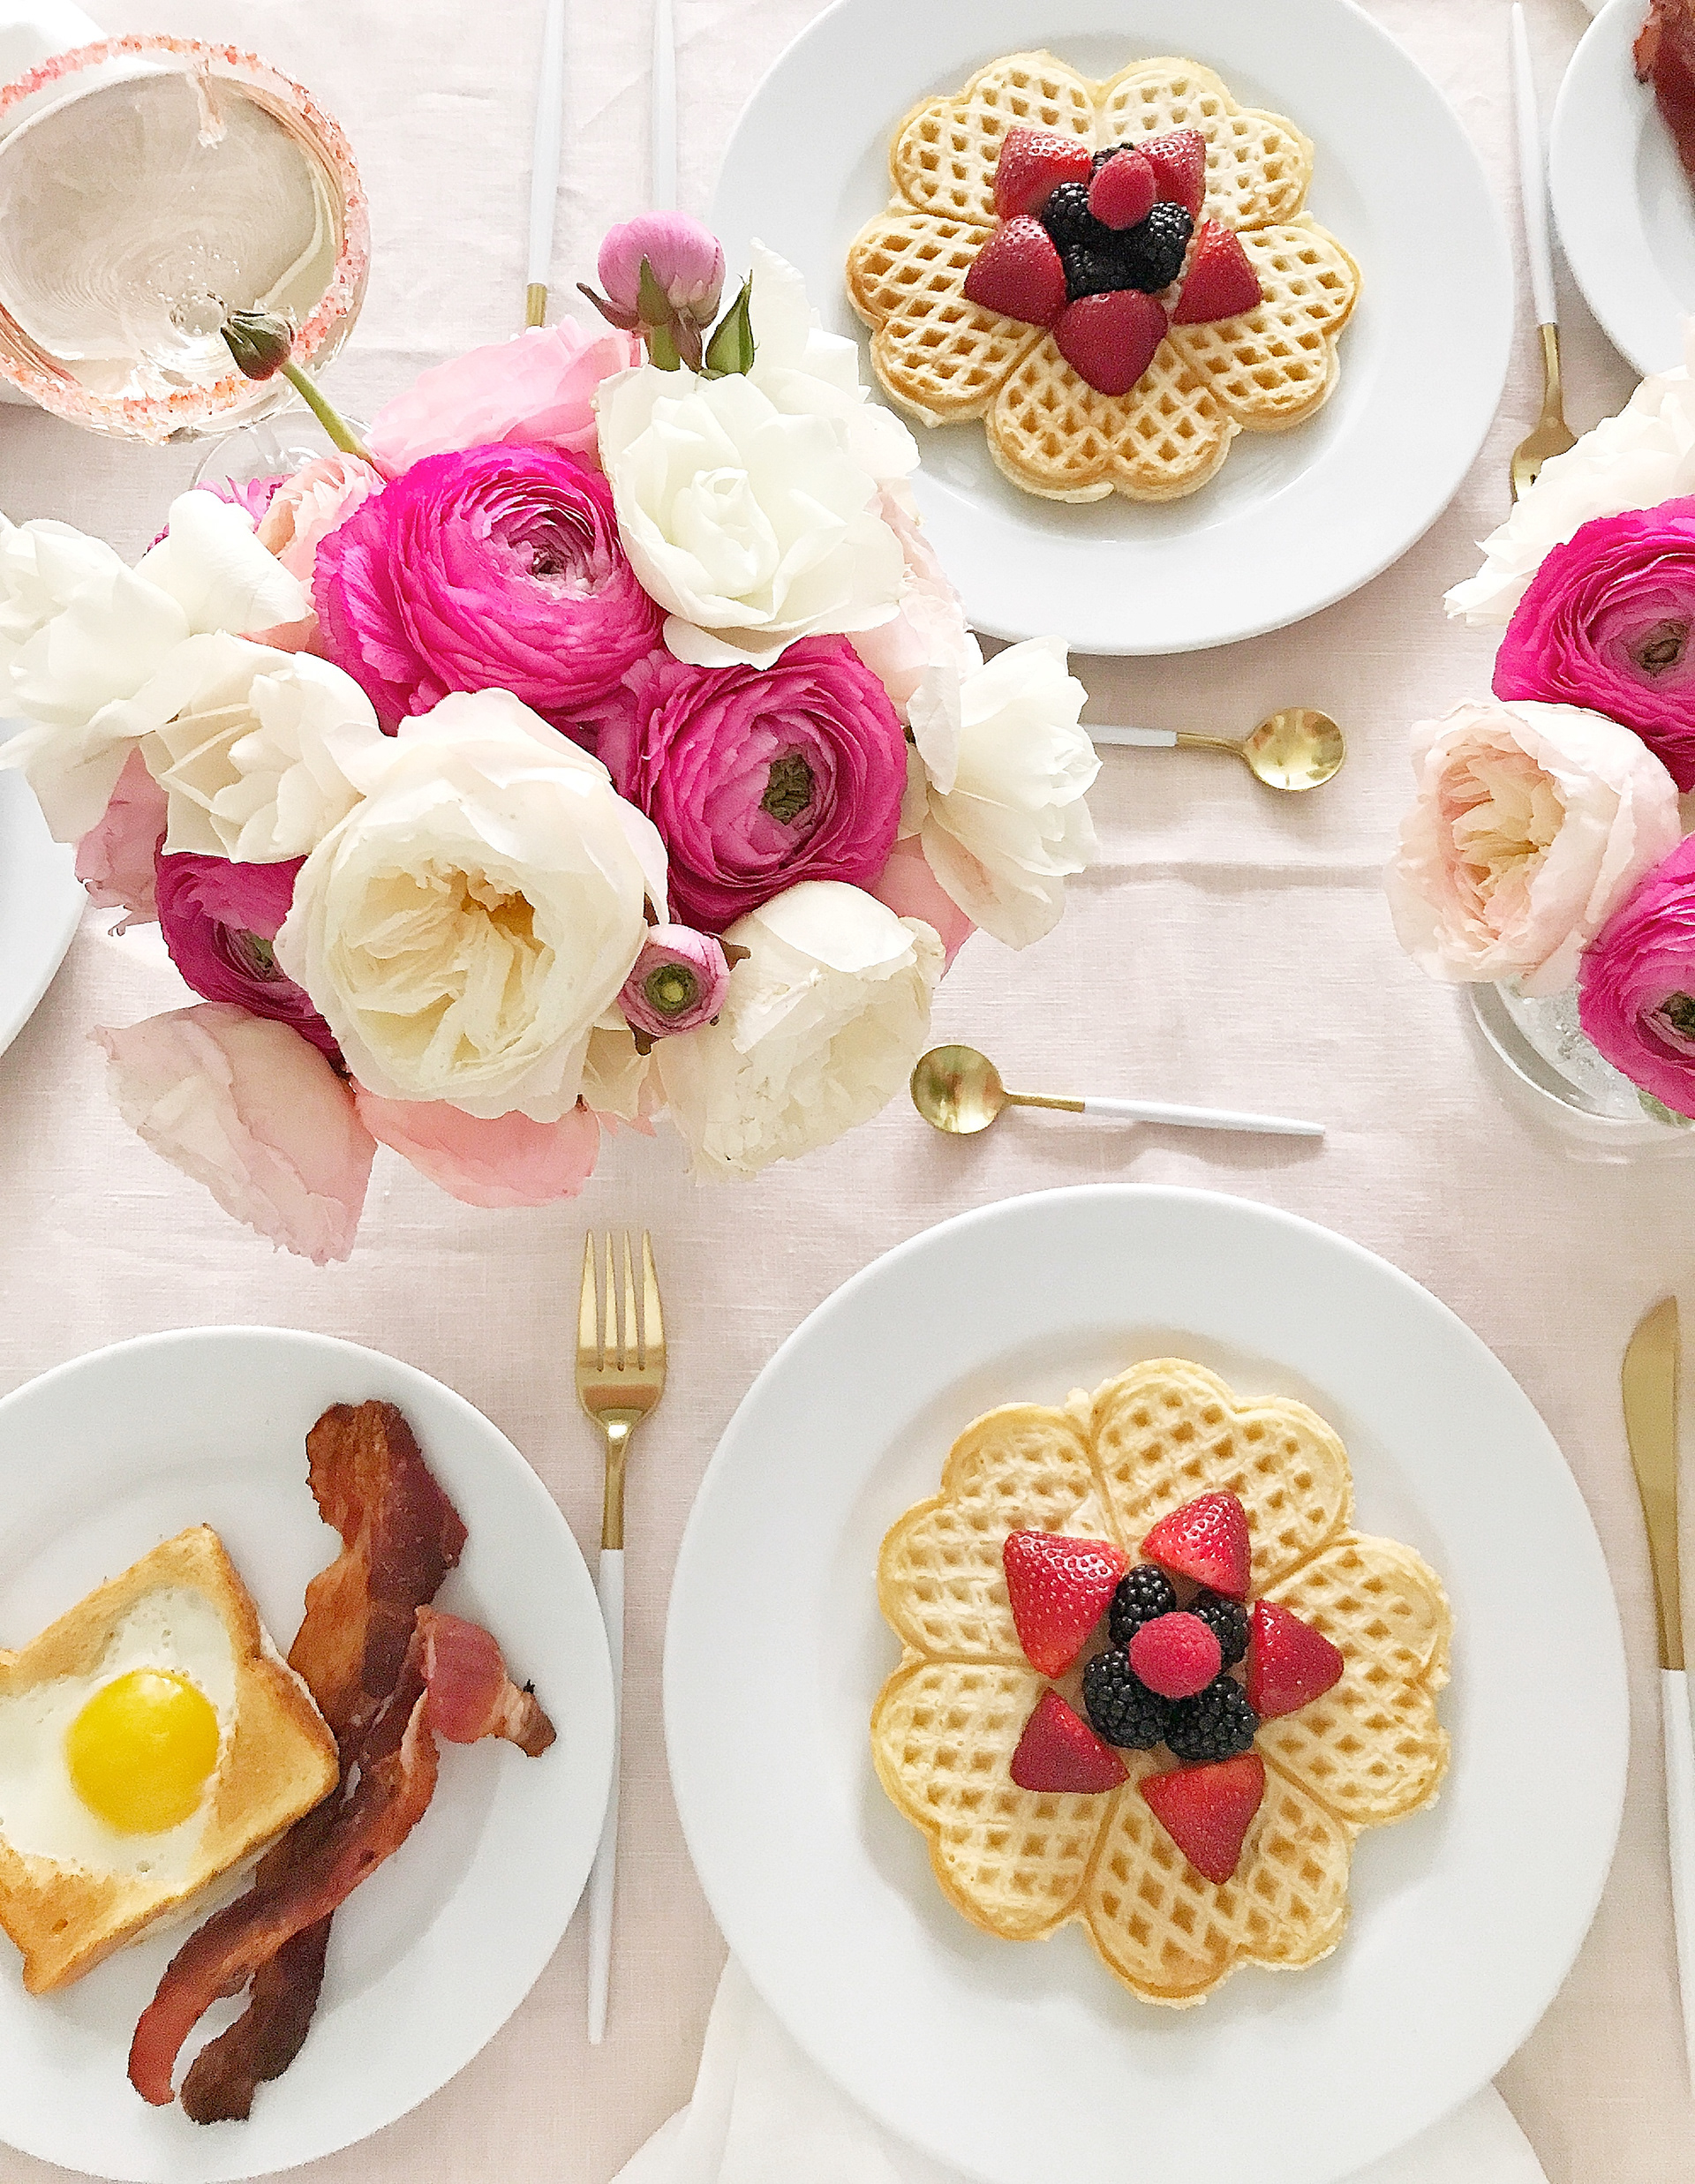
YOU'RE INVITED: GALENTINE'S DAY BRUNCH

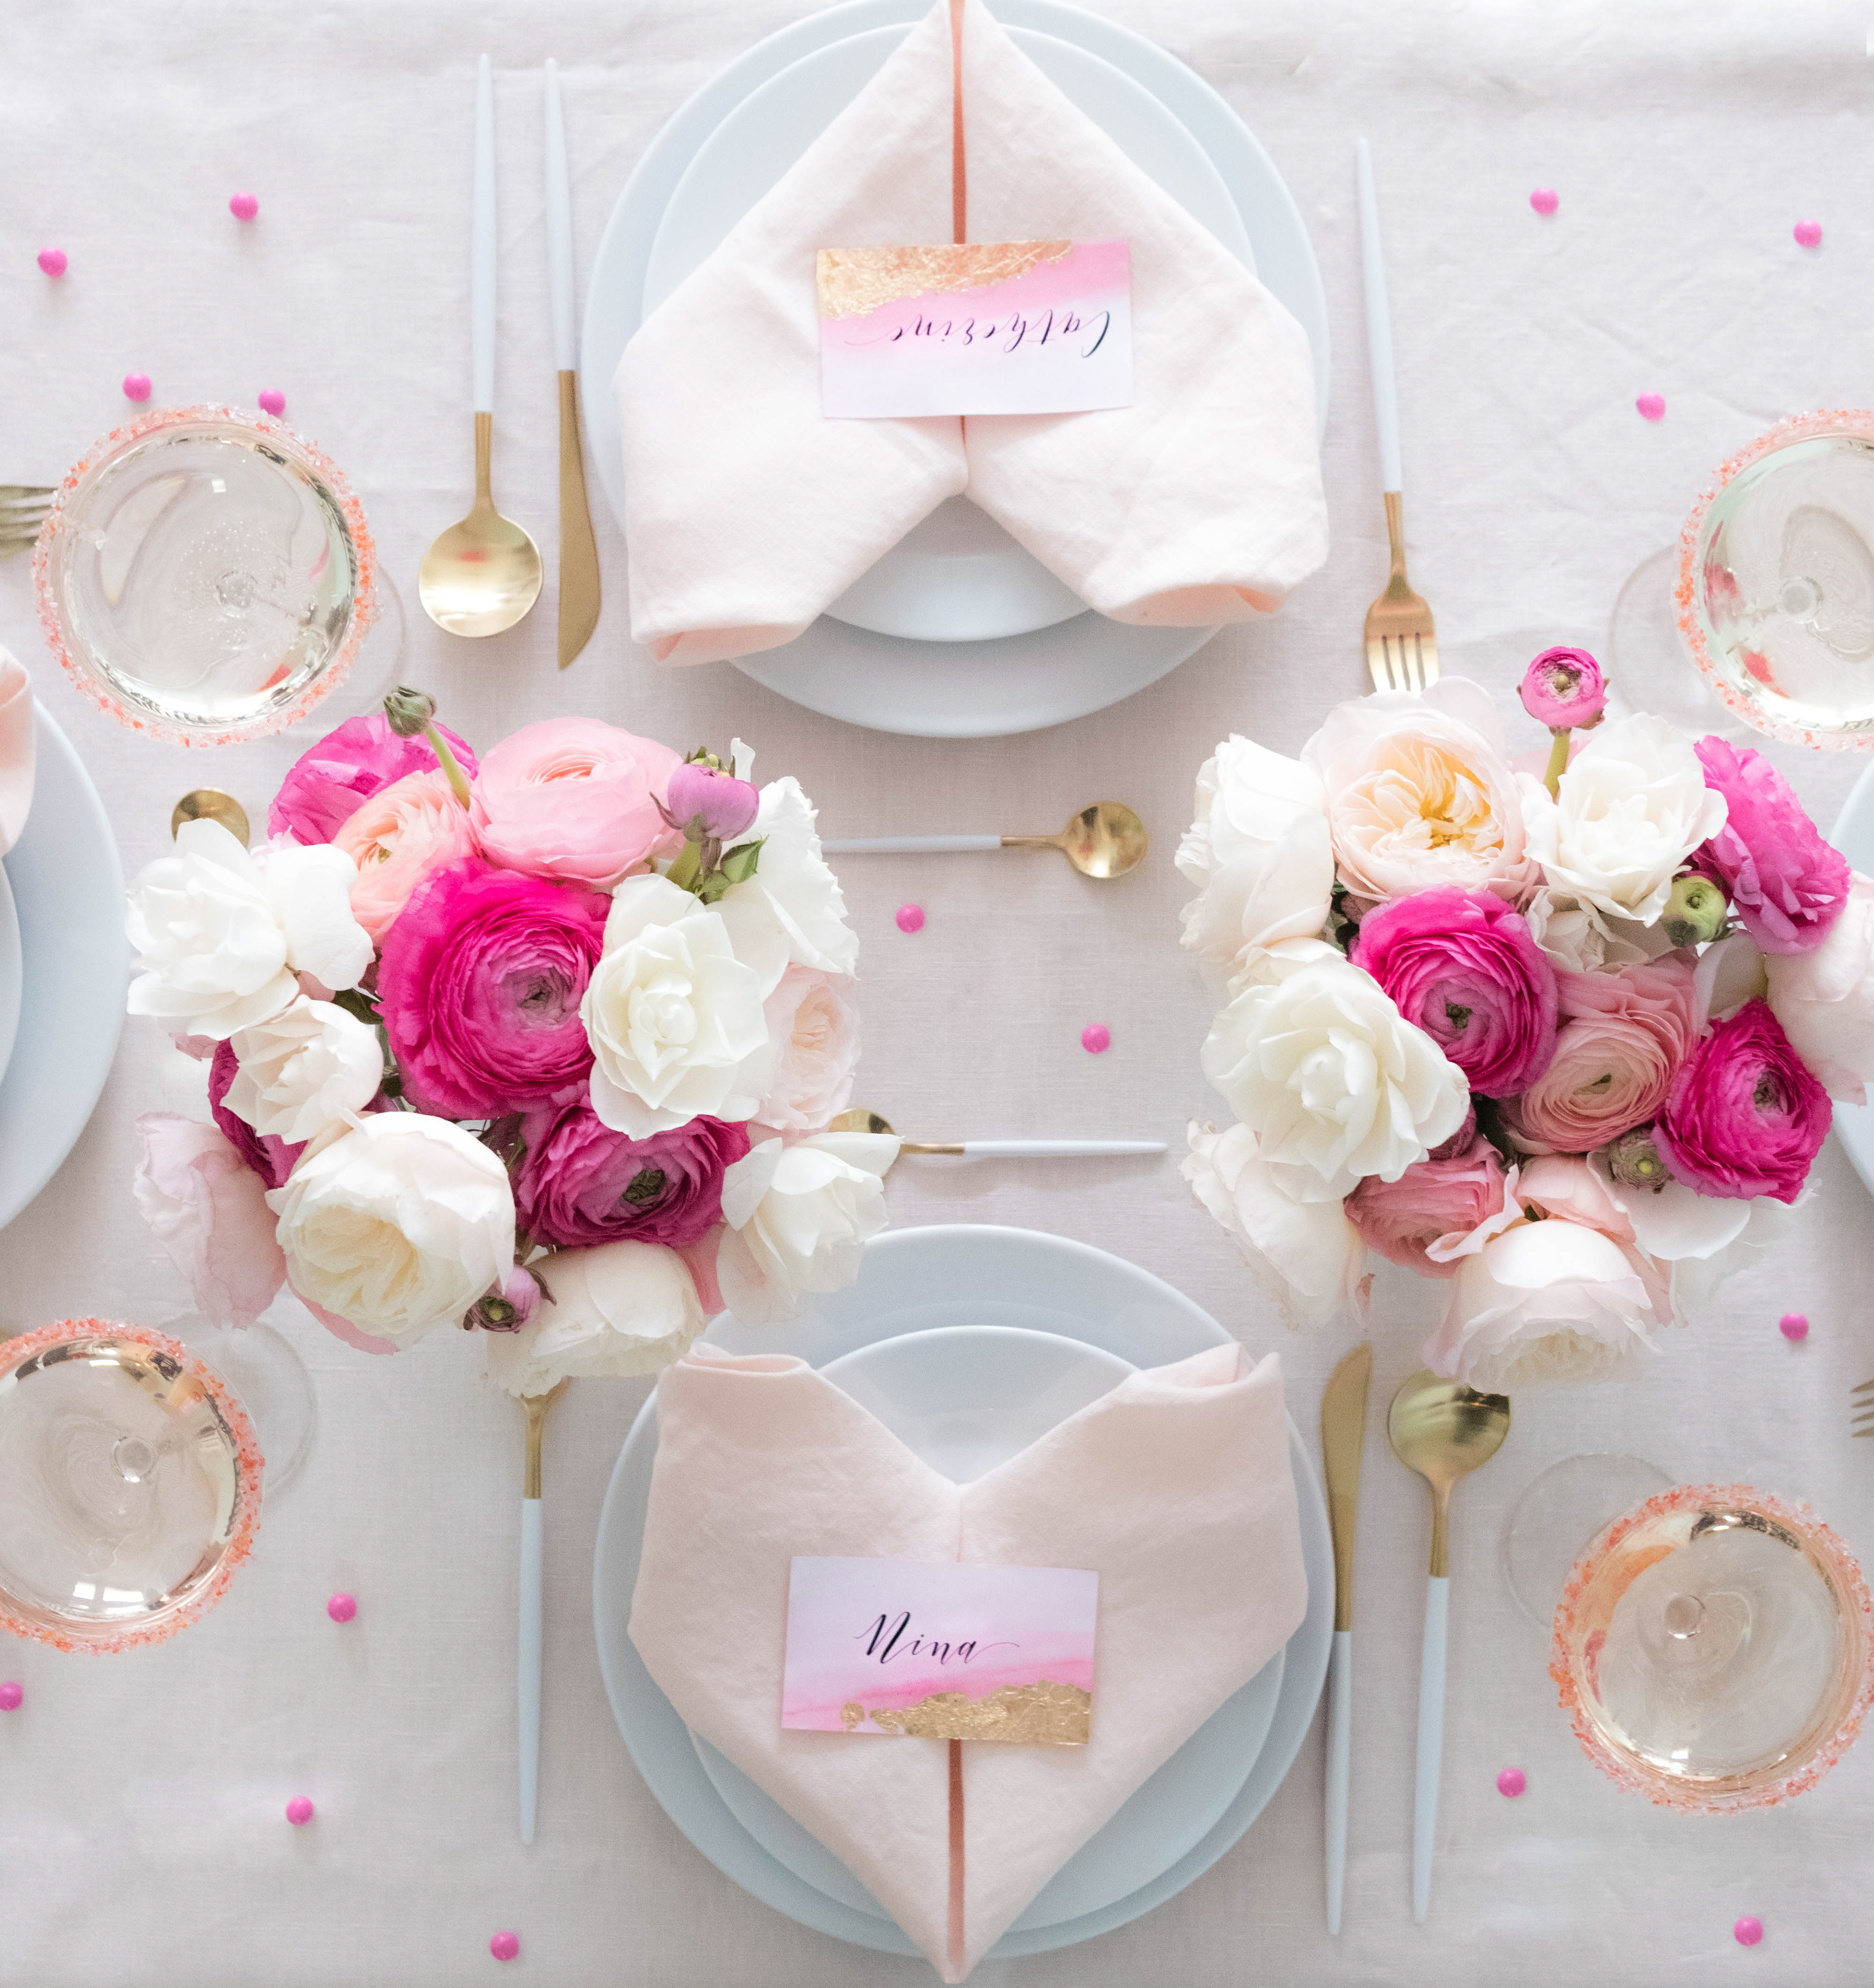
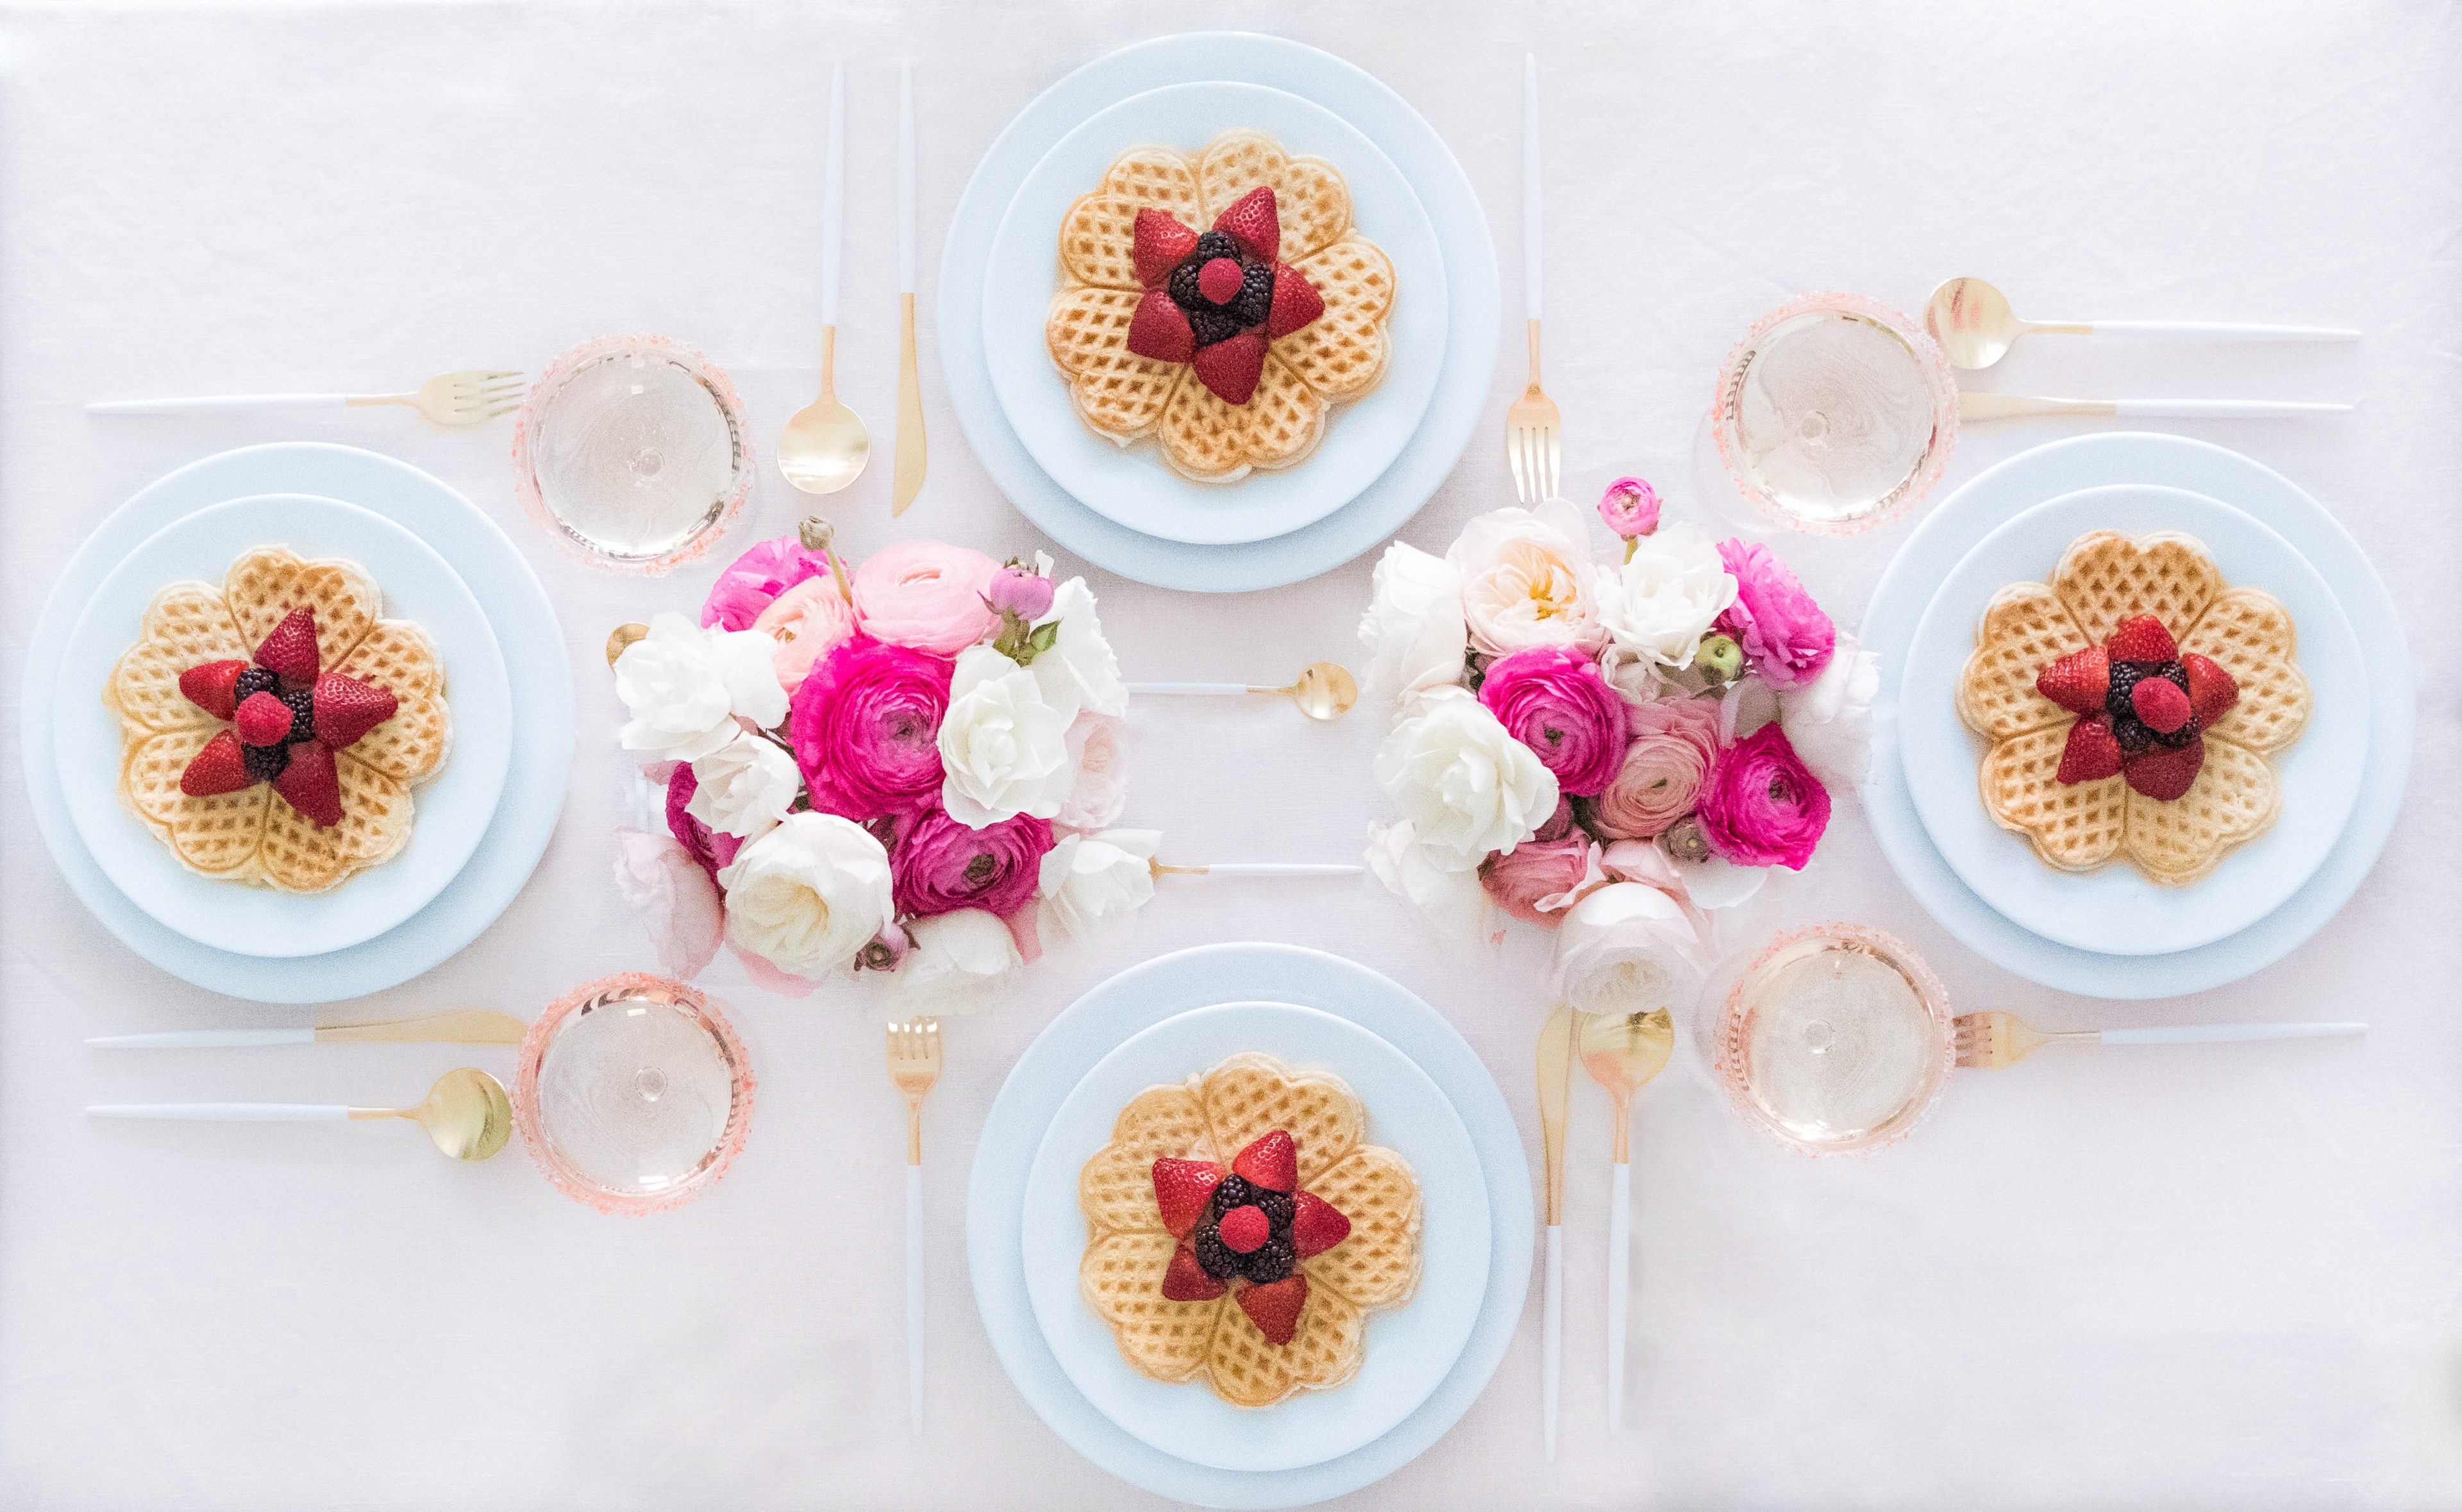
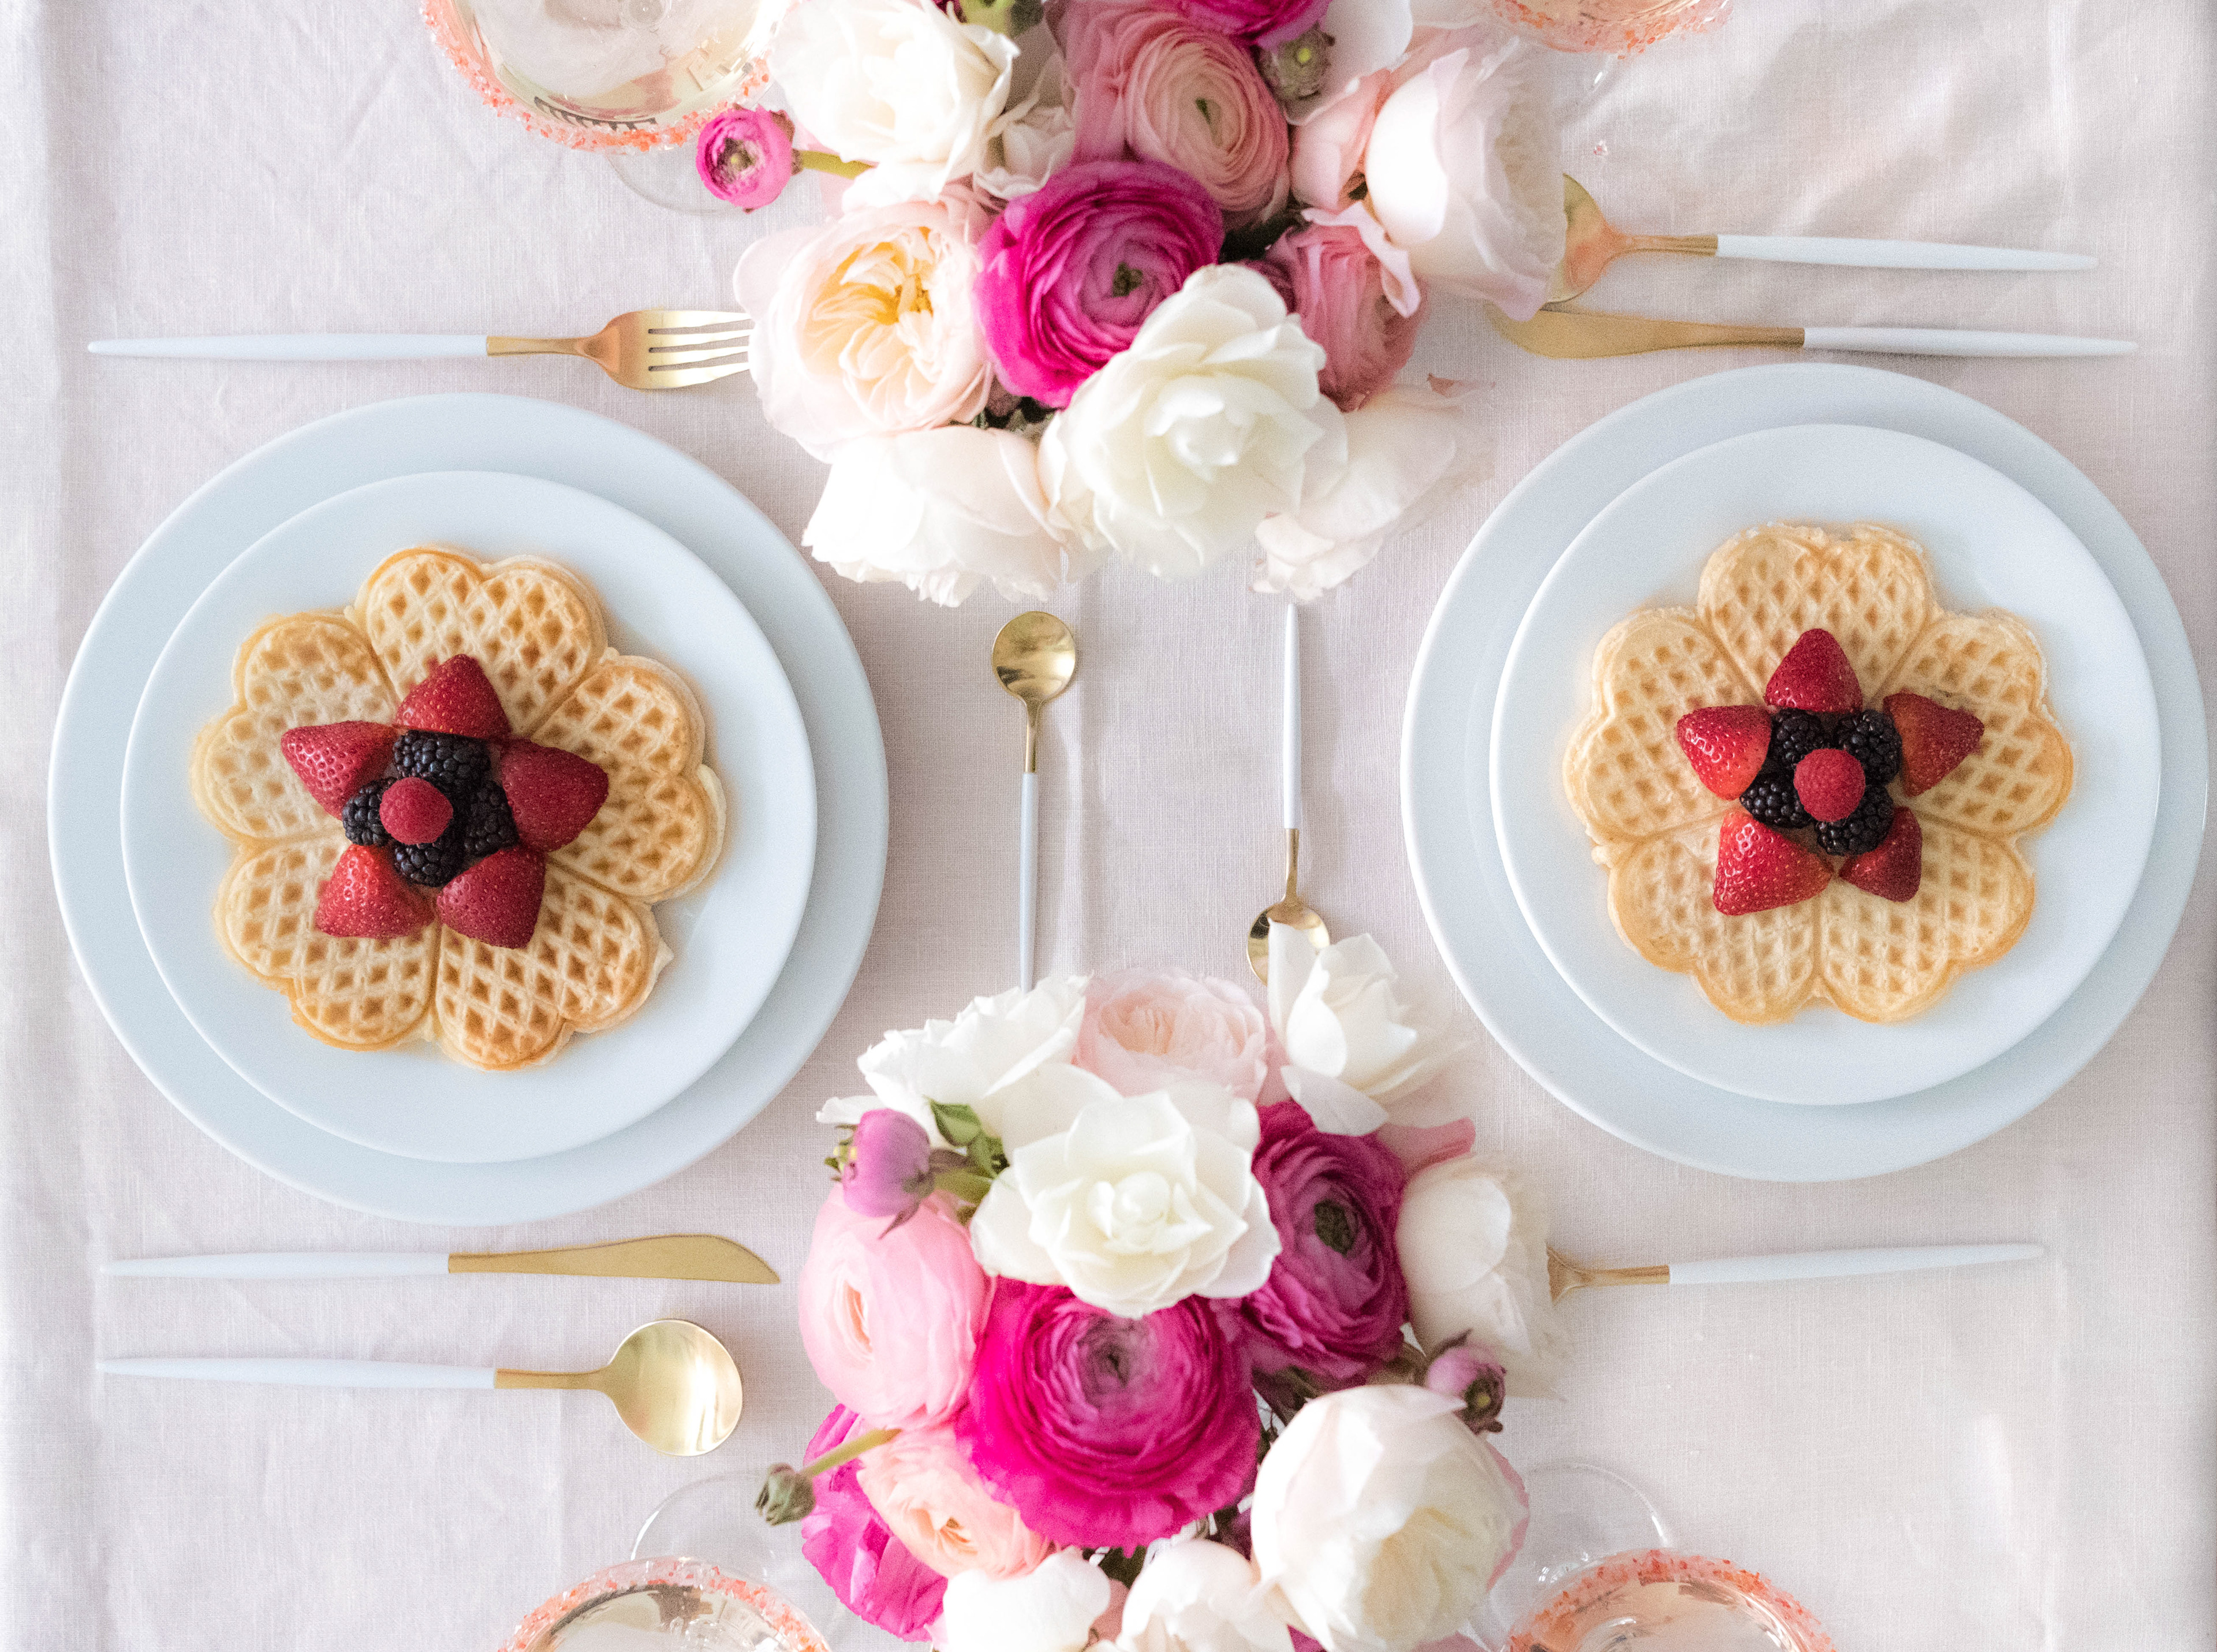
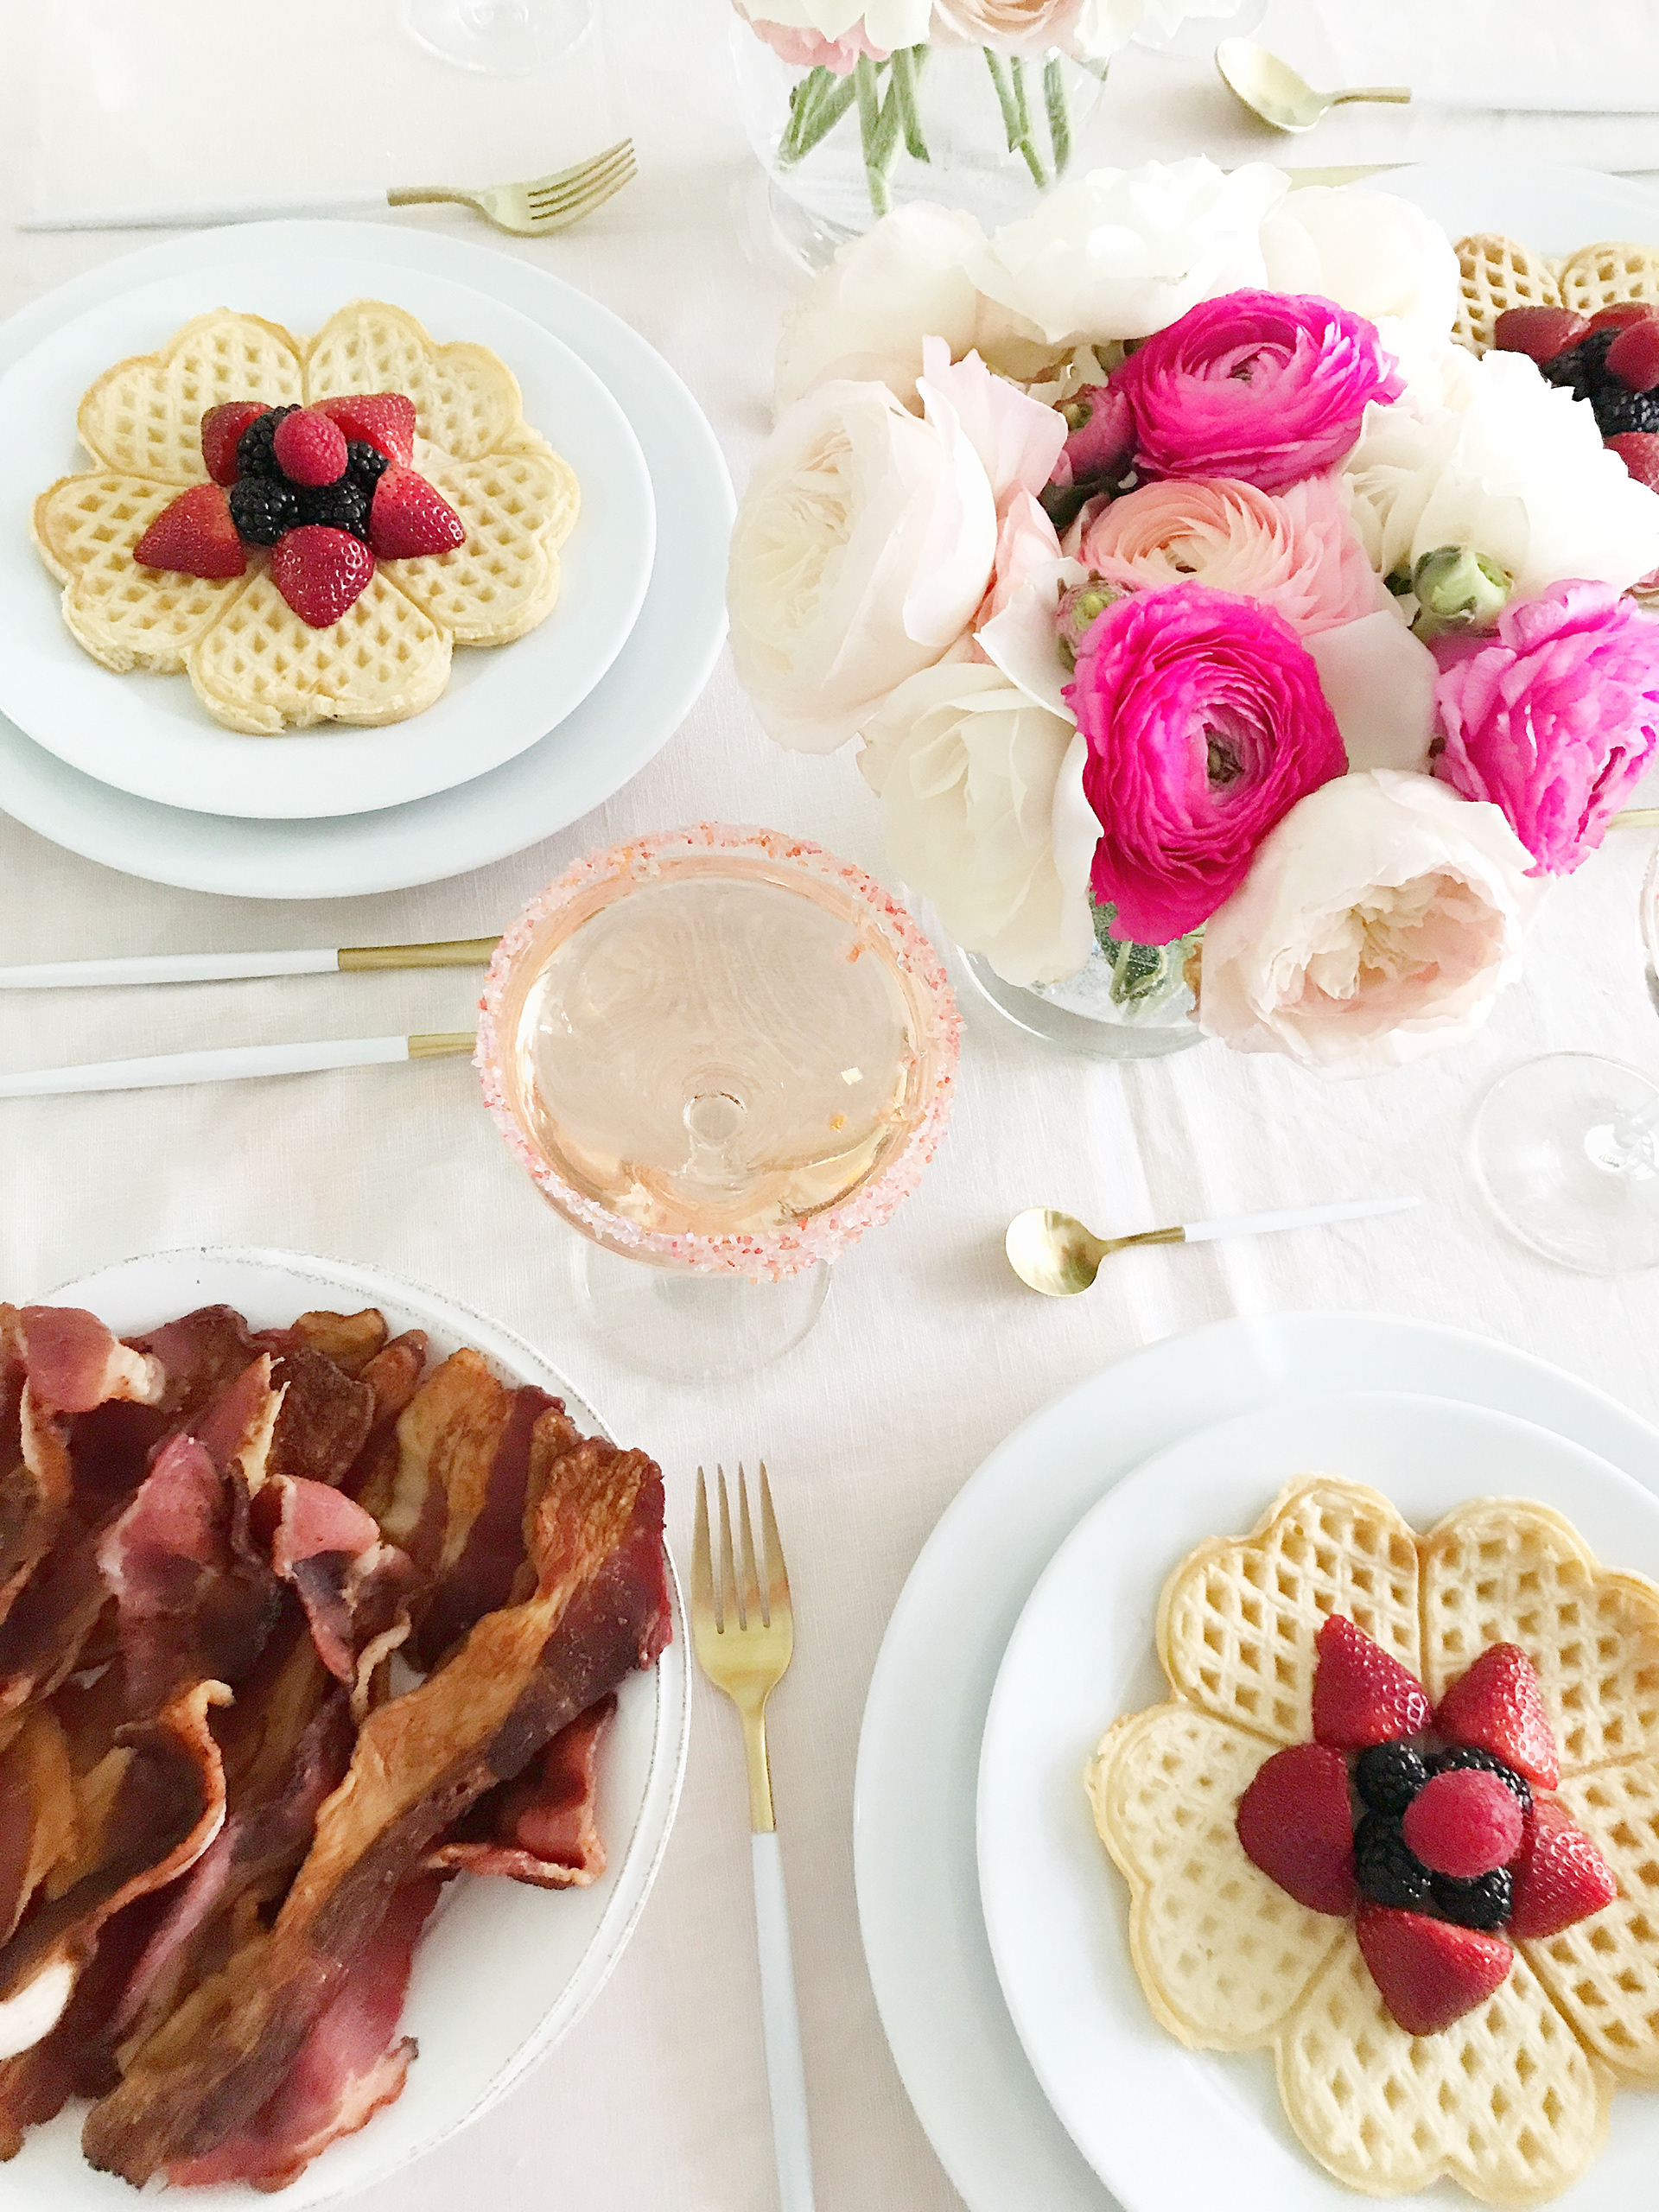
This year I wanted to make my Valentine’s Day celebration extra special by honoring the first loves of my life: my gal pals! No offense to my amazing hubby (whom I love dearly), but I think it’s equally as important to take the time to celebrate and honor all the other loved ones in your life. This thought became my inspiration for creating the ultimate Galentine’s Day Brunch display for my favorite female besties! I immediately asked one of my oldest girlfriends and crazy-talented food blogger, Nina Siman, to partner with me to bring this #GIRLPOWER concept to life!
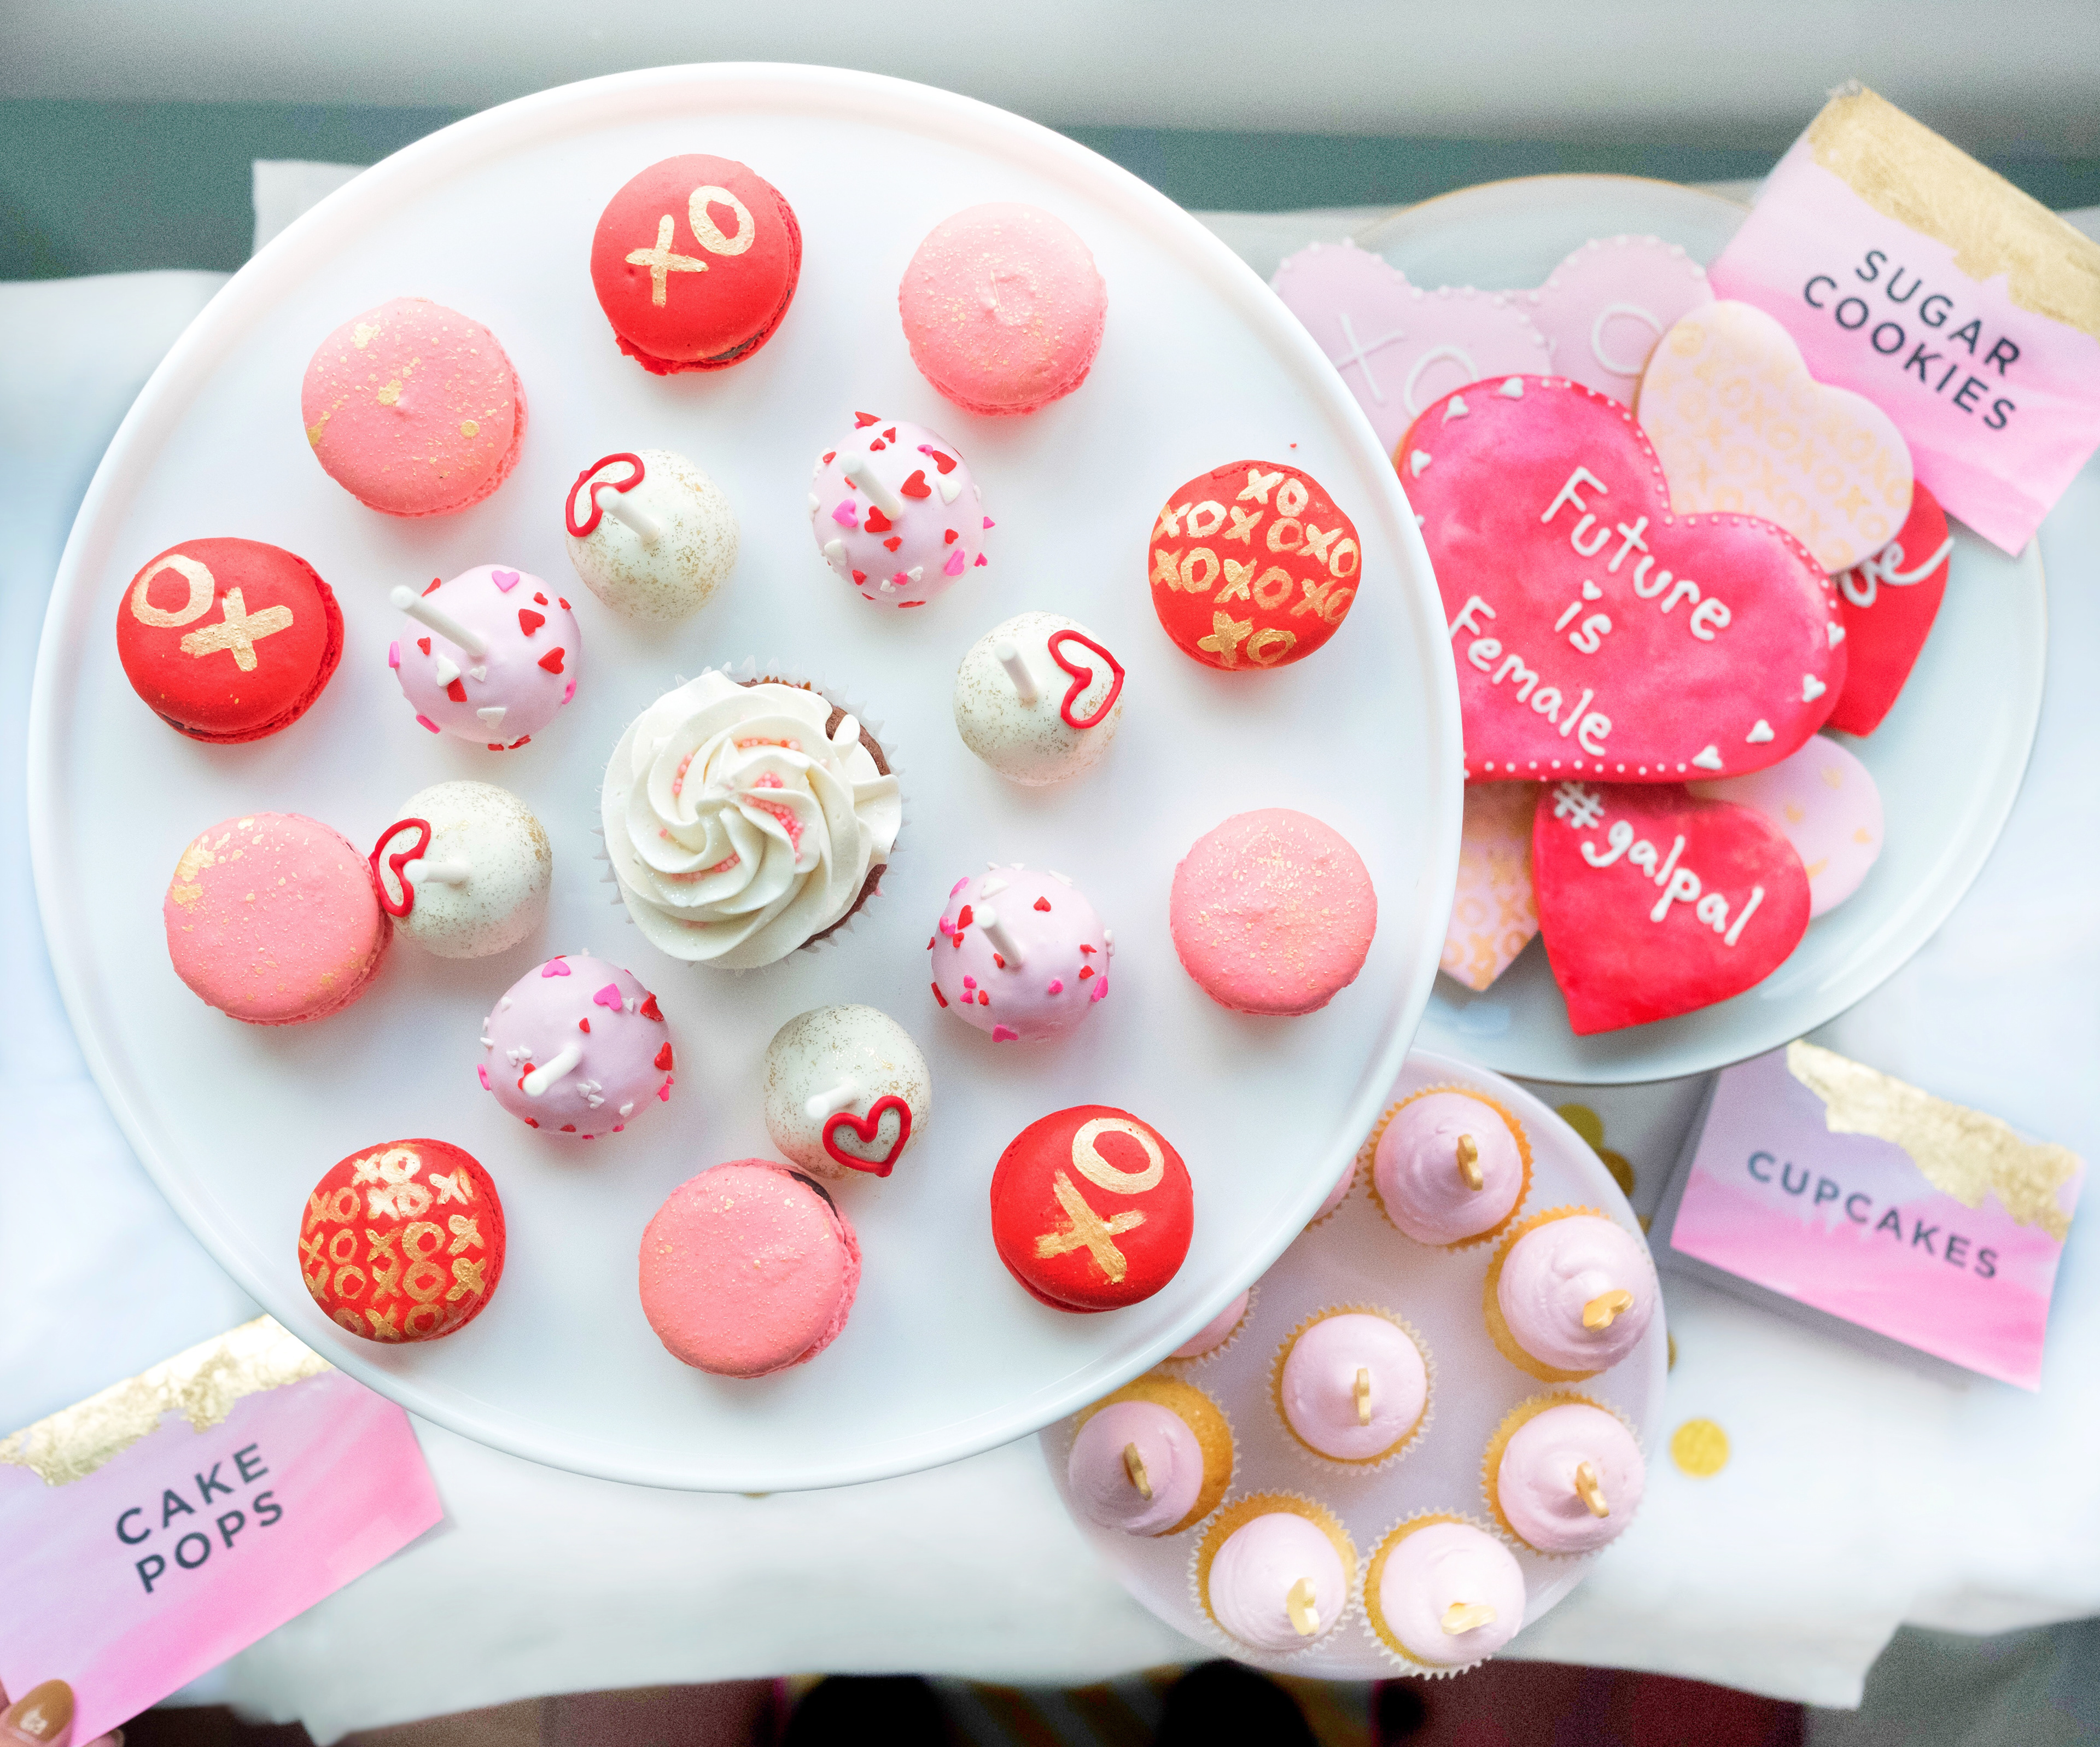
I wanted to create both an intimate tablescape (filled with yummy brunch favorites and endless champagne) as well as a separate dessert buffet, because after all the best part about Valentine’s Day is indulging in sweets! I set the scene in my apartment… I created a festive backdrop display of paper fan decorations behind my buffet table. To fill the dessert buffet, I collaborated with my favorite local bakery, Hudson Cakery, to design an array of insanely adorable sweet treats that included heart-shaped cookies, cake pops, gold-foiled pink truffles, macarons and cupcakes. I went to Party City and found various height clear vessels, some with and without tops, to display all the festive candies. I used two smaller cake stands to display the heart-shaped sugar cookies and mini-cupcakes. In partnering with Sur La Table for the dinnerware, I used one of their beautiful large, white cake stands for the center statement piece display of colorful macarons and cake pops. To complete the look, I partnered with Madison Stationery to design a banner that read “SWEET TREATS” and hung it along the edge of the table with matching labels for each dessert.
In planning the tablescape design, I instilled the assistance of yet another gal pal, Catherine, of BAYITH Linens to provide an array of beautifully elegant table coverings and napkins in matching colors. In addition to the cake stand, Sur La Table was generous enough to also provide the crisp white porcelain plates and champagne coupe glasses. In keeping with the Valentine’s Day theme, we creatively folded the blush pink linen napkins into the shape of large hearts and edged each champagne glass with a festive pink sugar rim. I selected an array of red, pink and white ranunculus for the floral arrangements and displayed them in two matching glass vases from Simon Pearce. The white and gold flatware, purchased on Amazon, complimented the overall warm and inviting look fit for an afternoon of love and laughter!


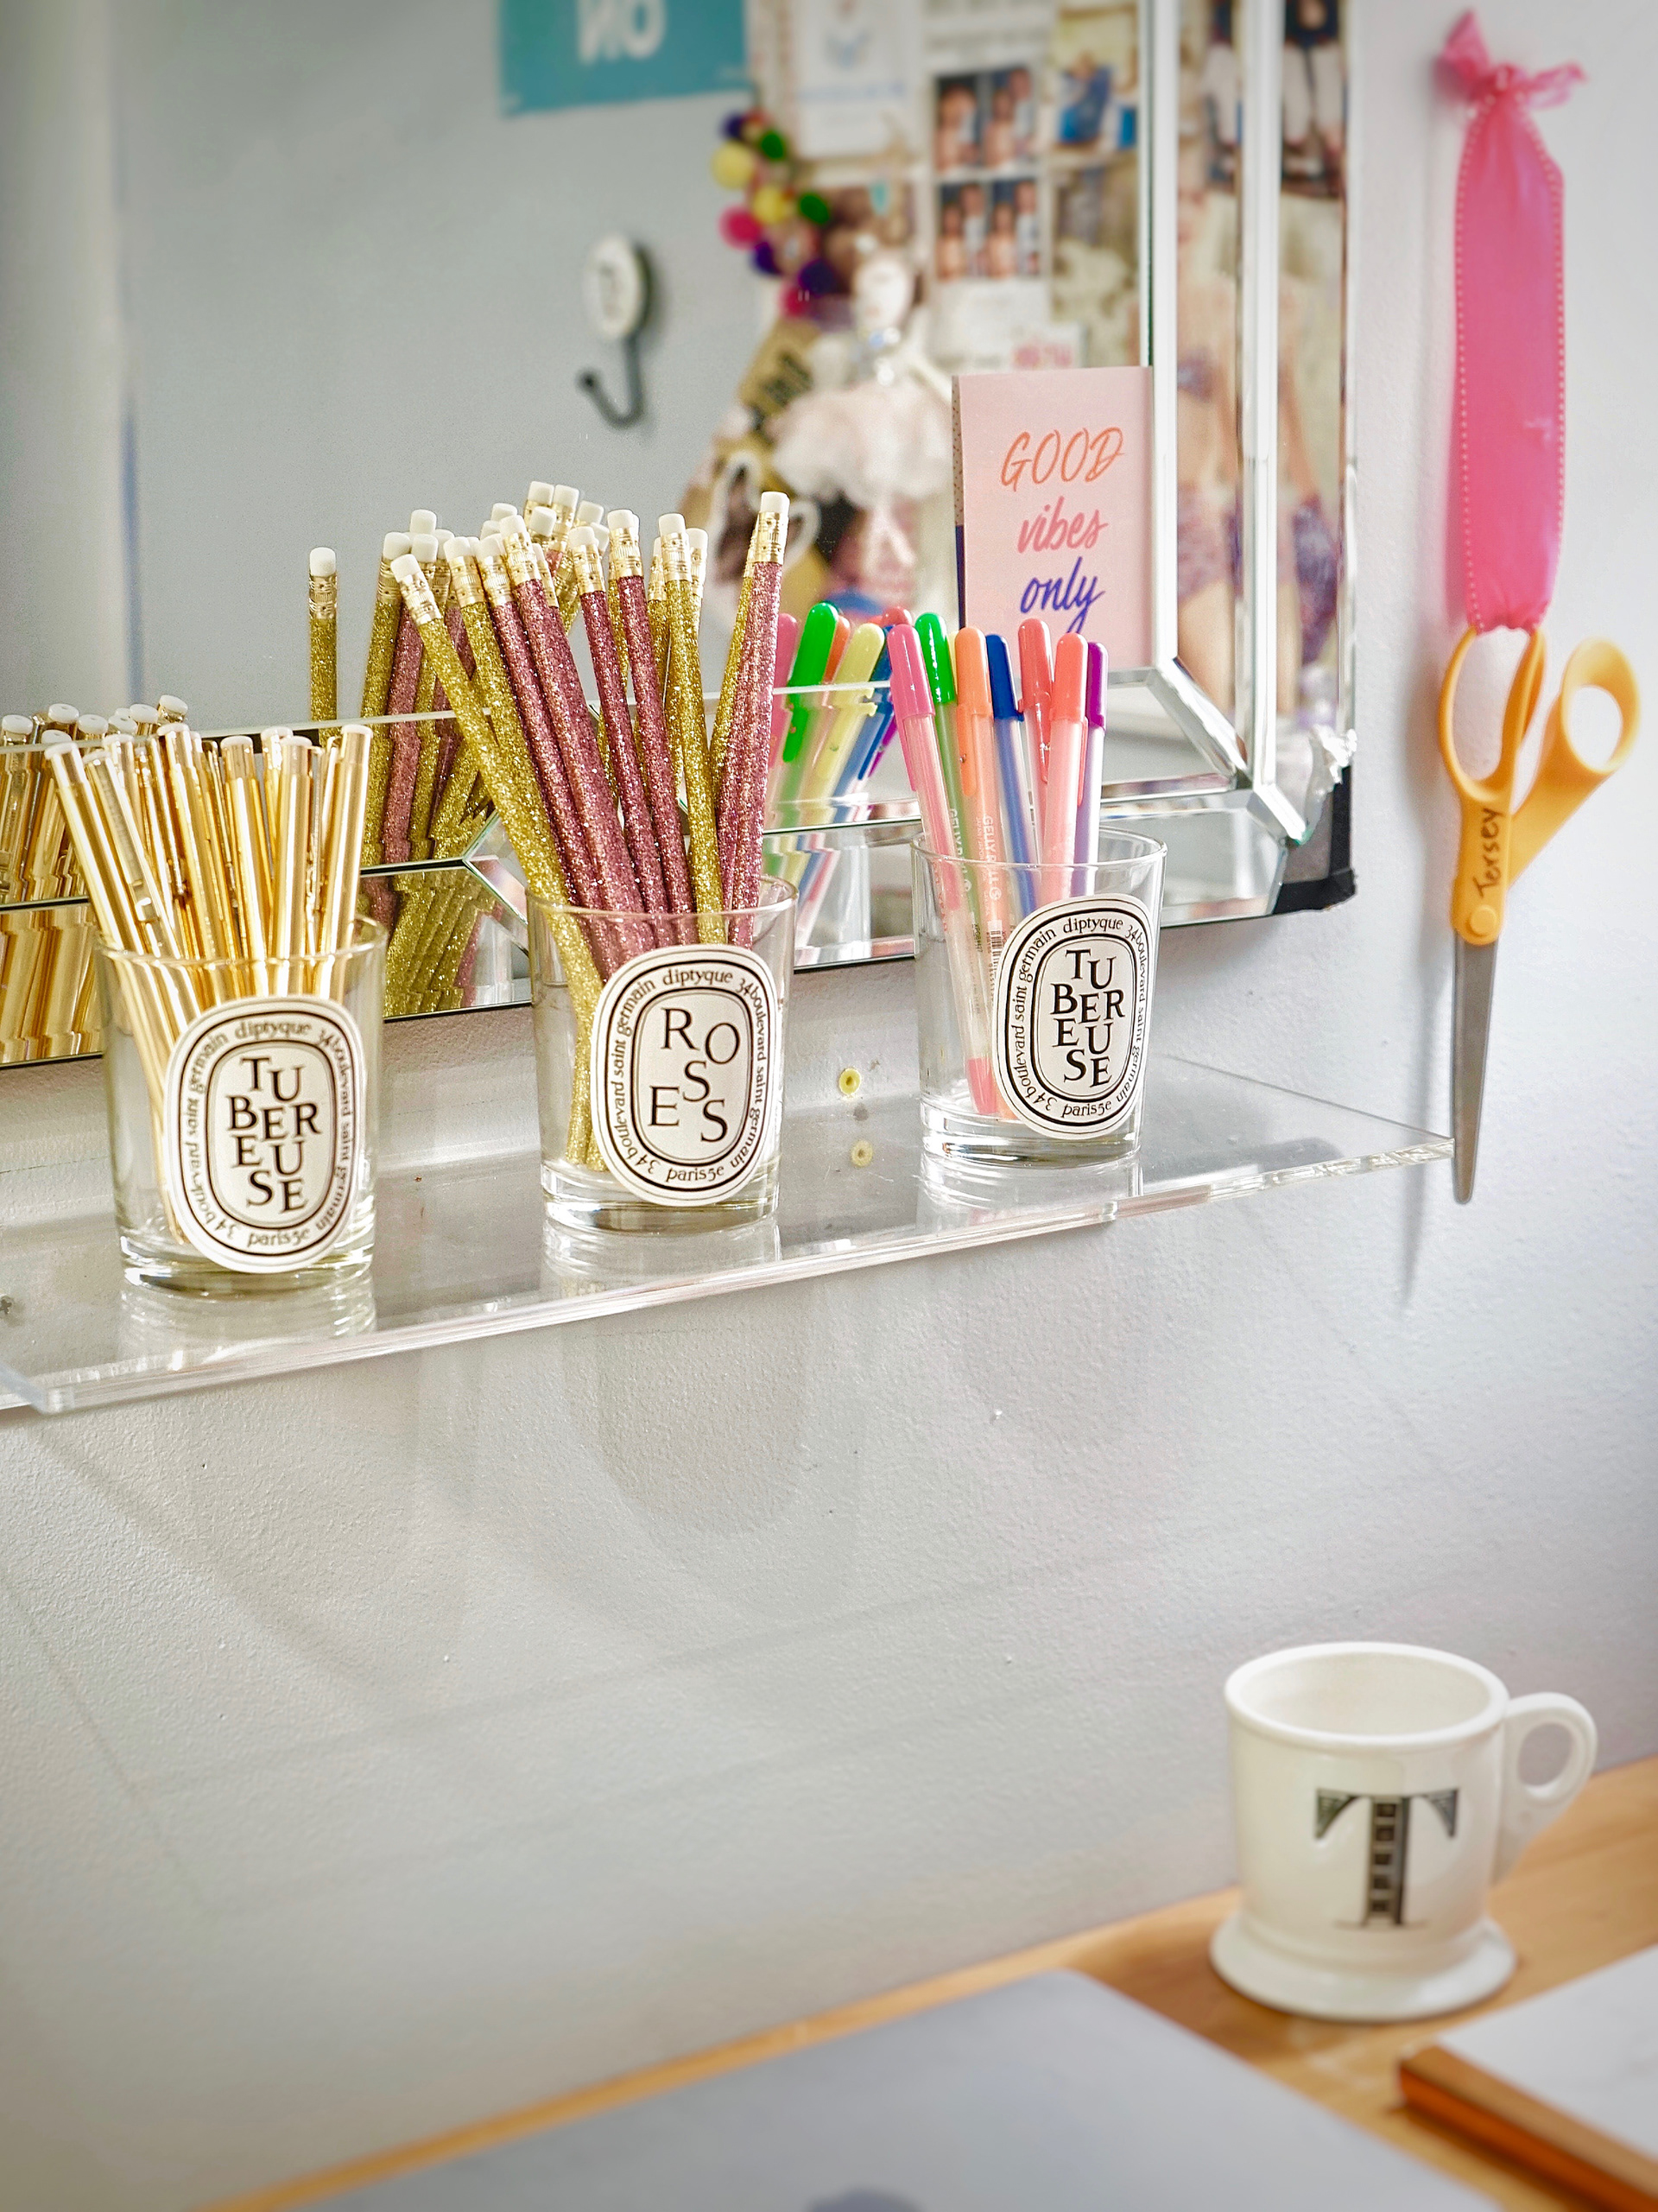
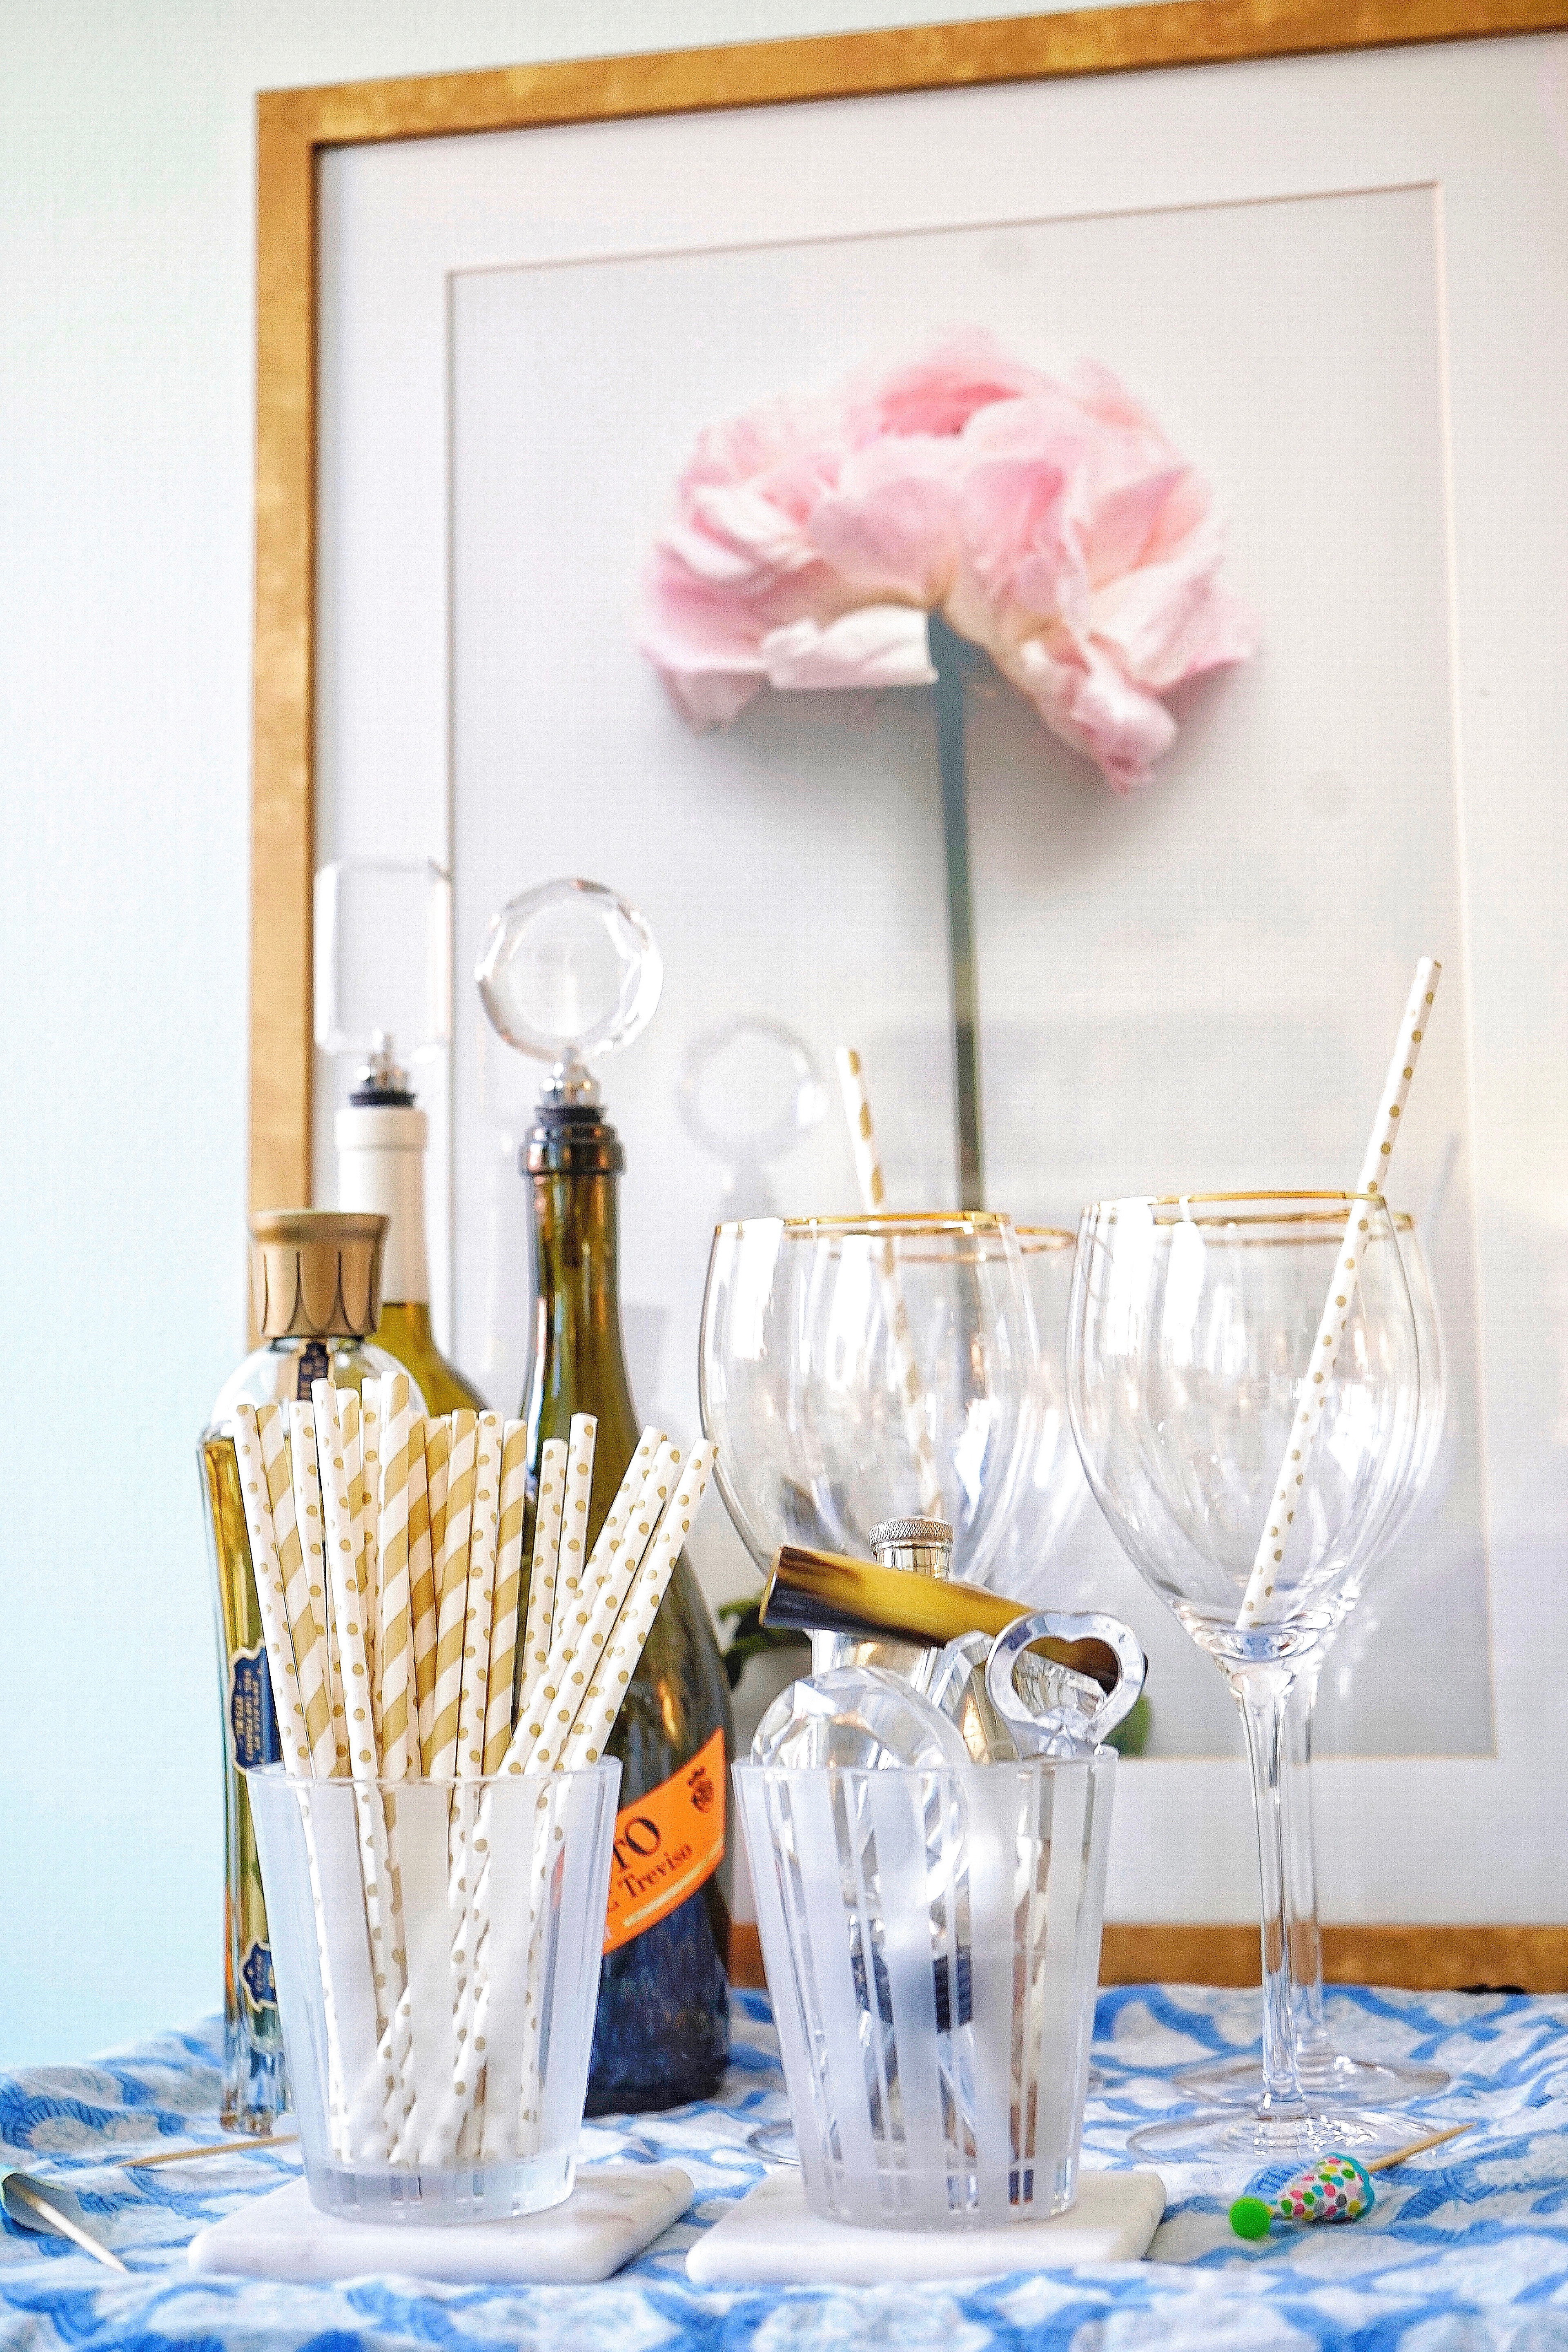
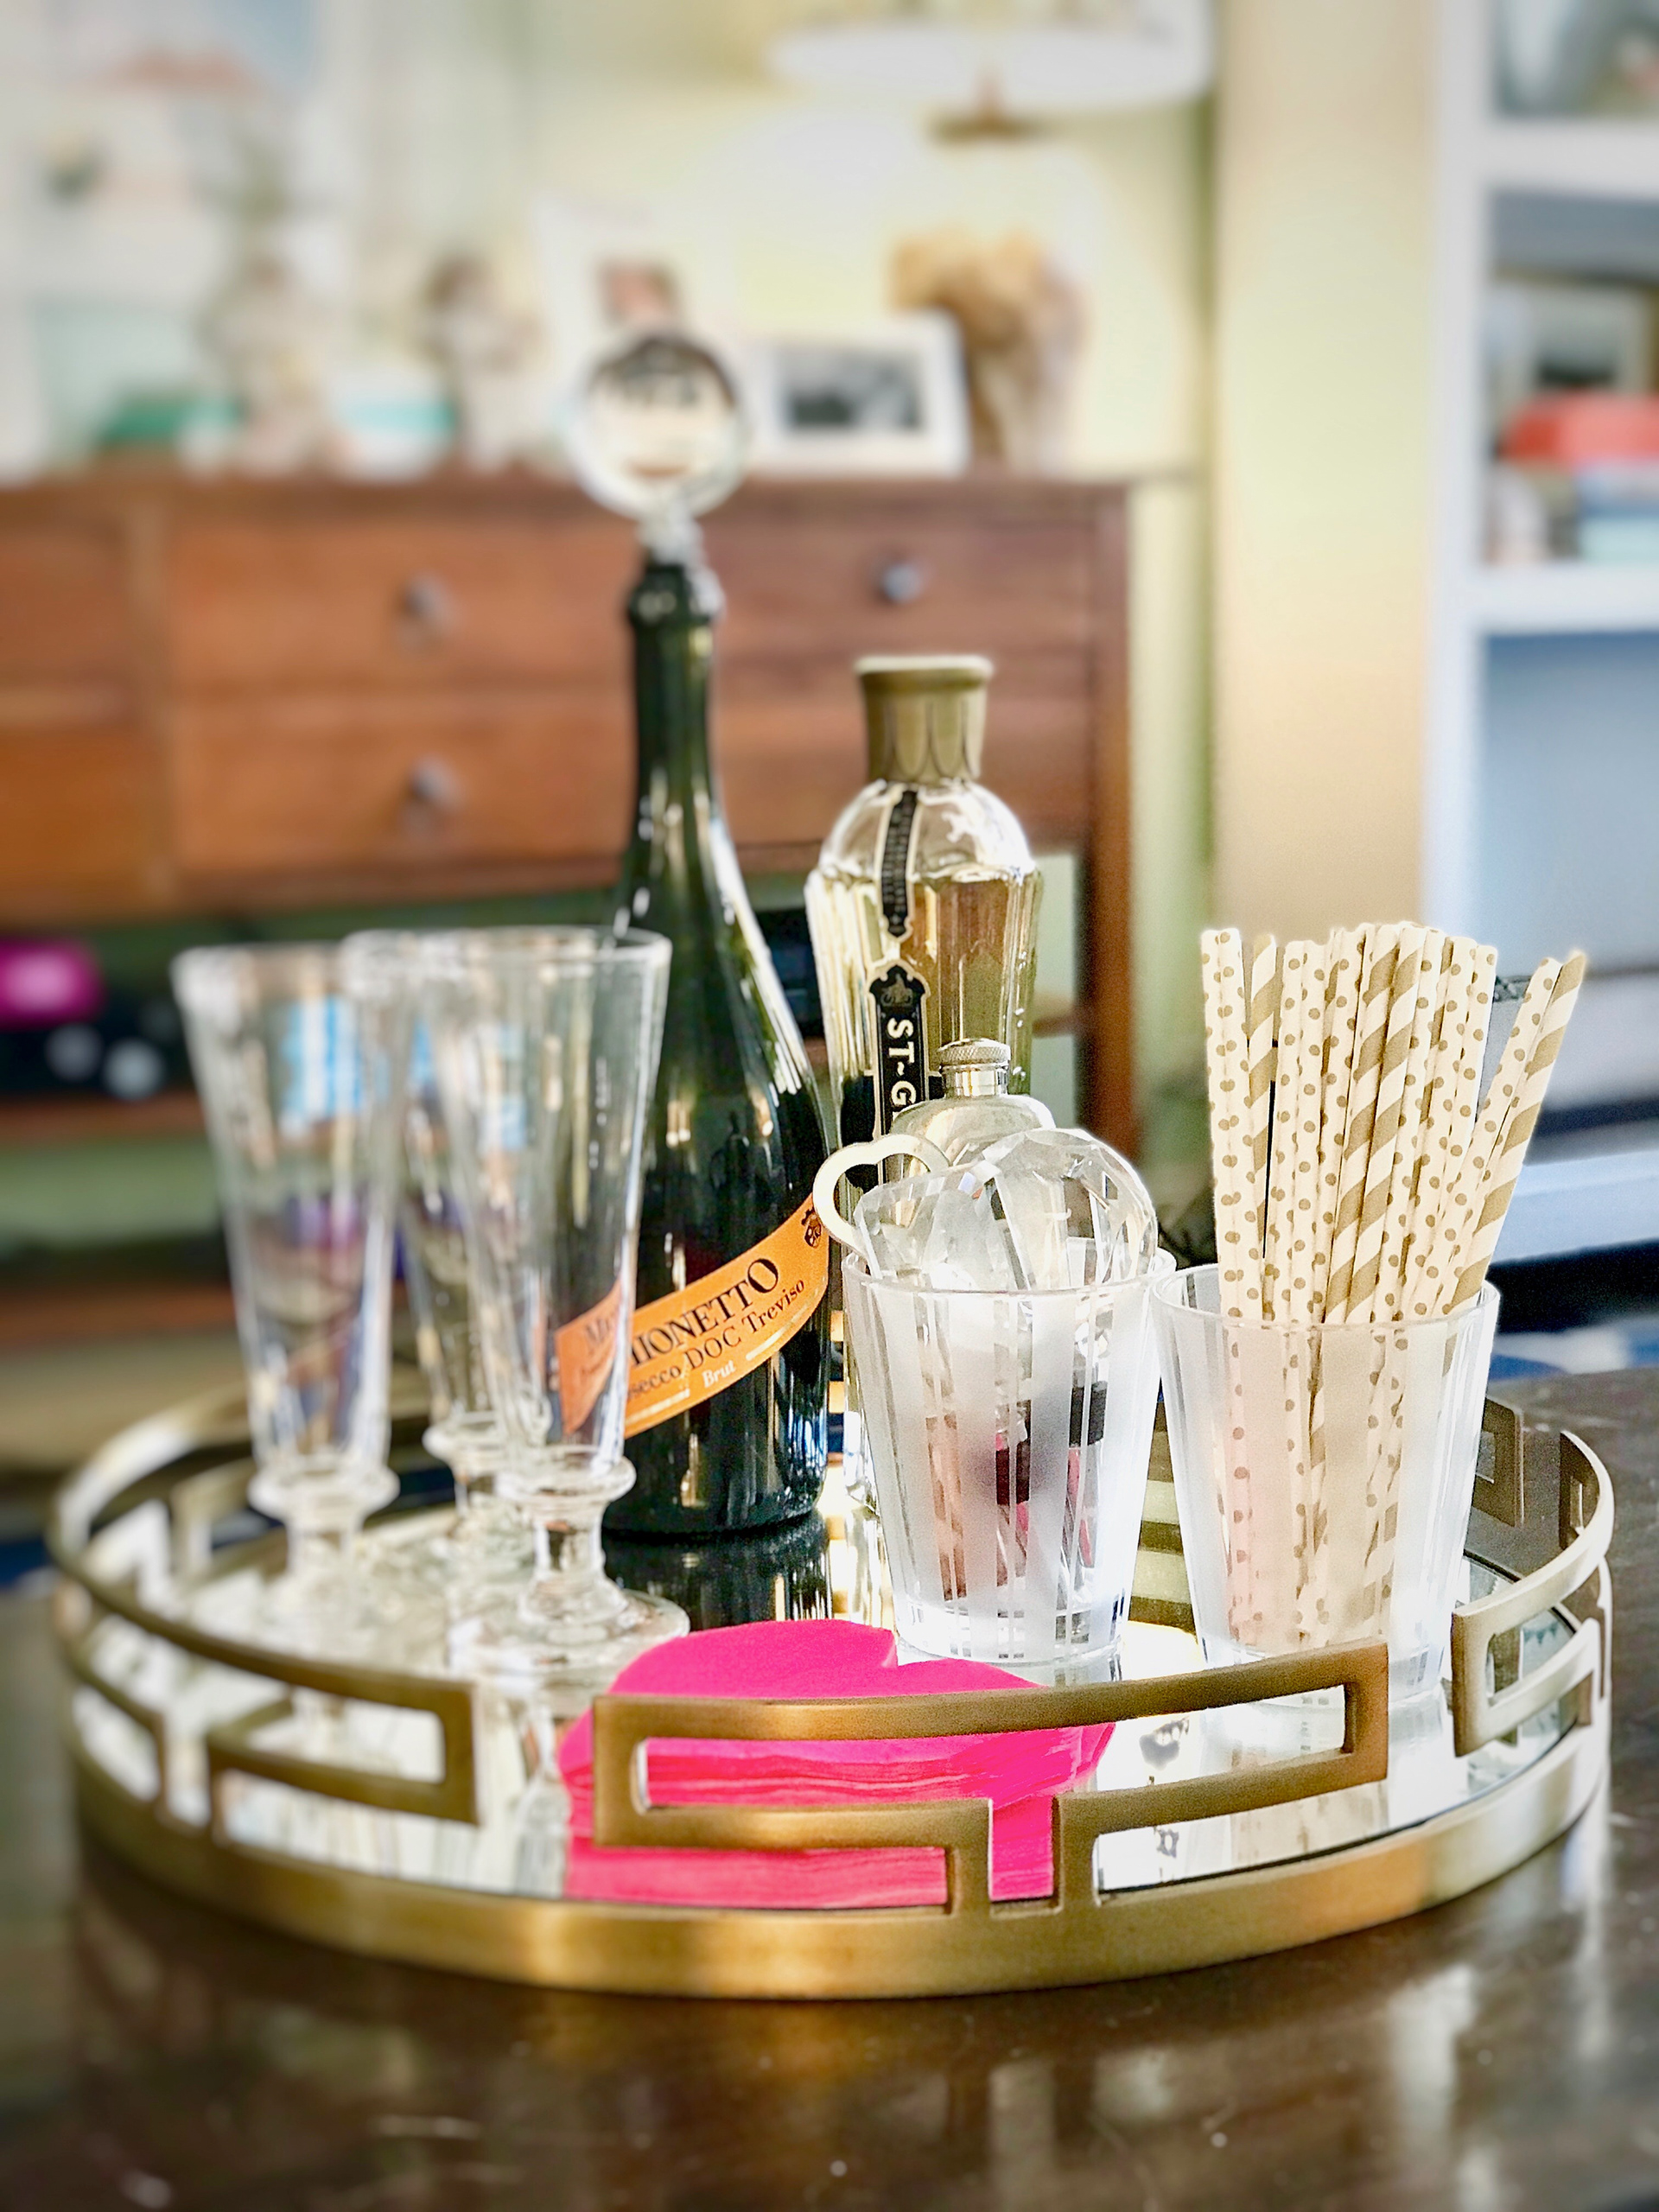
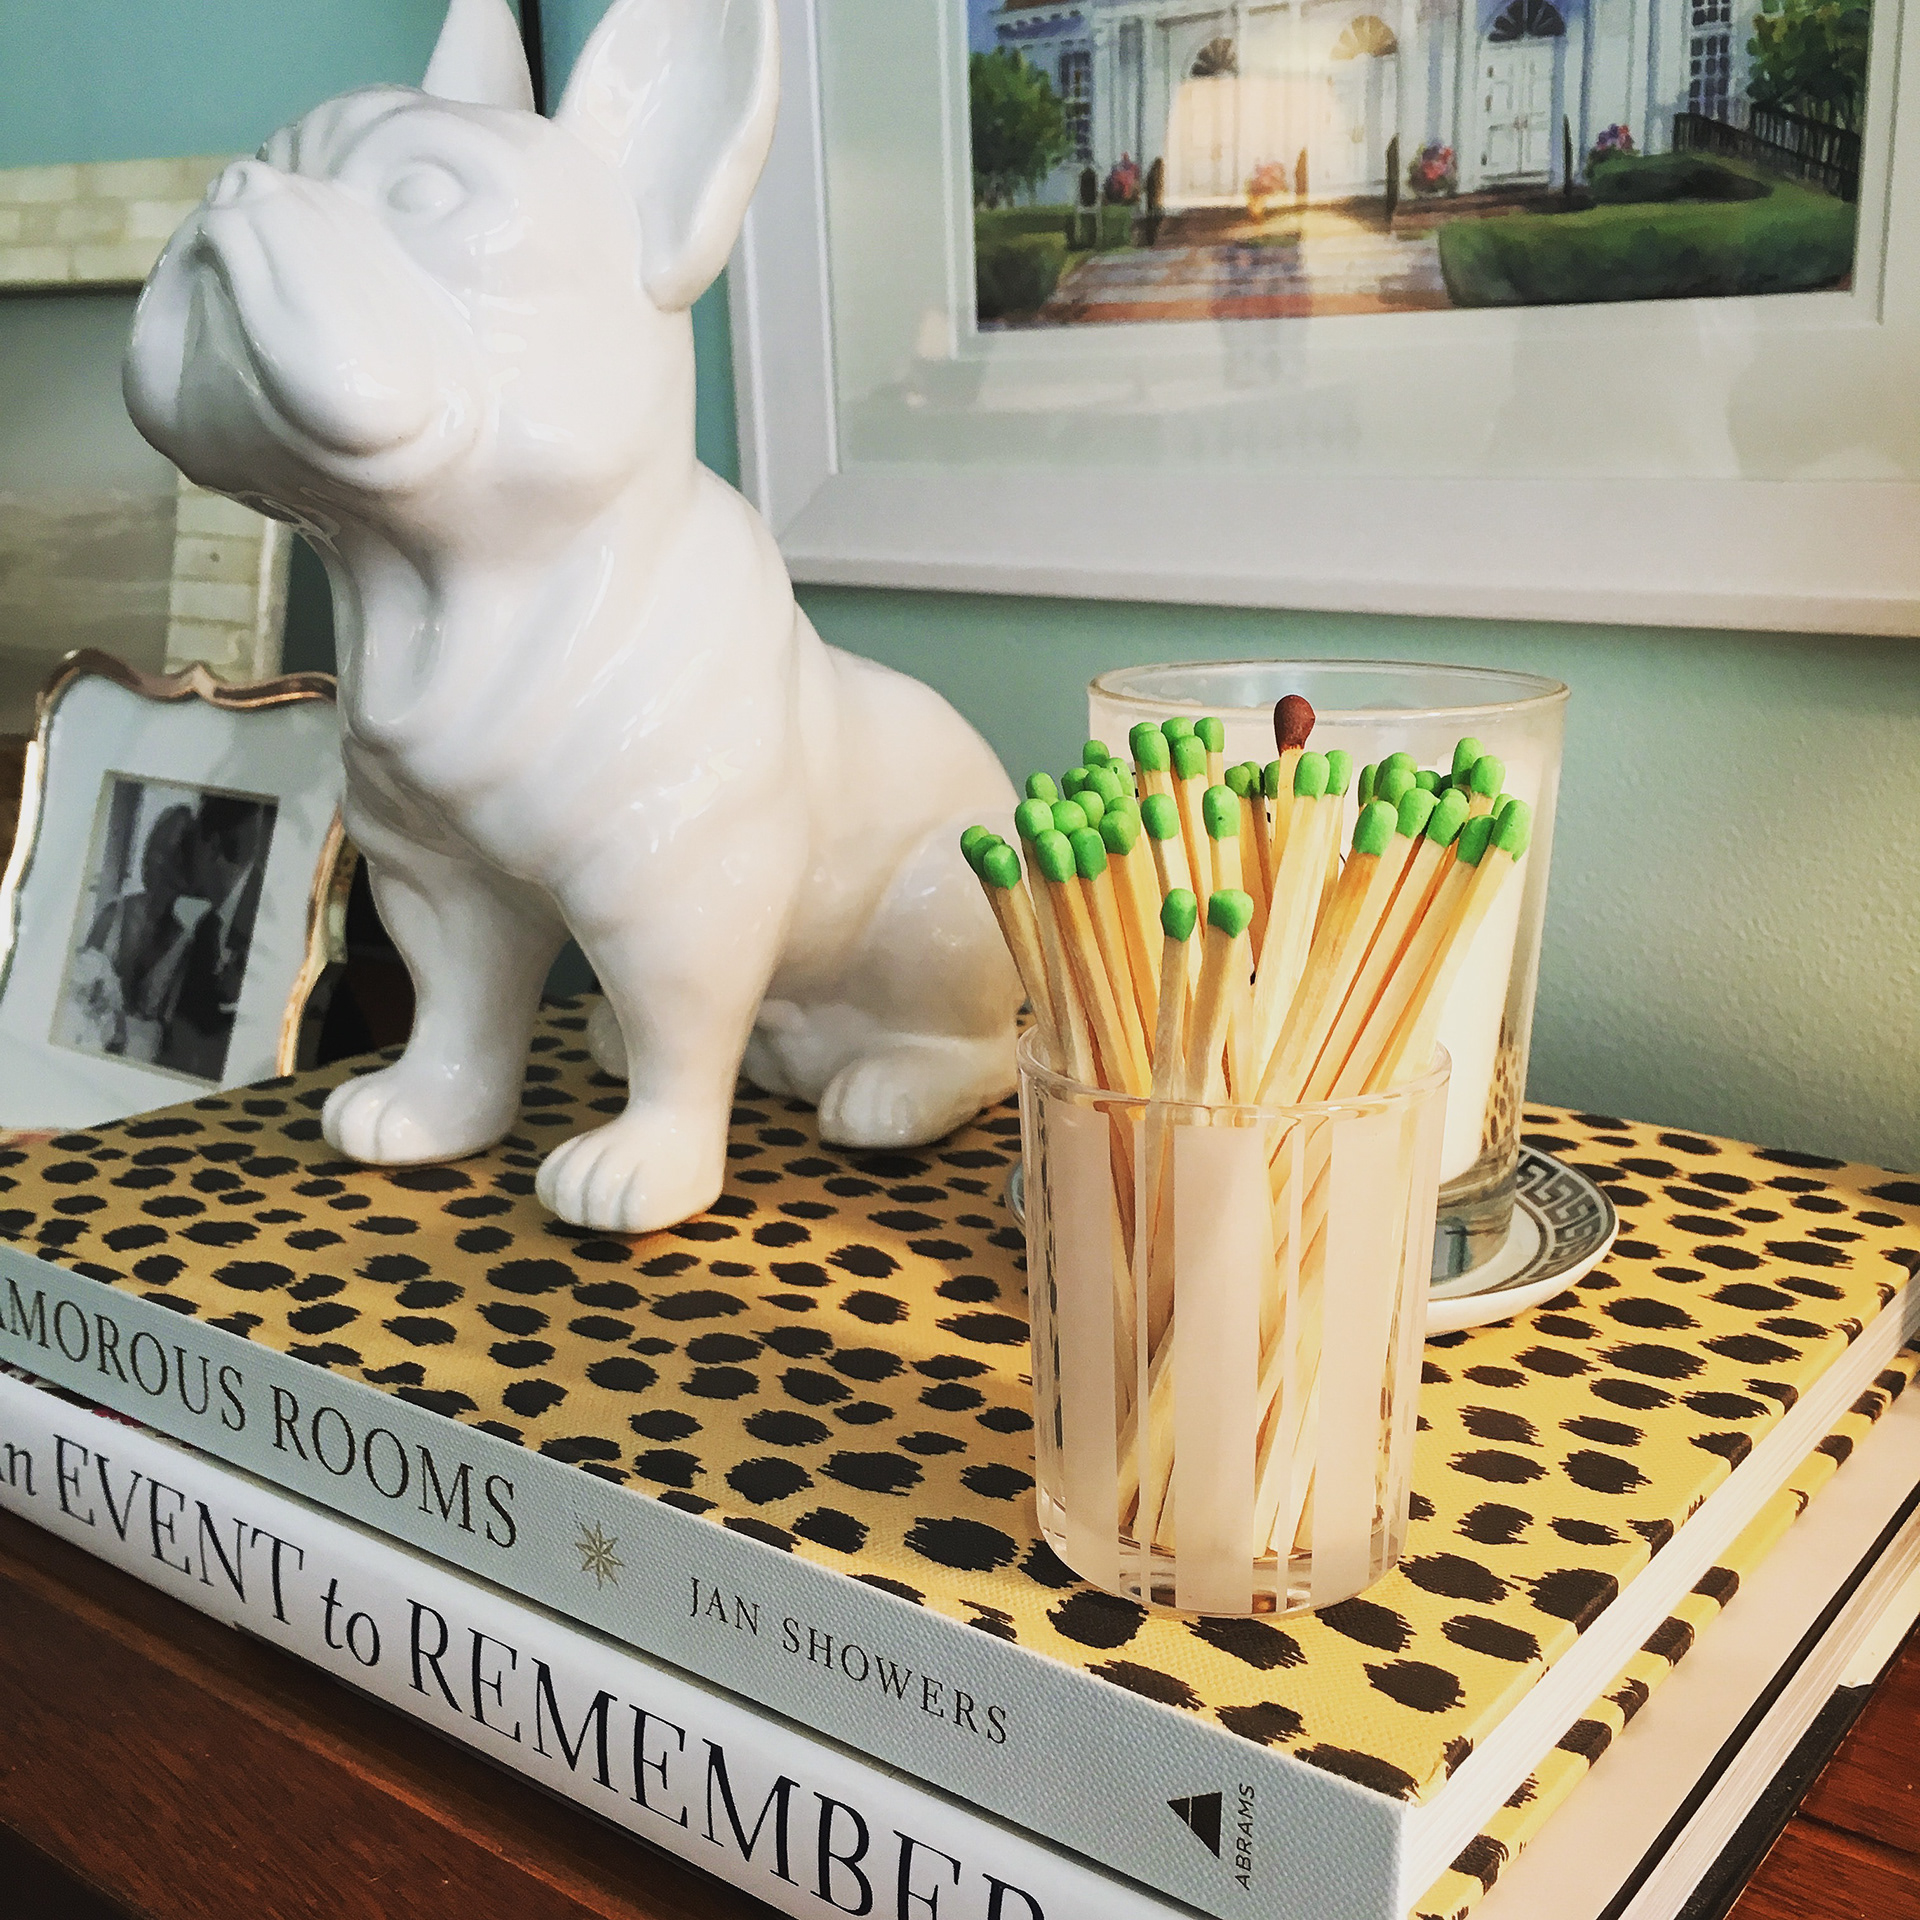
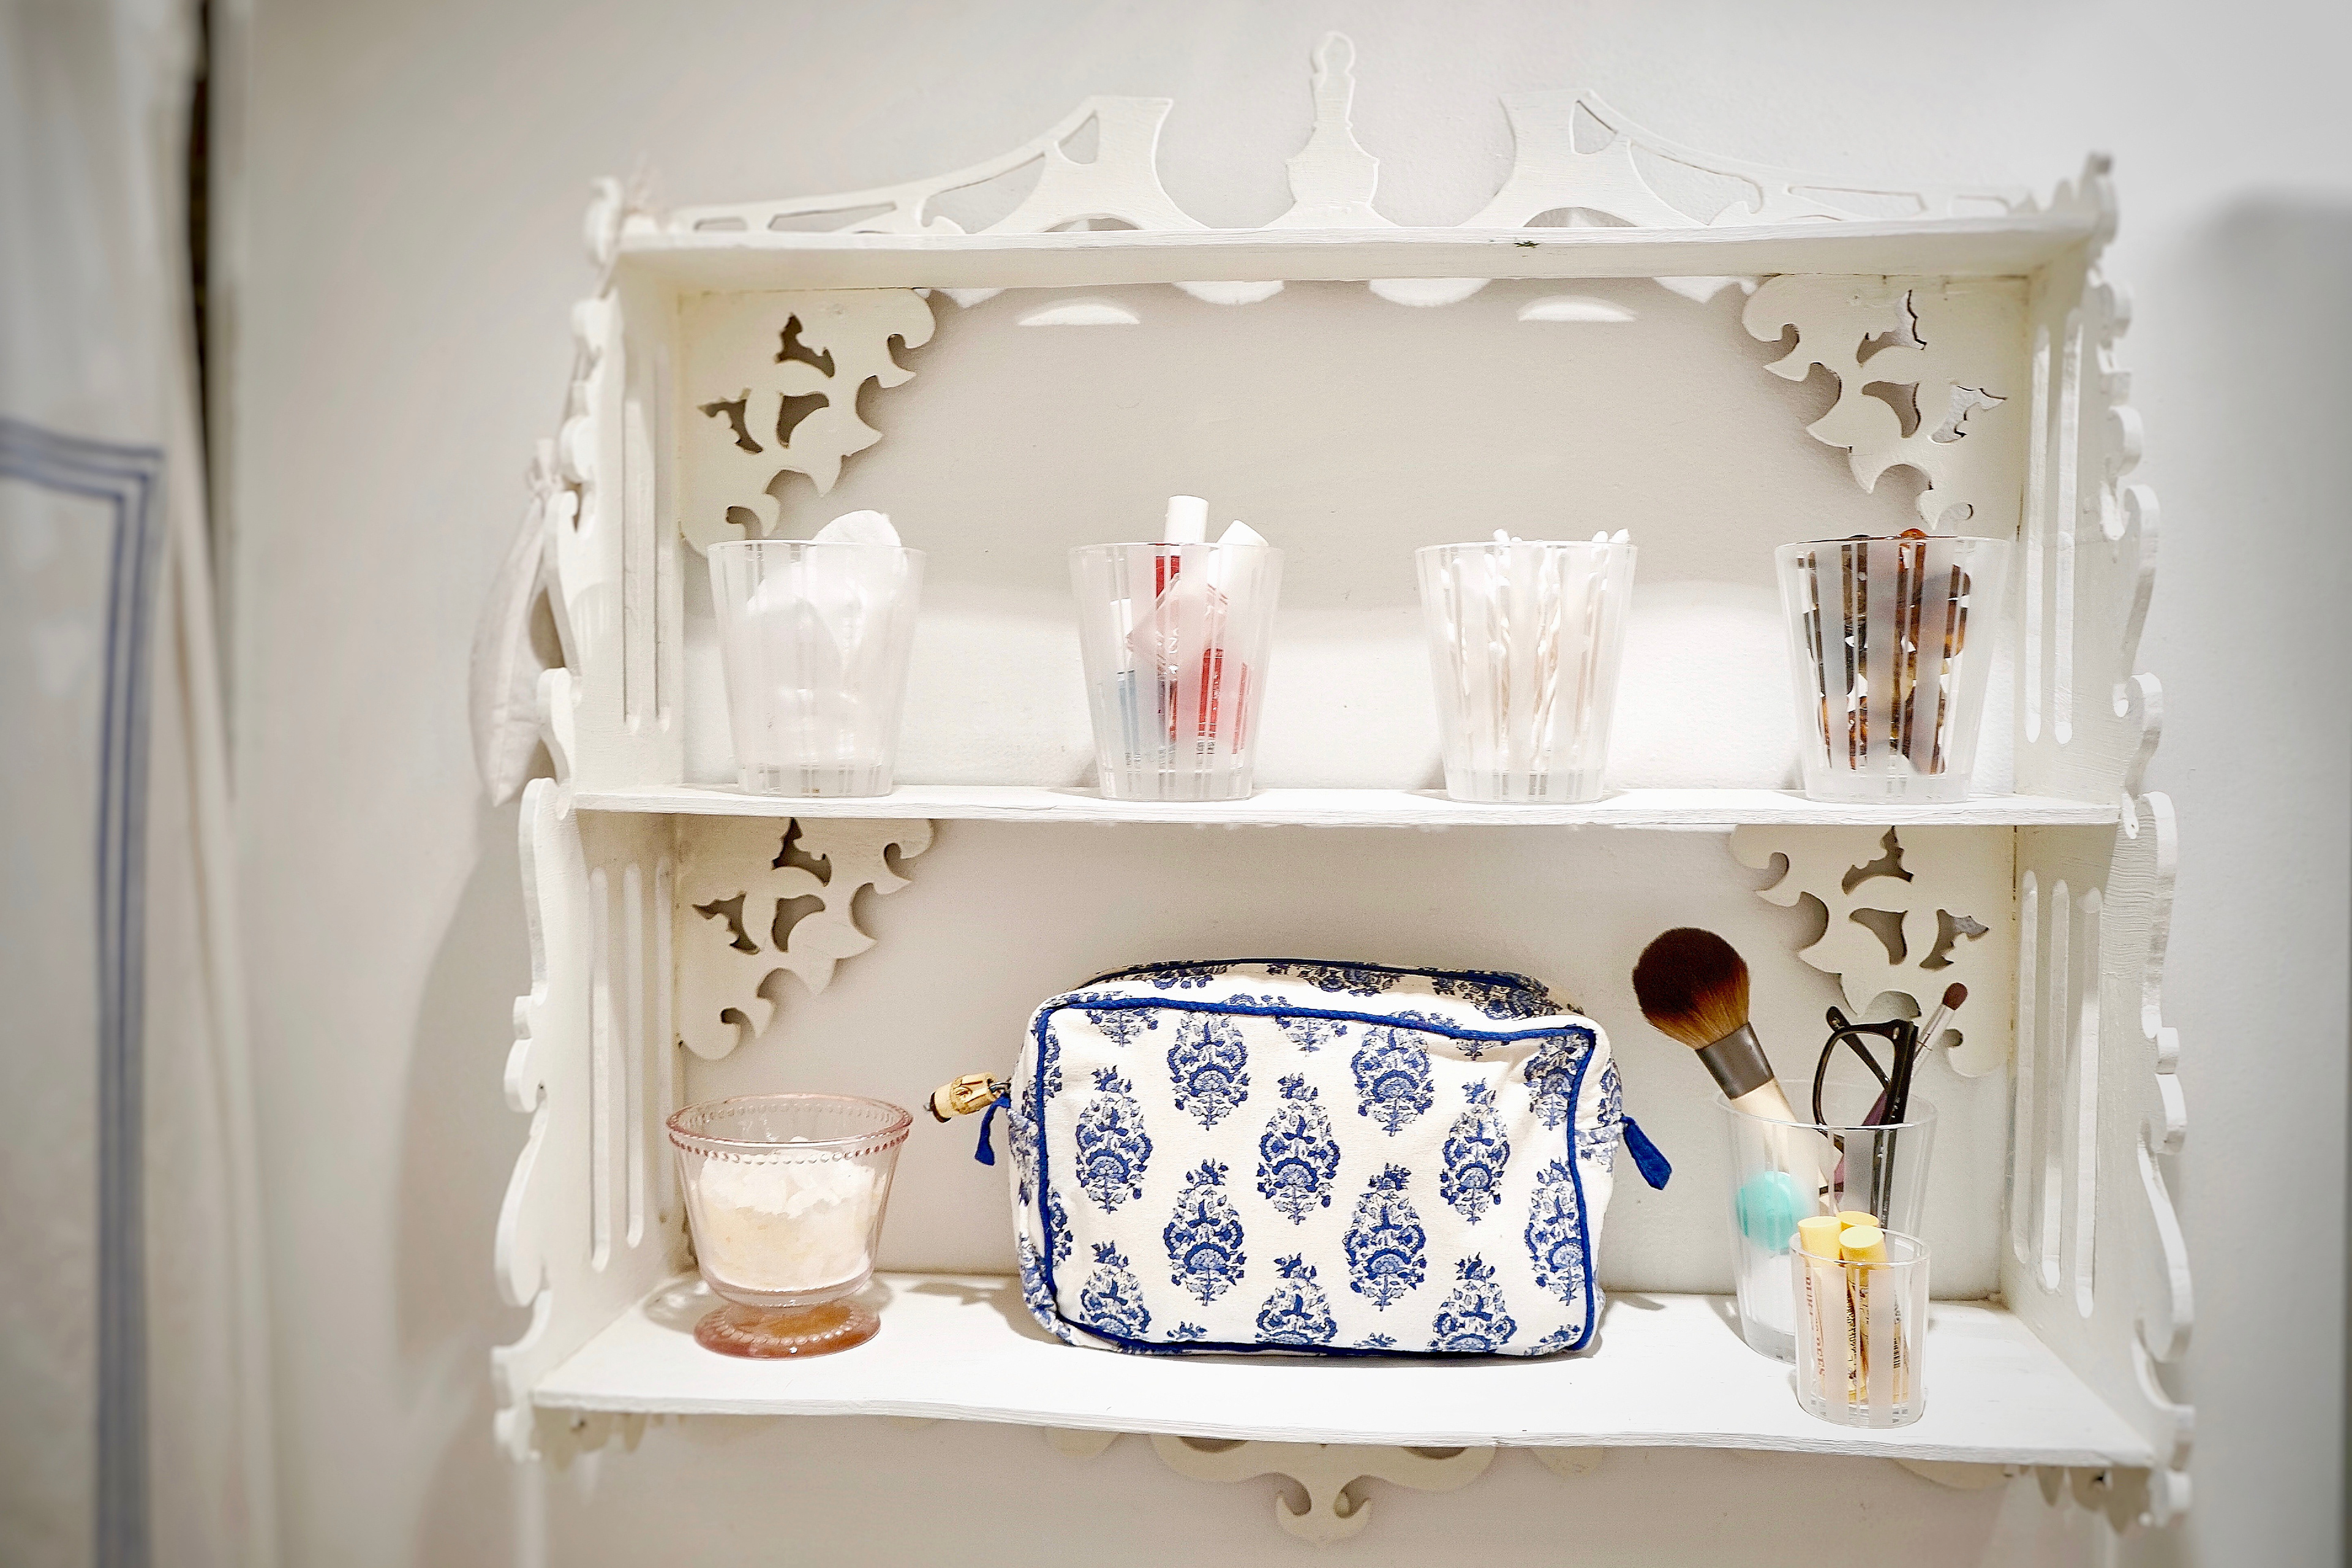
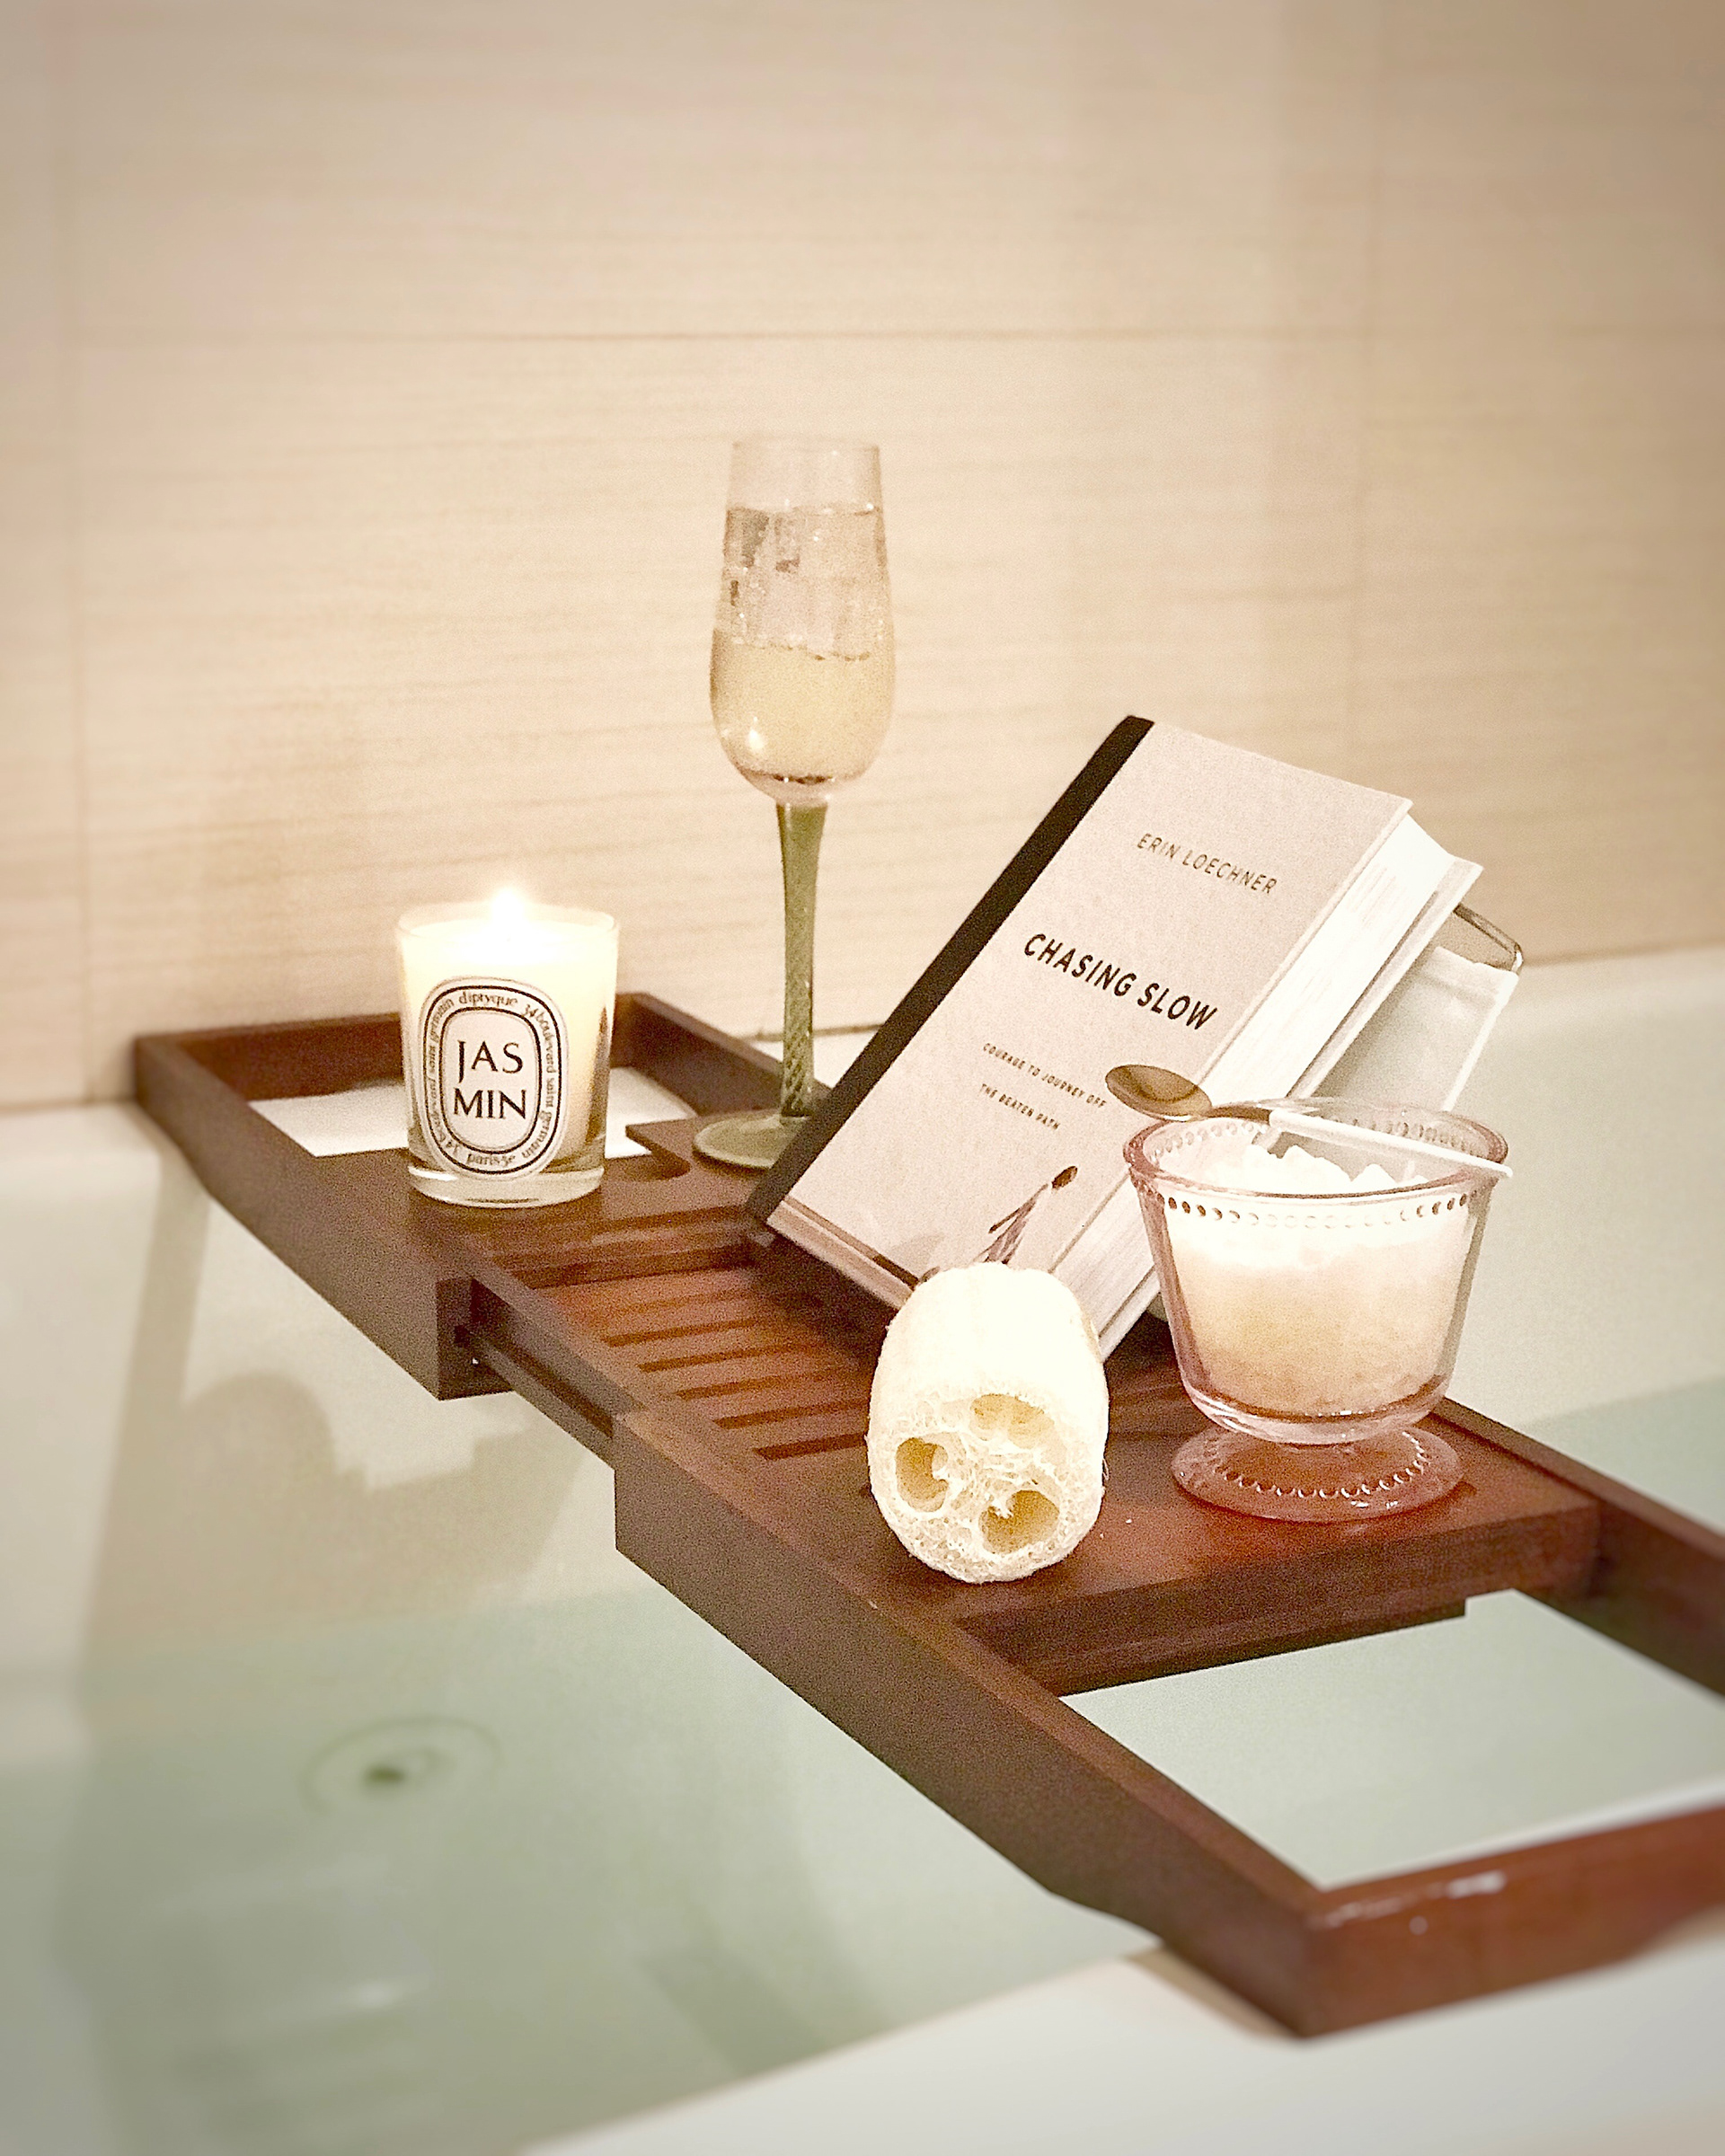
CANDLE JARS REJOICE!
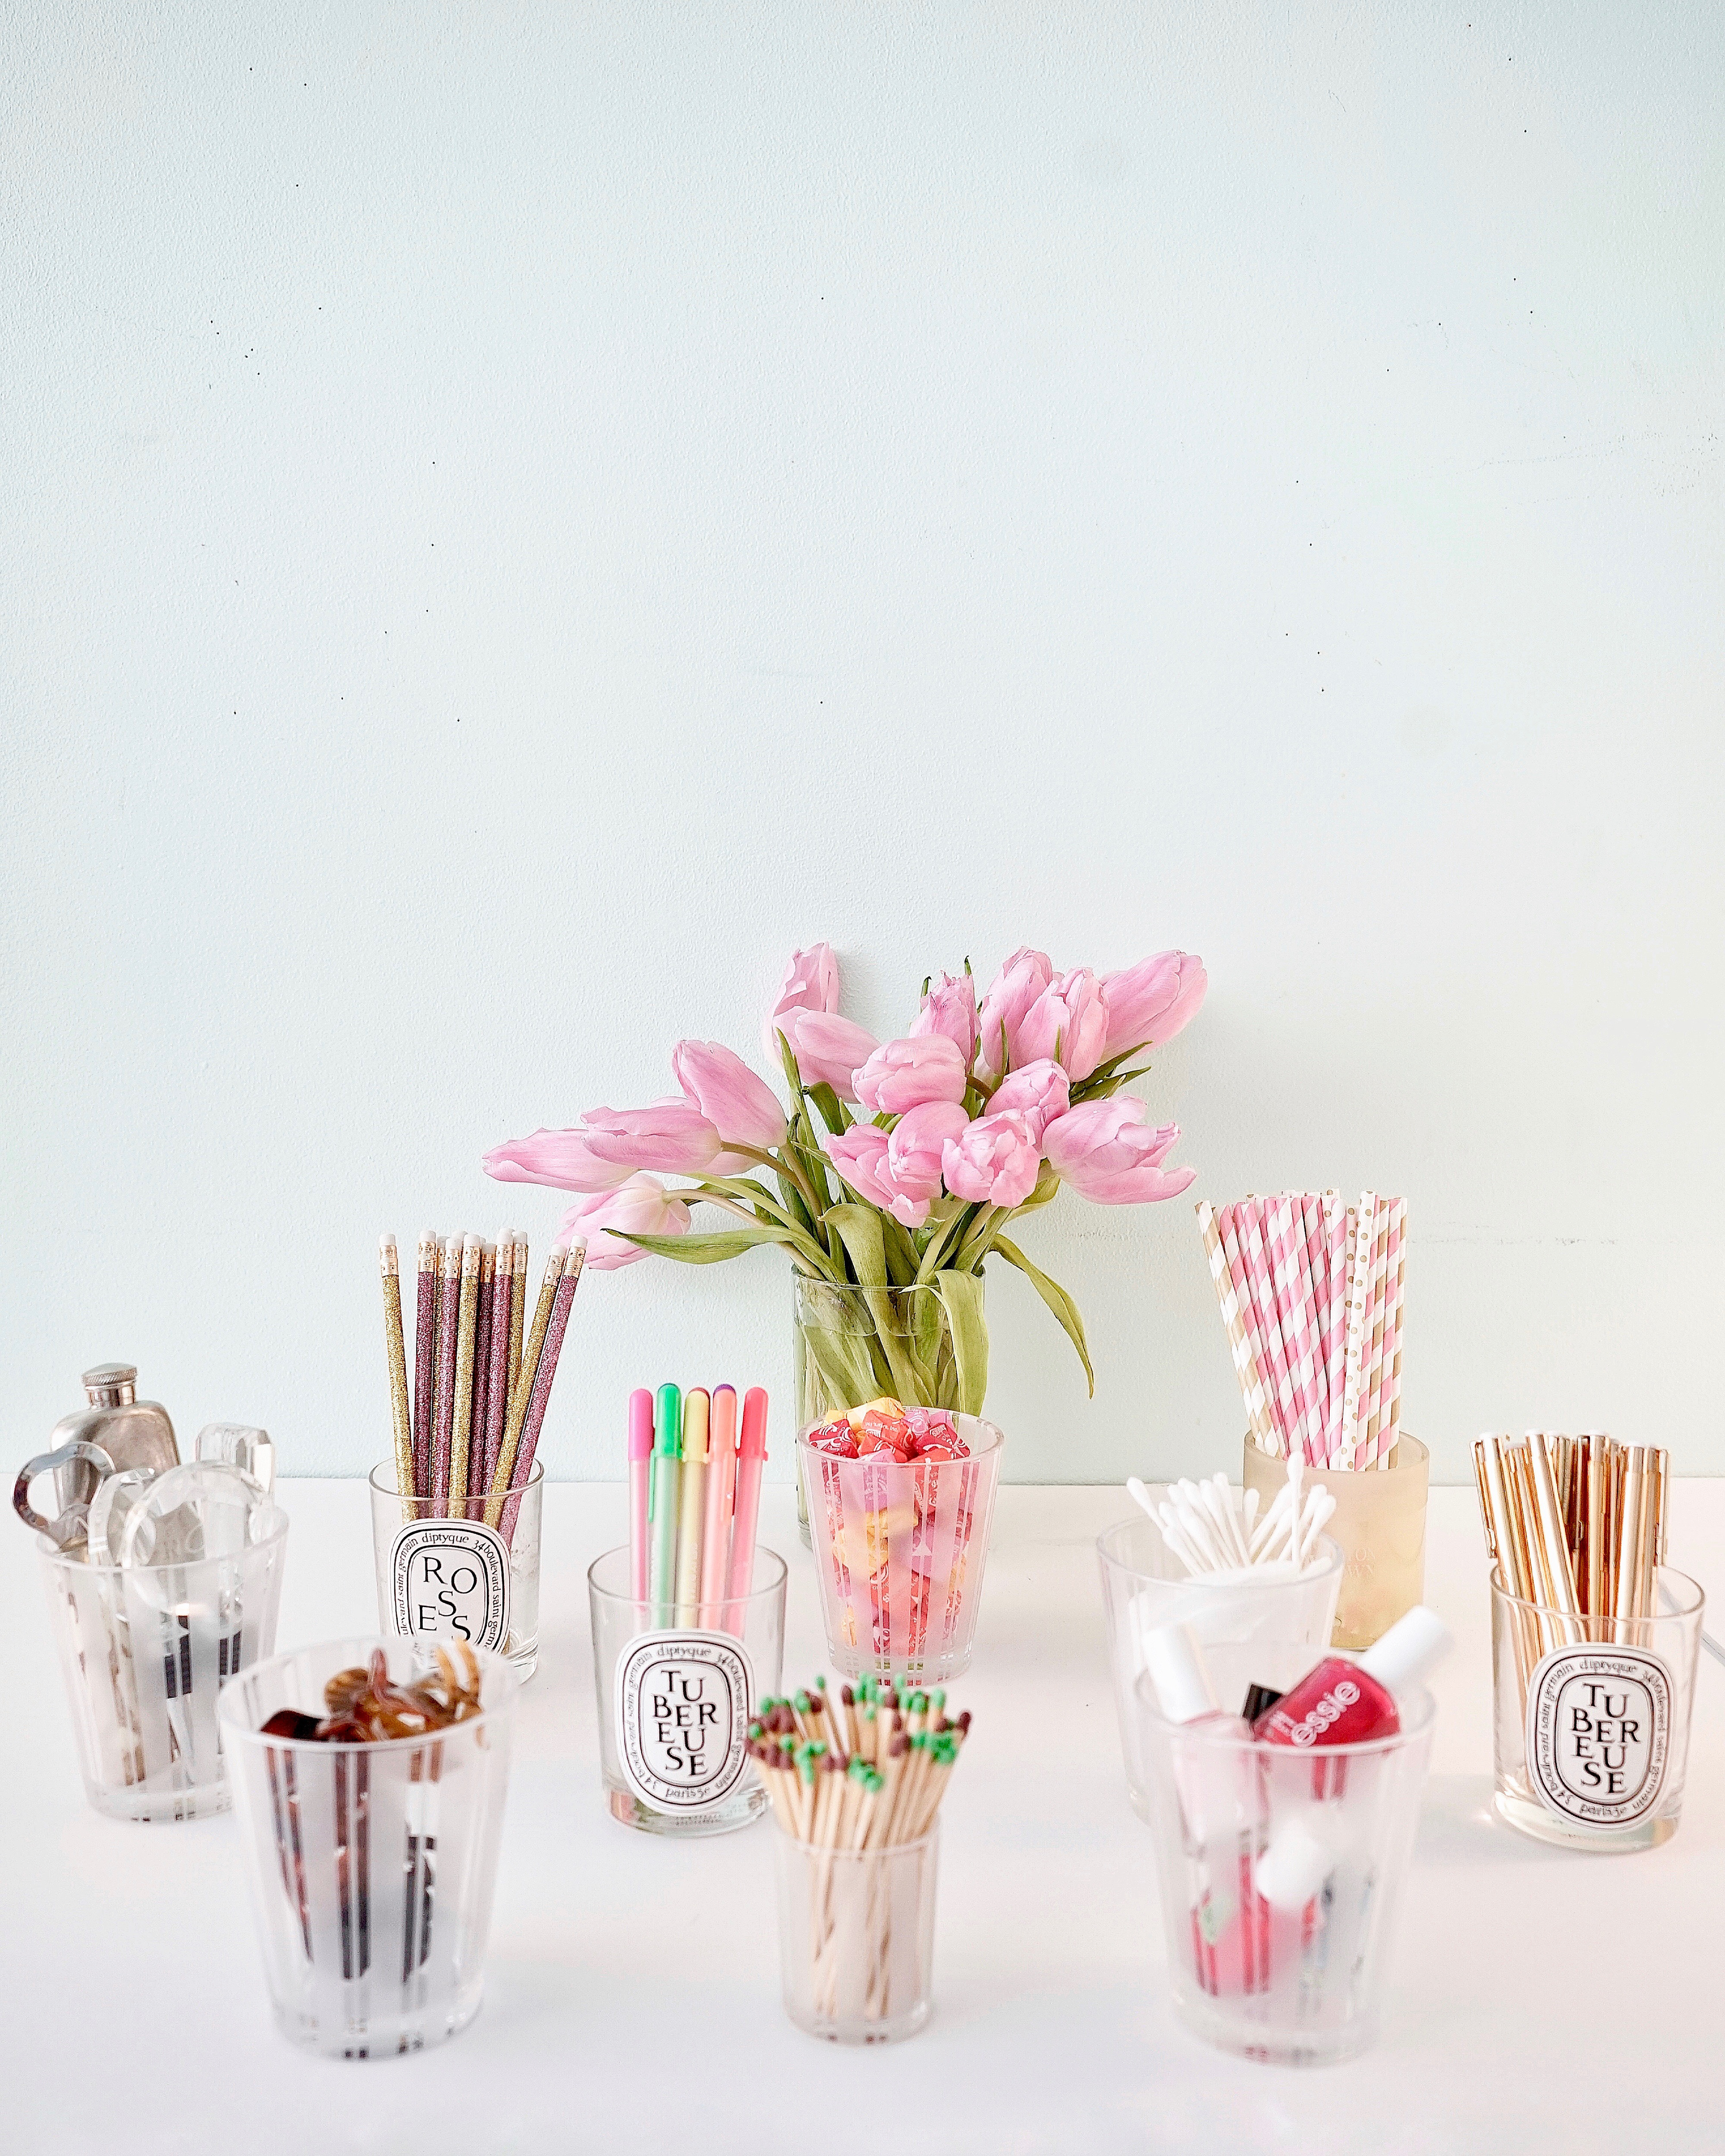
There’s nothing I love more than lighting a yummy scented candle every morning! Before I sit down at my desk, I must have a candle lit as it helps set the tone for a productive and creative day. Over the past year I have (not surprisingly) accumulated a ton of sad, used candle jars with gnarly, overgrown wicks and dark smoke marks along the sides. Whether the candles were purchased in the sale isle at Target or were a splurge-worthy Diptyque candle, I couldn’t bear the thought of throwing them out once they had been used. Call me crazy, but I felt guilty tossing these cute, little jars that had brought me (and my nose) so much joy over the past few weeks.
In the spirit of being more DIY-friendly, I began to make a list of all the ways I could repurpose my candle jars. As I made my list, I started to realize that these so called “un-usable jars” could in fact become a great organizational tool for items around my apartment. After endlessly researching online for different ways to clean your used candles, I have developed the most effective and quickest way to bring my candle jars back to their original glory!
Step 1: Take a dry paper towel and remove smoke residue along the inner sides of the candle jar
Step 2: Place used candle jars into freezer and let freeze for a minimum of 24 hours
Step 3: After 24+ hours in the freezer, remove and let set for 10-15 minutes
Step 4: Take a sharp steak knife and cut into the frozen wax from multiple angles, in order to loosen up the mix
Step 5. If it doesn’t come out in chunks, take a spoon and scoop out the remaining bits of wax and metal wick holder
Step 6: Clean out empty candle jar with hot water, soup and a sponge
Step 7: Dry off with a cloth and you’re good to go!
For candle jars with tough, sticky labels, I find the best way to remove them is by placing the jars in a bowl of hot water, soap and a few cups of white vinegar after 15 minutes. The hot water and soap helps to loosen up the paper label, making it easy to rub or peel off. Since white vinegar is somewhat acidic, it helps to dissolve any glue holding the label to the jar for a clean, polished and completed look!
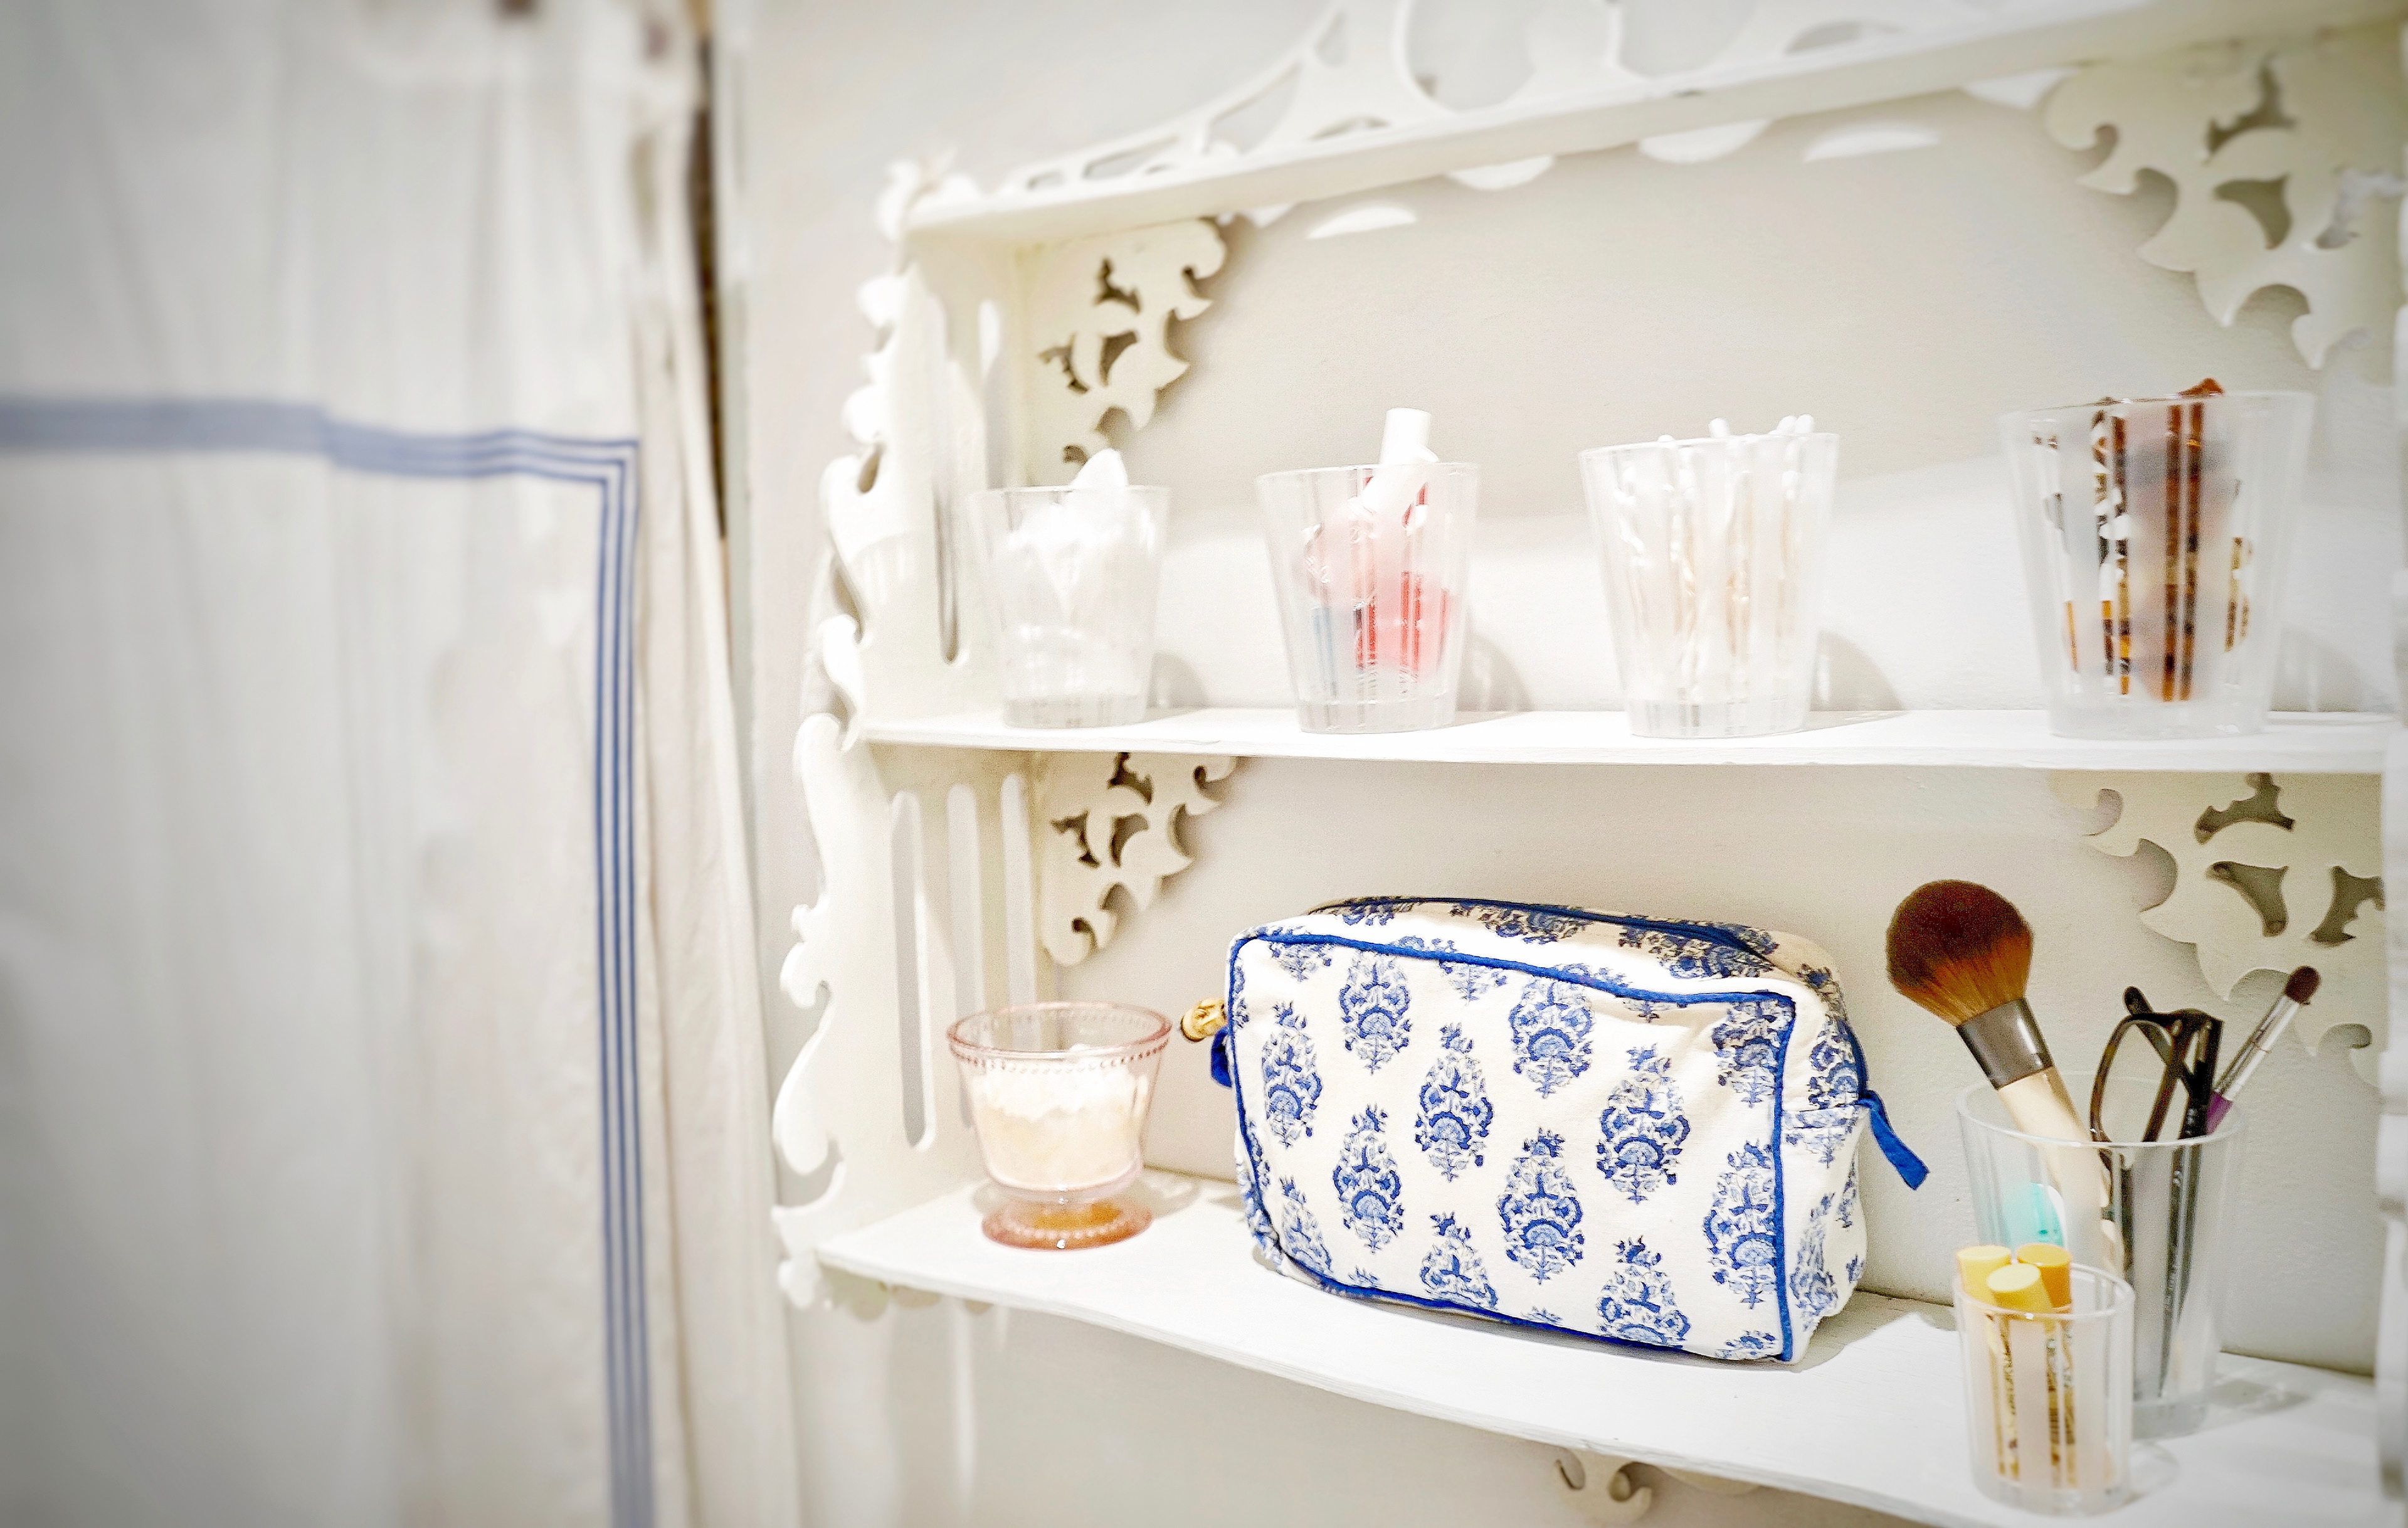
While I literally use my candle jars for everything here's a quick list of my favorite uses - matchsticks, loose change, makeup brushes , lipsticks, bath salts, pens/pencils, cotton balls, flower vase, succulent pot, candy jar, hair accessories, bar accessories, bedside table organizer.

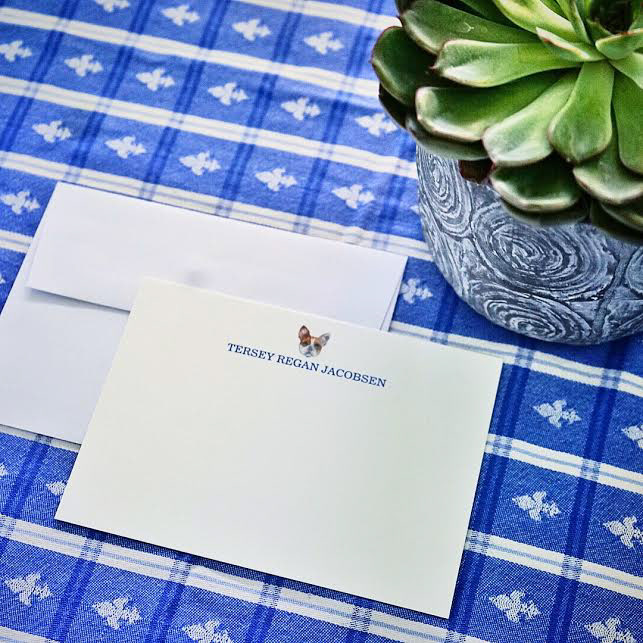
ADULTHOOD 101: PERSONALIZED STATIONARY
After getting married last summer, I became increasingly obsessed with personalized stationary. While my mother warned me several times about the lengthy amount of thank you letters I’d have to write over the upcoming months, I never realized how much it would actually be. And let me tell you, it’s A LOT.
I thankfully still had plenty of beautifully designed stationary from Merrimade Stationary that was given to me as present from my parents years ago. While I wasn’t too thrilled about the gift and secretly wished they were a pair of Tory Burch flats, they eventually came to good use after I graduated college. The personalized note cards are simple yet classic and got me through majority of my wedding-related thank you notes.
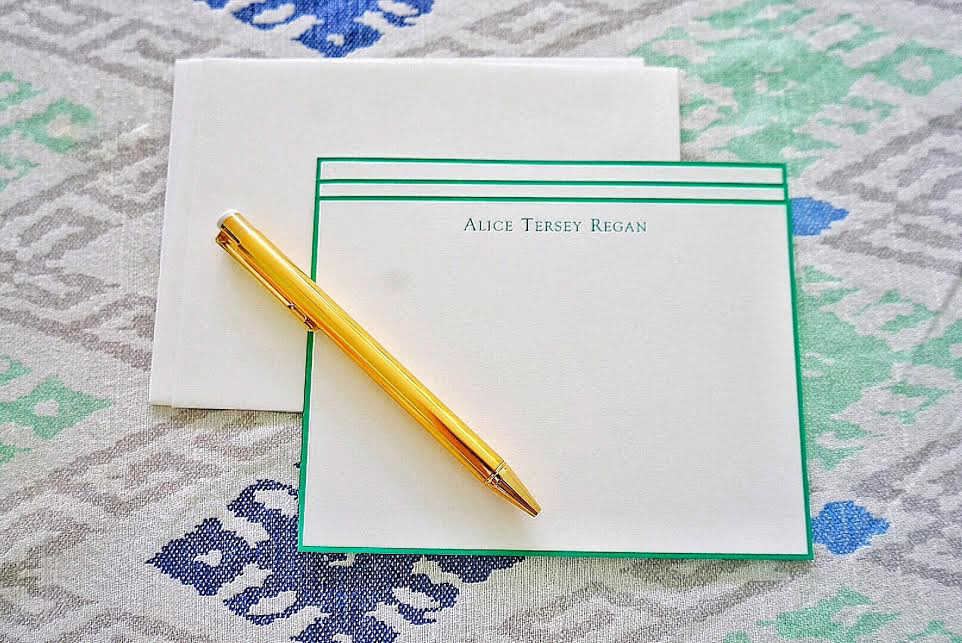
After the wedding, one of the first things I did to embrace my married name was to purchase new stationary. I searched tirelessly through all the lovely layouts from Merrimade Stationary and Crane & Co., but with no success. I wanted something unique and personal while still encompassing that timeless look and feel.
Cue my frenchie’s adorable face that was water colored on my wedding map and the rest is history! Designed by the insanely talented Kearlsey Lloyd, I took Molly’s water colored face and created my own custom stationary using my favorite website, Zazzle.com. They were reasonably priced and I am so pleased with the final result.
Here's to writing many more thank you notes in the future!
THE SCOOP ON DOGGIE TRAVEL

All doggie parents (like regular parents) need a weekend away from their four legged babies from time to time. When my husband and I travel to places where we cannot bring Molly, we board her at Unleashed Pet Resort and Spa located in Jersey City. The facilities are amazing, the staff are super friendly and make you feel as though you and your pooch are family right when you walk into the door. Molly loves going to Unleashed for a good old ‘doggie weekend on the town’!
When it comes to traveling, I have always been incredibly thorough when it comes to packing and the same is true when it comes to preparing for one of Molly’s weekend getaways. Whether we’re boarding her at Unleashed or are lucky enough to be visiting a location where Molly is welcomed, I always include items take make for a fun make a fun-filled, accident-free weekend.
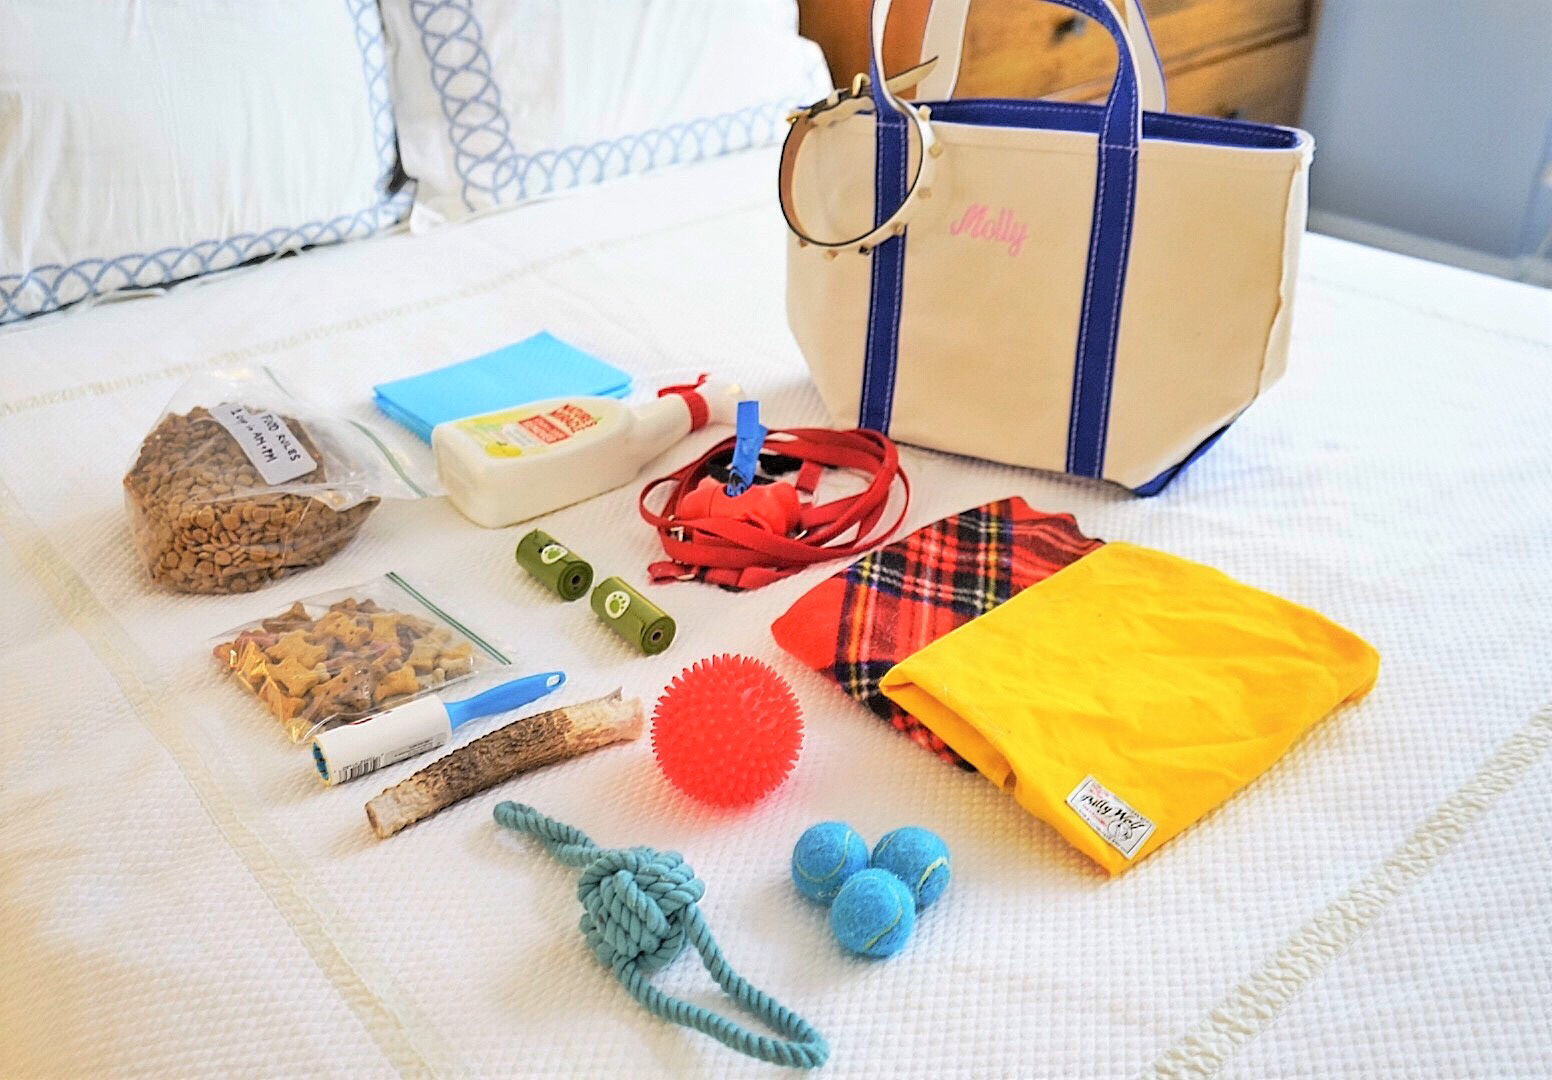
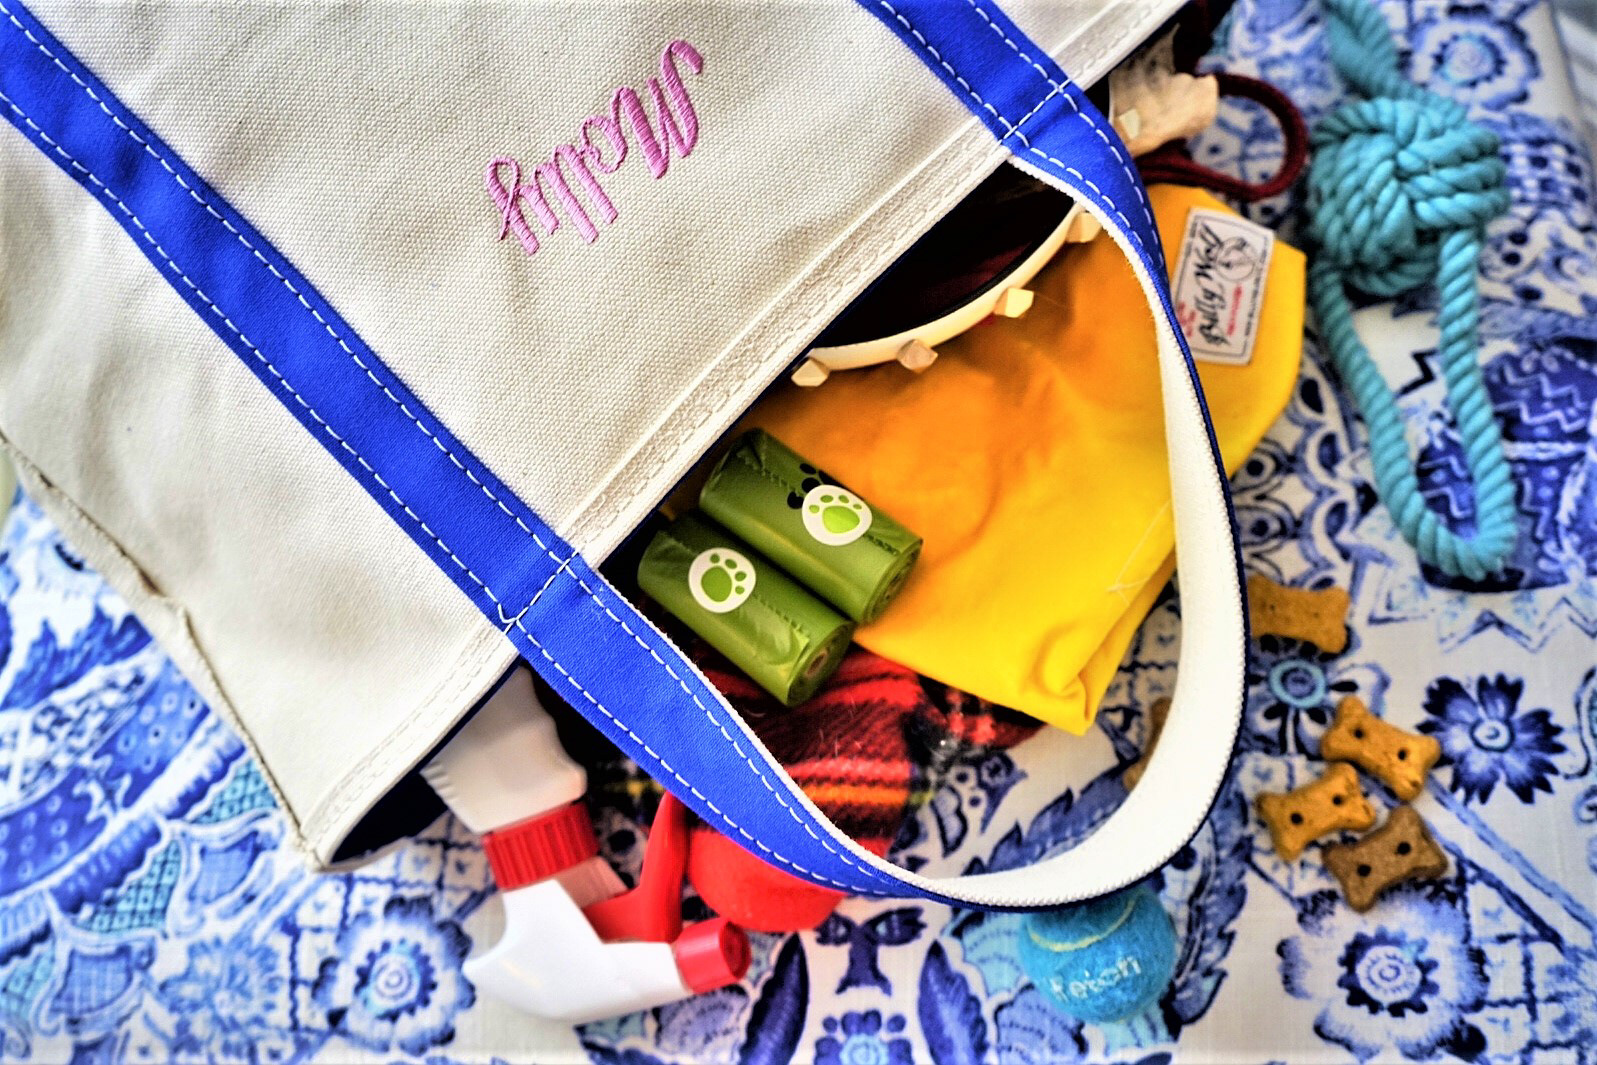
FAVORITE TRAVEL BAG: Love Thy Beast Canvas Pet Tote
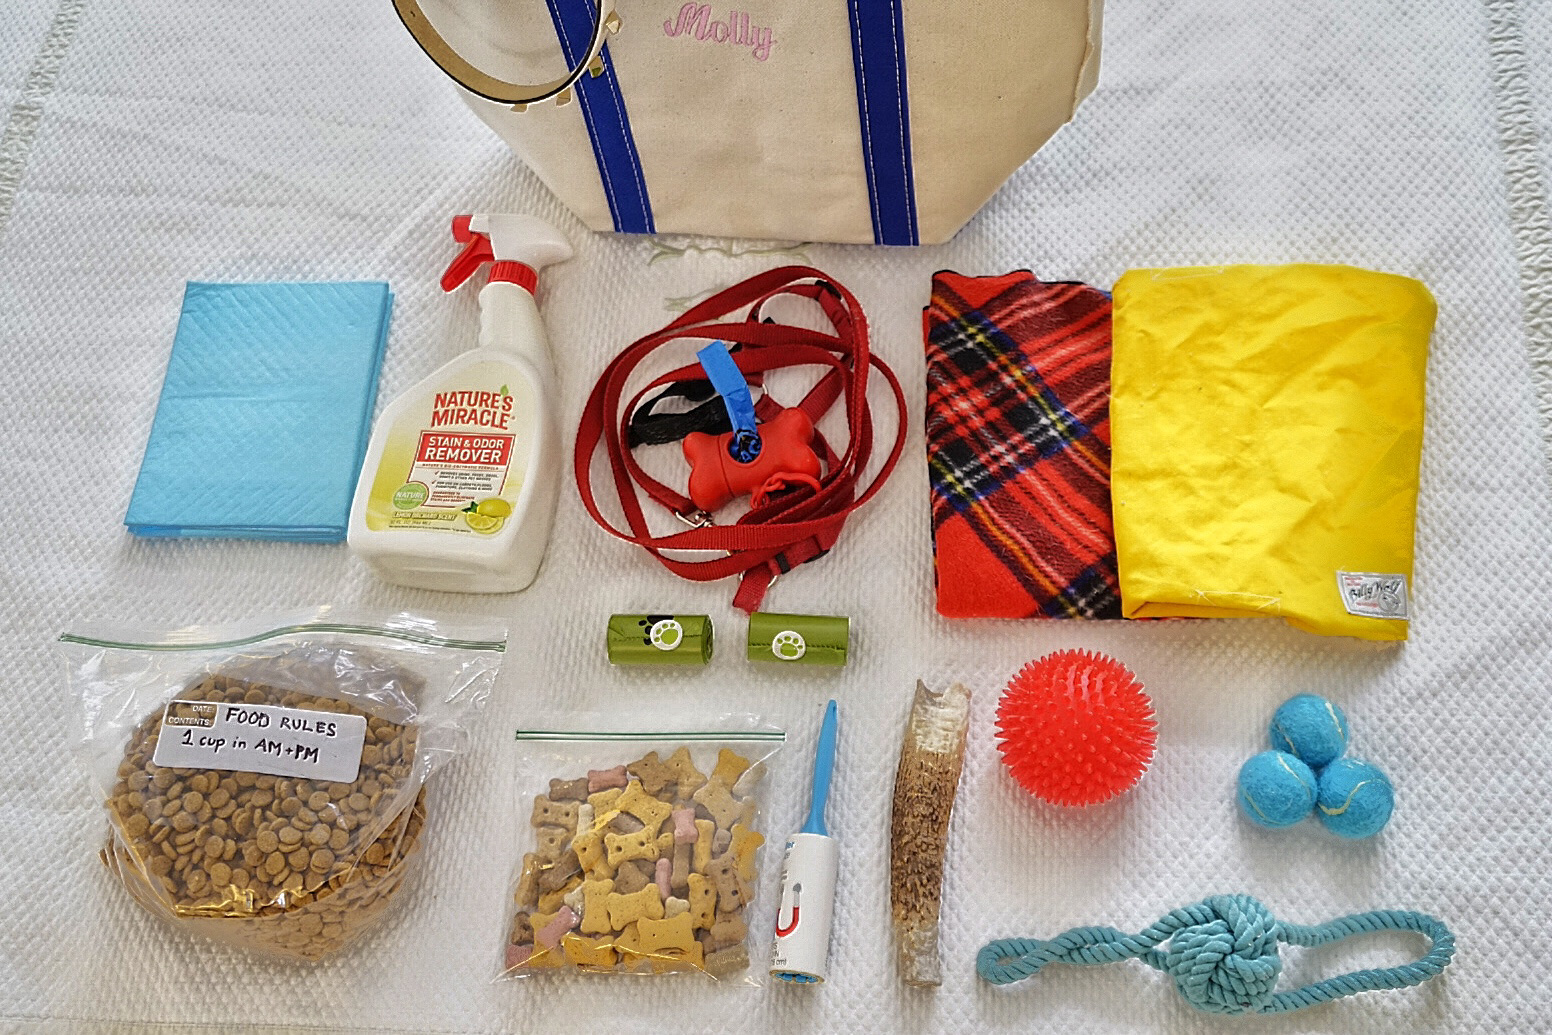
FAVORITE DOGGIE SUITCASE: L.L. Bean Boat and Tote Bag with zipper (personalized monogramming highly recommended!)
REQUIRED PACKING ITEMS:
- Collar or harness with dog’s name and owners phone number
- Leash with plenty of doggie waste bags (to politely clean up after your pooch)
- Ample supply of dog food placed in large zip lock bags with feeding instructions
- Dog’s favorite stuffed animal or toy
- Doggie jacket or rain coat or sweater/fleece (depending on the time of year)
OTHER RECOMMENDED ITEMS TO BRING AS A HOUSE GUEST:
- Dog bed and/or crate (depending on host preferences)
- Plenty of tennis balls to play fetch (preferably ones that don’t squeak for the consideration of your host)
- 2-3 dog bones (to keep your pooch occupied for those times when distractions are needed)
- Emergency supply of Four Paws wee wee pads (you never know what enticing smell your dog may react to when in a new place)
- Bottle of Nature’s Miracle Stain & Odor Remover + personal supply of paper towels
- Doggie treats
- Mini lint roller
WORDS OF TRAVEL ADVICE: Go the extra mile [pun intended] and get your pooch groomed and nails cut before traveling. This will make for a nice surprise and hopefully a warmer welcome from your host! Go the extra mile and get your pooch groomed and nails cut before traveling. This will make for a nice surprise and hopefully a warmer welcome from your host!
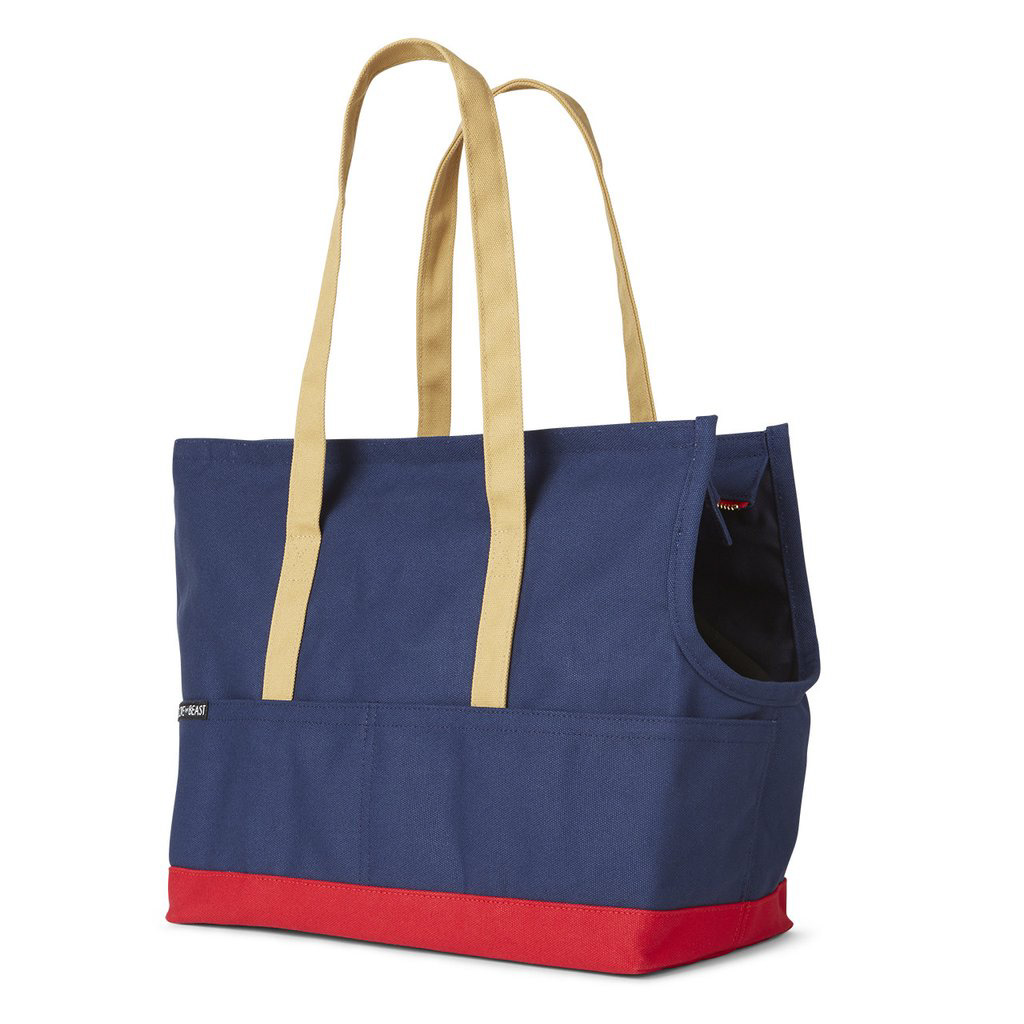
Love Thy Beast Canvas Pet Tote
BEING CREATIVE
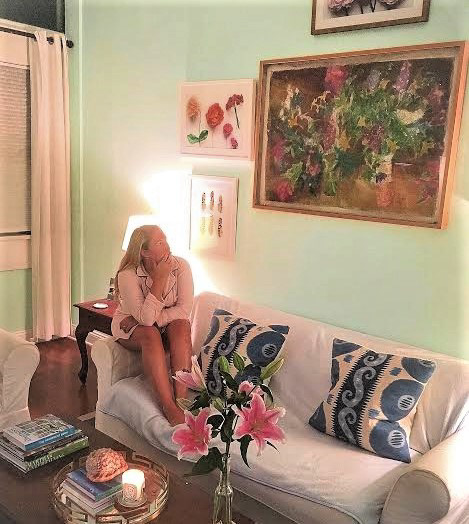
Starting a blog was taking my creative outlet to the next level. In today’s go-go-go environment, I find the one major thing that relaxes me is interior design and styling. Whenever I’ve had a stressful day or cannot sleep, I announce to my husband that I’m in the mood to "be creative" and to kindly let me do my thing without interrupting.
For me, "being creative" consists of re-arranging my living room furniture ten different ways, switching up the locations of all my tabletop chochski’s and moving various picture frames from one room to the other. Nothing makes me happier than testing ten different locations for a picture frame in order to find the perfect spot as its new home … at least until my next creative outburst.
Feeling like I have re-vamped my entire apartment to a more functional and beautiful layout makes me feel empowered and most importantly, at peace. "Being creative" has the same calming effect on me as enjoying a glass [or two] of wine at the end of a day. My husband may sometimes get confused as to how I can move around our furniture with the same excitement as someone who has just won the lottery, but truth be told, I am at my best when I am "being creative".
I want to share my passion for "being creative" along with all the other things that make my life so beautiful – photography, flowers, dogs, fashion, food, travel, books, yoga, family, friends, and home.
I hope you enjoy!
Xx